• ×
    Information
    Windows update impacting certain printer icons and names. Microsoft is working on a solution.
    Click here to learn more
    Information
    Need Windows 11 help?
    Check documents on compatibility, FAQs, upgrade information and available fixes.
    Windows 11 Support Center.
  • post a message
  • ×
    Information
    Windows update impacting certain printer icons and names. Microsoft is working on a solution.
    Click here to learn more
    Information
    Need Windows 11 help?
    Check documents on compatibility, FAQs, upgrade information and available fixes.
    Windows 11 Support Center.
  • post a message
Guidelines
Do you need the WPS PIN to connect your printer? Click here for tips and tricks!
Check some of the most frequent questions about Instant Ink: HP INSTANT INK, HP+ PLANS: INK AND TONER.


Check out our WINDOWS 11 Support Center info about: OPTIMIZATION, KNOWN ISSUES, FAQs AND MORE.
HP Recommended
HP Officejet 3830
Microsoft Windows 10 (64-bit)

The Printer has a top back load for paper. However, when I print, the upper left corner of each page is bent. I have dusted, and looked with a flashlight and do not see a blockage. Is there a way to open up the feeder to examine closer? Not sure why this is happening.

1 REPLY 1
HP Recommended

@dsthwrth,


I reviewed your post and I understand that the upper left side of the paper is bending when you print.


Don’t worry, I assure you I will try my best to get this sorted.


I recommend you follow the below steps and check if it helps.


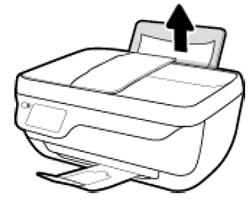
Clear jammed paper from the input tray


Remove any jammed paper that is accessible from the input tray.

  1. Gently remove any jammed paper and bits of torn paper from the input tray. To avoid tearing any whole sheets of paper, pull the paper with both hands.

    Image: Remove jammed paper from the input tray

    NOTE: 

    Use a flashlight to thoroughly check for torn pieces of paper that might remain inside the input tray. If any torn pieces of paper remain inside the printer, more jams are likely to occur.

  2. Make sure there are no foreign objects in the paper path, and then reload the input tray with new paper.

    NOTE: 

    The input tray shield prevents foreign debris from falling into the paper path and causing paper jams. Do not remove the input tray shield.

  3. Touch OK on the printer control panel to continue the current print job.

Try to print. If the error persists, check for jammed paper in another area of the printer.

Clear jammed paper from the output tray

Remove any jammed paper from the output tray.

  1. Gently remove any jammed paper and bits of torn paper from the output tray. To avoid tearing any whole sheets of paper, pull the paper with both hands.

    Image: Gently pull the paper out of the tray.

  2. Use a flashlight to thoroughly check for torn pieces of paper that might remain inside the output tray.

    If any torn pieces of paper remain inside the printer, more jams are likely to occur.

  3. Touch OK on the printer control panel to continue the current print job.

Try to print. If the error persists, check for jammed paper in another area of the printer.

Clear jammed paper from the ink cartridge access area

Clear jammed paper from underneath the printer

Remove any jammed paper from underneath the printer.

  1. Turn off the printer.

  2. Disconnect the USB cable from the rear of the printer, if it is not already disconnected.

  3. Disconnect the power cord from the rear of the printer.

  4. Lower the paper input tray back into the printer, close the output tray extender, and then push the output paper tray into the printer.

  5. Turn the printer so that you can access its underside (base).

       CAUTION: 

    Before turning the printer, use your hands to hold the scanner lid and the paper input tray.

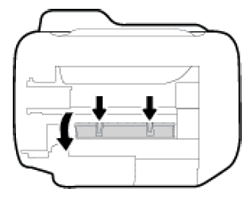
  6. Pull the tabs on either side of the cleanout door to open it.

    Image: Opening the cleanout door

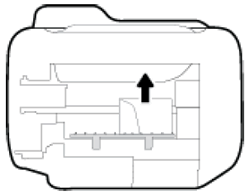
  7. Gently remove any jammed paper from inside the printer.

    Image: Removing jammed paper from inside the printer

  8. Close the cleanout door. Gently push the door forward until it snaps into place.

    Image: Reattaching the cleanout door

  9. Turn the printer over to its normal position.

  10. Open the ink cartridge access door, and then look inside the printer for any loose objects that might have shifted when the printer was turned over. Remove any loose objects found.

    NOTE: 

    Use a flashlight to thoroughly check for any objects that might remain inside the printer. If any items remain inside the printer, more jams are likely to occur.

  11. Close the ink cartridge access door.

  12. Reconnect the power cord to the rear of the printer.

  13. Reconnect the USB cable if necessary.

  14. Press the Power button to turn on the printer.

Try to print. If the error persists, check for jammed paper in another area of the printer.

Clear jammed paper from the ADF

Remove any jammed paper from the ADF.

  1. Lift the ADF cover.

    Image: Lift the ADF cover

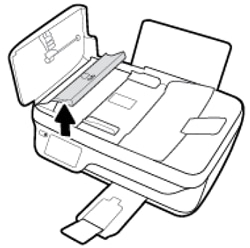
  2. Lift the tab on the left edge of the ADF to raise the ADF mechanism.

    Image: Lift the ADF mechanism.

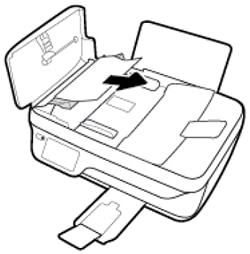
  3. Gently pull out any jammed paper from the ADF. To avoid tearing any whole sheets of paper, pull out the paper with both hands.

    Image: Remove paper from the ADF

    NOTE: 

    Use a flashlight to thoroughly check for torn pieces of paper that might remain inside the tray. If any torn pieces of paper remain inside the printer, more jams are likely to occur.

  4. Close the ADF.

  5. Touch OK on the printer control panel to continue the current print job.


Let me know how it goes and you have a great day!


P.S: Welcome to the HP Support Community 😊


If you wish to show appreciation for my efforts, mark my post as Accept as Solution. Your feedback counts!


Cheers!

Stay Home – Stay Safe

The_Fossette
I am an HP Employee

† The opinions expressed above are the personal opinions of the authors, not of HP. By using this site, you accept the <a href="https://www8.hp.com/us/en/terms-of-use.html" class="udrlinesmall">Terms of Use</a> and <a href="/t5/custom/page/page-id/hp.rulespage" class="udrlinesmall"> Rules of Participation</a>.