-
×InformationHP Solution Center Adobe Flash player error
Please check this document to find the workaround solution for Print and Scan - HP Solution Center doesn't open
InformationFix Windows 10 Update IssuesResolve Windows 10 or update issues on HP computer or printer– Click Here
-
-
×InformationHP Solution Center Adobe Flash player error
Please check this document to find the workaround solution for Print and Scan - HP Solution Center doesn't open
InformationFix Windows 10 Update IssuesResolve Windows 10 or update issues on HP computer or printer– Click Here
-
- HP Community
- >
- Printers
- >
- Printer Ink Cartridges & Print Quality
- >
- My old hp photosmart 7520
- Subscribe to RSS Feed
- Mark Topic as New
- Mark Topic as Read
- Float this Topic for Current User
- Bookmark
- Subscribe
- Mute
- Printer Friendly Page
My old hp photosmart 7520
01-05-2021 01:50 PM

- Mark as New
- Bookmark
- Subscribe
- Subscribe to RSS Feed
- Permalink
- Email to a Friend
- Flag Post
Printer wont print black. Prints color ok. Prints blank sheet in response to both computer and copy. However, print quality diagnostic report prints black wording beautifully. On this report the black and photo blocks are both empty of color while at the same time the actual ink cartridges have ink in them. I have unplugged the printer, cleaned the print heads, aligned, etc. This must be an internal command issue in the printer since I get great black print on the diagnostic report. ???
01-18-2021 07:03 AM

- Mark as New
- Bookmark
- Subscribe
- Subscribe to RSS Feed
- Permalink
- Email to a Friend
- Flag Post
Welcome to the HP support community.
If the black ink blocks are showing empty then it should be the issue with the black cartridge.
A combination of color cartridges is used for printing black wordings in the report.
Follow the below steps to fix the issue:
Make sure the ink cartridges are properly vented and seated correctly
-
Turn on the printer, if it is not already on.
-
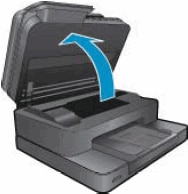
Open the ink cartridge access door.
The carriage moves to the access area.
-
Wait until the carriage stops moving before you continue.
-
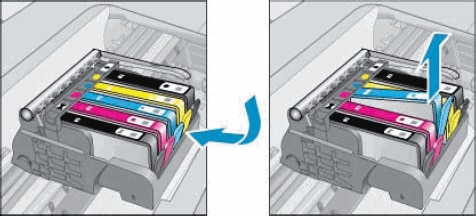
Press the tab on the front of the ink cartridge inward to release it, and then pull up on the ink cartridge to remove it from the slot.
-
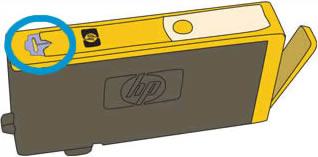
Examine the vent area on each ink cartridge, above the HP logo on the top of the ink cartridge.
-
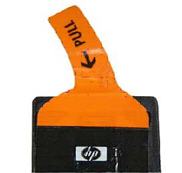
If the ink cartridge still has the pull tab attached, pull to remove it.
-
If the vent is clogged, use a straight pin to gently remove excess adhesive from the vent.
-
-
Clogged vent -
With a straight pin, gently remove excess adhesive from the vent
-
Unclogged vent
-
-
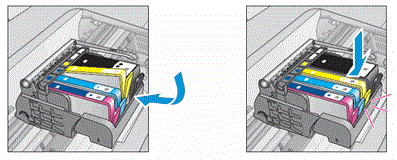
With the nozzle and the contacts facing down, slide the ink cartridge into its slot. Press down on the ink cartridge until it snaps into place. Make sure the color icon on the ink cartridge label matches the color icon on the slot.
-
Repeat these steps to inspect the vents on each ink cartridge.
-
Make sure each ink cartridge is firmly in place in its slot. Run your finger along the top of the cartridges to feel for any that are protruding, and if any are, press down firmly until each ink cartridge snaps into place.
-
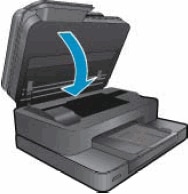
Close the ink cartridge access door.
You can refer this HP document for more assistance:- Click here
Let me know how it goes.
To thank me for my efforts to help you, please mark my post as an accepted solution so that it benefits several others.
Cheers.
Sandytechy20
I am an HP Employee
01-19-2021 01:52 PM

- Mark as New
- Bookmark
- Subscribe
- Subscribe to RSS Feed
- Permalink
- Email to a Friend
- Flag Post
Hi Your solution did not work. I think there is somekind of a problem with the (settings/commands/software). I bought a new printer. Ardy

Didn't find what you were looking for? Ask the community