• ×
    Information
    Windows update impacting certain printer icons and names. Microsoft is working on a solution.
    Click here to learn more
    Information
    Need Windows 11 help?
    Check documents on compatibility, FAQs, upgrade information and available fixes.
    Windows 11 Support Center.
  • post a message
  • ×
    Information
    Windows update impacting certain printer icons and names. Microsoft is working on a solution.
    Click here to learn more
    Information
    Need Windows 11 help?
    Check documents on compatibility, FAQs, upgrade information and available fixes.
    Windows 11 Support Center.
  • post a message
Guidelines
Do you need the WPS PIN to connect your printer? Click here for tips and tricks!
HP Recommended
OFFICE JET PRO 9018
Microsoft Windows 10 (64-bit)

paper jams at the paper path cover. clear jam and it does the same thing again.

1 REPLY 1
HP Recommended

@MEPHISTOWALTZ Welcome to HP Community!


I understand that you are getting a paper jam.


Step 1: Clear jammed paper from inside the printer

Remove any loose or jammed paper from inside the printer.

  1. Turn on the printer.

  2. Open the front door, and then lift the ink cartridge access door.

    1. Front door

    2. Ink cartridge access door

  3. Wait until the carriage stops moving before you continue.

  4. With the printer turned on, disconnect the power cord from the rear of the printer.

       WARNING: 

    To avoid risk of injuries or electric shock, you must disconnect the power cord before reaching inside the printer

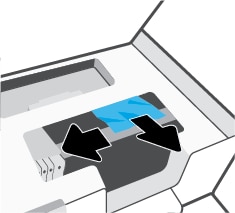
  5. Move the print carriage to the far left and far right, and remove any jammed or torn pieces of paper.

    Moving print carriage left and removing paper

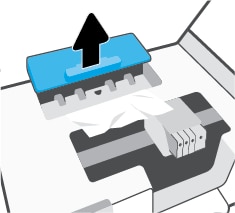
  6. Remove the paper path cover.

    Removing the cover

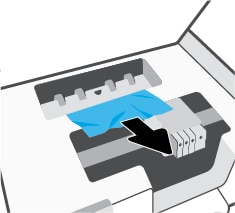
  7. Use both hands to remove any jammed paper from inside the printer.

    Removing the jammed paper from printer

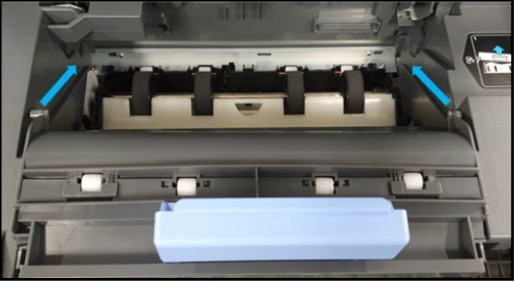
  8. Align the sides of the paper path cover to the guides inside the printer, and then slide it into the printer.

    Aligning and sliding the paper path cover into printer

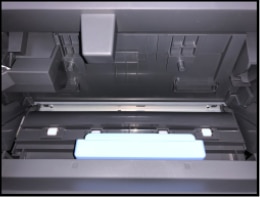
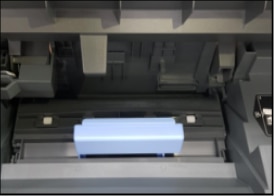
  9. Make sure the paper path cover sits fully in place. It should be fully seated without either edge closer to the side than the other.

    Good

    Bad

    Example of properly seated paper path cover

    Example of improperly seated paper path cover

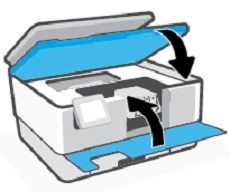
  10. Close the ink cartridge access door, and then close the front door.

    Closing the cartridge access door and the front door

  11. Reconnect the power cord, and turn on the printer.

  12. Try to print. If the error persists, check for jammed paper in another area of the printer.

Clear a paper jam from the rear of the printer.

  1. Turn off the printer, and then disconnect the power cord and any other cables.

  2. Turn the printer so that the rear access door faces you.

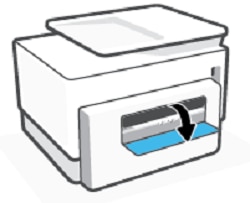
  3. Press the tab on the rear access door and open the door.

    Opening the rear access door

  4. Remove any jammed paper.

    Removing jammed paper

  5. Close the rear access door.

    Closing the rear door

Try to print. If the error persists, check for jammed paper in another area of the printer.


Remove debris from inside the paper path

When small bits of paper become lodged inside the paper path, paper jams are more likely to occur. To remove debris from the paper path and output rollers, run thicker paper through the printer.

  1. Remove all paper from the input tray, and load one full-size page of photo paper (letter or A4).

  2. Print a blank page, or make a blank copy.

  3. After the paper ejects, pull out the input tray.

  4. Lift the front of the printer, and then remove any torn paper or debris from inside the tray and rollers.

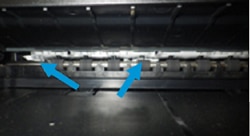
    Example to show if paper debris stuck beneath starwheel area

  5. Replace the tray, load normal paper, and print again.

    If a paper jam occurs, continue to the next step.

Step 4: Clean the paper feed rollers

Dust, paper fiber, and other debris might accumulate on the paper feed rollers and cause paper jams and paper feed issues. Clean the rollers inside the printer, and then try to print again.


Step 5: Reset the printer

Sometimes a paper jam error persists even though there is no jammed paper (false paper jam). Reset the printer, which might clear a false paper jam error, and then try to print again.

  1. With the printer turned on, disconnect the power cord from the printer.

  2. Unplug the power cord from the power source.

  3. Wait 60 seconds.

  4. Reconnect the power cord to a wall outlet and to the printer.

    NOTE: 

    HP recommends plugging the printer directly into a wall outlet.

    Keep us posted,

    If you would like to thank us for our efforts to help you, 


    Give us a virtual high-five by clicking the 'Thumbs Up' icon below, followed by clicking on the "Accept as solution" on this post, 


    Have a great day!

† The opinions expressed above are the personal opinions of the authors, not of HP. By using this site, you accept the <a href="https://www8.hp.com/us/en/terms-of-use.html" class="udrlinesmall">Terms of Use</a> and <a href="/t5/custom/page/page-id/hp.rulespage" class="udrlinesmall"> Rules of Participation</a>.