• ×
    Information
    Windows update impacting certain printer icons and names. Microsoft is working on a solution.
    Click here to learn more
    Information
    Need Windows 11 help?
    Check documents on compatibility, FAQs, upgrade information and available fixes.
    Windows 11 Support Center.
  • post a message
  • ×
    Information
    Windows update impacting certain printer icons and names. Microsoft is working on a solution.
    Click here to learn more
    Information
    Need Windows 11 help?
    Check documents on compatibility, FAQs, upgrade information and available fixes.
    Windows 11 Support Center.
  • post a message
Guidelines
Do you need the WPS PIN to connect your printer? Click here for tips and tricks!
HP Recommended
OfficeJet J4680
iOS

I’m using an HP OfficeJet 4680. The problem I’m having is that when ever I try to print photo sized prints, it always gets jammed, is there something I’m doing wrong? I took out all the paper in the tray except for the photo paper and readjusted the tray sizing. 

1 REPLY 1
HP Recommended

@Ady-17  Welcome to HP Community!


I understand that you are getting paper jam.


Print a self-test report

Use the following steps to print a self-test report.

  1. Load unused, plain white, U.S. letter or A4 sized paper in the tray.

  2. Press the Power button () to turn on the product.

  3. Press the Setup button ().

  4. Press the right arrow button () to select Print Report, and then press OK.

  5. Press the right arrow button () to select Self-Test Report, and then press OK. The self-test report prints.

IMPORTANT! Try to print a self-test report after every solution even if the solution resolves the issue.
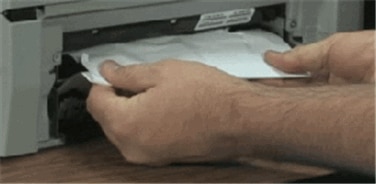
 

Clear the jam from the rear of the product

   CAUTION: 

Never pull jammed paper from the front of the product. If you can pull it from the rear of the product or the tray, always try the rear first. Pulling paper from inside the front cover can cause mechanical damage to the product.

  1. Disconnect the USB cable from the rear of the product.

  2. Press the Power button () to turn off the product.

  3. Disconnect the power cord from the rear of the product.

  4. Press the tab on the left side of the rear access door, and then pull the door outward to remove it.

    Figure : Remove the rear access door

    Illustration of removing the rear access door
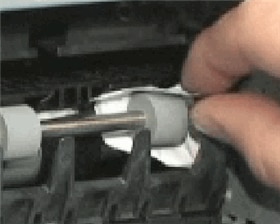
  5. Gently remove any jammed paper or bits of torn paper from the rollers inside the product. Use both hands to pull any whole sheets of paper to avoid tearing them.

    Figure : Remove the paper from the rollers

    Illustration of removing the jammed paper from the rollers
       CAUTION: 

    Use a flashlight to thoroughly check the rollers and wheels for torn pieces of paper that might remain inside the product. If any torn pieces of paper remain inside the product, more jams are likely to occur.

    Figure : Remove scraps of paper

    Illustration of removing scraps of paper
  6. Gently push the rear access door into the product until it snaps firmly into place.

Please 

Clean the rollers

  1. Gather the following materials:

    • A clean, lint-free cloth, or any cloth that will not come apart or leave fibers

    • Distilled, filtered, or bottled water (tap water might damage the product)

  2. Press the Power button () to turn off the product.

  3. Disconnect the power cord from the rear of the product.

  4. Press in the tab on the left side of the rear access door, and then pull the door away from the product to remove it.

    Figure : Remove the rear access door

    Illustration of removing the rear access door
  5. Lightly dampen a clean, lint-free cloth with bottled or distilled water, and then squeeze any excess liquid from the cloth.

  6. Press the cloth against the rollers and rotate them upwards with your fingers. Apply a moderate amount of pressure to remove any dust or dirt buildup.

    Figure : Rotate and clean the rollers

    Illustration of the rollers inside the rear access door
  7. Allow the rollers to dry for 10 or 15 minutes.

  8. Gently push the rear access door into the product until it snaps firmly into place.

  9. Reconnect the power cord to the rear of the product.

  10. Press the Power button () to turn on the product.

If the issue still persists, please perform the hard reset.


Turn the printer on, if it is not already on. 


Wait until the printer is idle and silent before you continue. 


With the printer turned on, disconnect the power cord from the rear of the printer. 


Unplug the power cord from the wall outlet. 


Wait at least 60 seconds. 


Plug the power cord back into the wall outlet. 


Reconnect the power cord to the rear of the printer. 


Turn on the printer, if it does not automatically turn on. 


Wait until the printer is idle and silent before you proceed 


Keep us posted,

If you would like to thank us for our efforts to help you, 


Give us a virtual high-five by clicking the 'Thumbs Up' icon below, followed by clicking on the "Accept as solution" on this post, 


Have a great day!

† The opinions expressed above are the personal opinions of the authors, not of HP. By using this site, you accept the <a href="https://www8.hp.com/us/en/terms-of-use.html" class="udrlinesmall">Terms of Use</a> and <a href="/t5/custom/page/page-id/hp.rulespage" class="udrlinesmall"> Rules of Participation</a>.