• ×
    Information
    Windows update impacting certain printer icons and names. Microsoft is working on a solution.
    Click here to learn more
    Information
    Need Windows 11 help?
    Check documents on compatibility, FAQs, upgrade information and available fixes.
    Windows 11 Support Center.
  • post a message
  • ×
    Information
    Windows update impacting certain printer icons and names. Microsoft is working on a solution.
    Click here to learn more
    Information
    Need Windows 11 help?
    Check documents on compatibility, FAQs, upgrade information and available fixes.
    Windows 11 Support Center.
  • post a message
Guidelines
Do you need the WPS PIN to connect your printer? Click here for tips and tricks!
HP Recommended
MFP M281fdw
Microsoft Windows 10 (64-bit)

Just opened my new HP LaserJet Pro, today. Replaced all ink cartridges (except black).  Yellow toner is leaving a yellow tint on my printed pages. Any suggestions as to how to fix this?

1 REPLY 1
HP Recommended

@LRMooak Welcome to HP Community!


I understand that you are getting the prints with a yellow tint.


Do not worry. I will try to fix the issue.


Inspect the toner cartridges

Examine the toner cartridge imaging drums and memory chips for damage.

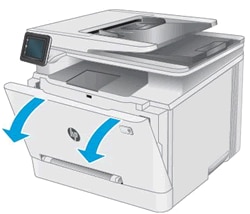
  1. Open the front door.

    Figure : Opening the front door

    Open front door
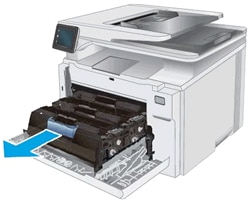
  2. Grasp the blue handle on the toner cartridge drawer, and then pull out the drawer.

    Figure : Pulling out the toner cartridge drawer

    Pull out cartridge drawer
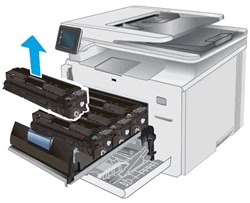
  3. Grasp the handle on the toner cartridge, and then pull the toner cartridge straight up to remove it.

    Figure : Removing the toner cartridge

    Remove toner cartridge
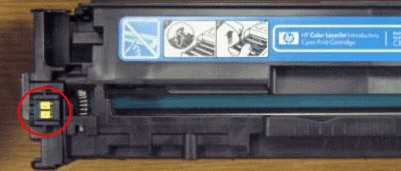
  4. Examine the memory chip for damage.

    Figure : Location of the memory chip

    Location of the memory chip
    • If the memory chip is damaged, refer to the previous steps in this document to replace the toner cartridge.

    • If the memory chip is not damaged, continue with these steps.

  5. Examine the surface of the imaging drum.

       CAUTION: 

    Do not touch the imaging drum. Fingerprints on the imaging drum can cause print quality problems.

    Figure : Location of the imaging drum

    Location of the imaging drum
    • If you see any scratches, fingerprints, or other damage on the imaging drum, refer to the previous steps in this document to replace the toner cartridge.

    • If the imaging drum is not damaged, continue with these steps.

  6. Insert the toner cartridge into the drawer. Make sure that the color chip on the cartridge matches the color chip on the drawer.

    Figure : Inserting the toner cartridge into the printer

    Insert the toner cartridge.
  7. Repeat these steps for the other toner cartridges.

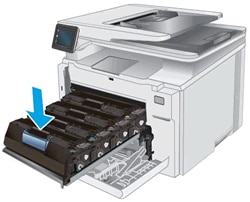
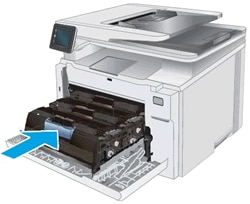
  8. Push the toner cartridge drawer into the printer.

    Figure : Pushing the toner cartridge drawer into the printer

    Push in toner cartridge drawer
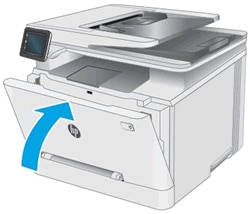
  9. Close the front door.

    Figure : Closing the toner cartridge drawer

    Close the cartridge drawer

Print another page. If the issue persists, continue to the next step.


Please let us know if any damage to the drum surface.


Keep us posted,

If you would like to thank us for our efforts to help you, 


Give us a virtual high-five by clicking the 'Thumbs Up' icon below, followed by clicking on the "Accept as solution" on this post, 


Have a great day!


† The opinions expressed above are the personal opinions of the authors, not of HP. By using this site, you accept the <a href="https://www8.hp.com/us/en/terms-of-use.html" class="udrlinesmall">Terms of Use</a> and <a href="/t5/custom/page/page-id/hp.rulespage" class="udrlinesmall"> Rules of Participation</a>.