-
×InformationNeed Windows 11 help?Check documents on compatibility, FAQs, upgrade information and available fixes.
Windows 11 Support Center. -
-
×InformationNeed Windows 11 help?Check documents on compatibility, FAQs, upgrade information and available fixes.
Windows 11 Support Center. -
- HP Community
- Desktops
- Desktop Software and How To Questions
- HP TouchSmart 520-1030 PC webcam not working

Create an account on the HP Community to personalize your profile and ask a question
05-12-2020 08:03 AM
@OCEANDESIGNZ Welcome to HP Community!
I understand that the HP TouchSmart 520-1030 PC webcam not working.
Please let us know which operating system you are using.
Don't worry as I'll be glad to help, however, to provide an accurate resolution, I need a few more details:
When was the last time it worked fine?
Were there any hardware/software changes made?
Have you tried using Cyberlink YouCam?
Do you have Skype app installed on your PC?
Let's try these steps to resolve the issue:
Restarting the computer to correct webcam problems
The webcam may be associated with another software program or not responding. Often, restarting the computer can correct the problem. Restart the computer and open your Webcam software as soon as Windows finishes loading.
If restarting the computer does not correct this problem, continue troubleshooting.
Updating or changing the webcam driver in Windows 7
Some software applications require updated drivers for your webcam to display video or they might need a more basic driver. Use the following steps to change the driver for your webcam:
-
Go to the HP Software & Driver Downloads web page for your model of HP computer and select the version of Windows being used on your computer.
-
Do one of the following tasks depending on what you found:
-
If a webcam driver update is available from HP, download the file to your computer and install the software according to the instructions on the web page. After updating, restart the computer and try using your software again. If the problem persists, complete the remainder of these steps to use a generic Windows USB video driver.
-
If a webcam driver is not available from HP or you cannot access the Internet, continue using these steps to install a generic Windows USB Video driver.
-
-
Click Start, type Device Manager in the search field, and select Device Manager from the search results list.
-
Double-click Imaging Devices to expand the list of webcam drivers.
Figure: Device Manager
-
If there is no imaging devices category listed in Device Manager, stop using these steps and see the section Webcam is not listed in Device Manager in this document.
-
If more than one webcam driver is listed, right-click the driver and select uninstall for any driver that is not the HP Webcam-101 or Microsoft USB Video Device driver. Once the other drivers have been removed, restart your computer and open your software. If problems persist, continue using these steps.
-
-
Right-click the name of the webcam in the Images Devices category (HP Webcam-101 or Microsoft USB Video Device), and select Update Driver Software.
-
Click Browse the computer to select a specific USB Video Device driver.
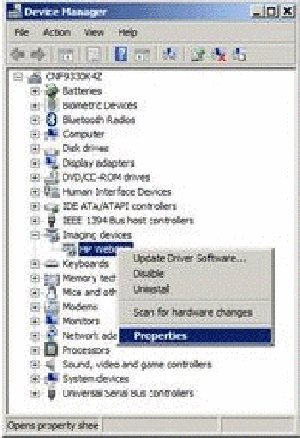
Double-click Imaging Devices to expand the list of webcam drivers, right-click the webcam driver, and then select Properties.
Figure: Webcam Properties selection
Make a note of the existing name of the webcam driver (Example: HP Webcam), as it may change after the update.
-
On the Webcam Properties window, select Update Driver.
-
When prompted, select the option to Browse the computer for desired driver.
-
When prompted, select the Let me pick from a list of device drivers on my computer option.
-
Remove the selection from Show compatible hardware, select Microsoft in the Manufacturer pane, and select USB Video Device in the Model pane.
-
Click Next to install the webcam driver.
-
Allow the installation of the USB Video Device, and then click Close.
-
After the device has been updated to USB Video Device in Device Manager, restart your computer and open the software. If problems persist, install the latest BIOS update from HP and get all the latest Windows 7 Updates from Microsoft.
Create a new User account to check the functionality of Webcam:
- To open User Accounts, click the Start button,
click Control Panel, click User Accounts and Family Safety, and then click User Accounts.
- Click Manage another account.
If you're prompted for an administrator password or confirmation, type the password or provide confirmation.
- Click Create a new account.
- Type the name you want to give the user account, click an account type, and then click Create Account.
If the issue persists, please perform a system recovery (Note: BACK UP YOUR PERSONAL DATA BEFORE PERFORMING SYSTEM RECOVERY).
-
Turn off the computer.
-
Disconnect all connected devices and cables such as Personal Media Drives, USB drives, printers, and faxes. Remove media from internal drives, and remove any recently added internal hardware. Do not disconnect the monitor, keyboard, mouse, or power cord.
-
Turn on the computer and repeatedly press the F11 key, about once every second, until Recovery Manager opens.
Figure: Recovery Manager
-
Under I need help immediately, click System Recovery.
-
When System Recovery prompts you to back up your files, select a backup option:
-
If you have already backed up personal files or you do not want to back up personal files, select Recover without backing up your files, and then click Next. Continue to the next step.
-
If you want to back up your personal files, follow these steps to create a backup.
-
-
Click OK in the warning that appears.
-
After the system recovery is complete, click Finish to restart the computer. Complete the setup screens and wait until the computer finishes the setup.
-
Once the setup is complete, turn off the computer, reconnect all devices and cables, and then turn on the computer.
-
Before using the computer, update and protect your computer. Reinstall any virus and security software that was installed before the system recovery.
-
Reinstall any software programs that were added after purchasing the computer, as well as any files that were backed up.
For more troubleshooting steps, you could refer to this document: Click Here.
Keep us posted,
If you would like to thank us for our efforts to help you,
Give us a virtual high-five by clicking the 'Thumbs Up' icon below, followed by clicking on the "Accept as solution" on this post,
Have a great day!