• ×
    Information
    Need Windows 11 help?
    Check documents on compatibility, FAQs, upgrade information and available fixes.
    Windows 11 Support Center.
  • post a message
  • ×
    Information
    Need Windows 11 help?
    Check documents on compatibility, FAQs, upgrade information and available fixes.
    Windows 11 Support Center.
  • post a message
Guidelines
Join the HP Community Solve‑a‑thon | Help Others & Share Your Solutions | Live on Zoom | 2:30 PM to 2:30 AM IST | Every Wednesday Click here to know more
HP Recommended
Officejet Pro 6830

The printer has stopped printing from the Cyan cartridge.  I have done three print head cleanings, and set for best quality.

All cartridges have been replaced with new.  The fluid level display shows all four cartridges as full.  The test prints run after the head cleaning does not include a cyan test block.


Thanks for help

1 REPLY 1
HP Recommended

@Catspaw


Welcome to HP support community.


Make sure the ink cartridges are properly vented and seated correctly

  1. Press the Power button to turn on the printer, if it is not already on.

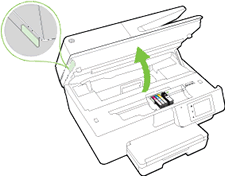
  2. Place your fingers into the slot on the left side of the printer, and then gently lift up to open the cartridge access door. The carriage moves to the cartridge access area. Wait several seconds until the carriage is idle and silent before you continue.

    Image: Open the cartridge access door

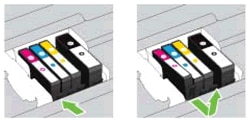
  3. Press the tab inward on the front of the old cartridge to release it, and then pull up on the cartridge to remove it from the slot.

    Image: Remove the cartridge from its slot

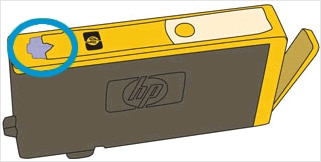
  4. Examine the vent area above the HP logo on the top of the cartridge.

    Image: Examine the vent area on the top of the cartridge

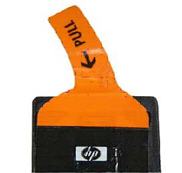
  5. If the cartridge still has the orange pull-tab attached, pull to remove it.

    Image: Remove the orange pull-tab

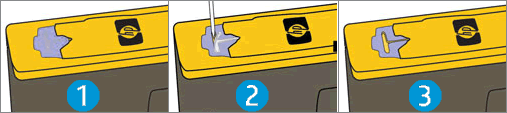
  6. If the vent is clogged, use a straight pin to gently remove excess adhesive from the vent.

    1.  

      Image: Clean the clogged vent with a pin

      Clogged vent
    2. With a straight pin, gently remove excess adhesive from the vent

    3. Unclogged vent

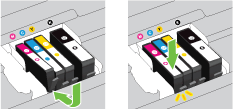
  7. Turn the cartridge so that the cartridge contacts face downward, and then match the label color with the color dot on the carriage.

  8. Slide the cartridge into its slot, and then gently press the cartridge down until it clicks into place.

    Image: Install the cartridge

  9. Repeat these steps to inspect the vents on each of the cartridges.

  10. Make sure that each cartridge is firmly installed in its slot. Run your finger along the top of the cartridges to feel for any that are protruding, and if any are, press down firmly until each cartridge snaps into place.

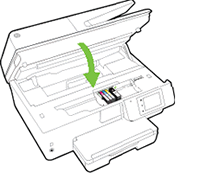
  11. Close the cartridge access door.

    Image: Close the cartridge access door

You can refer this HP document for more assistance :- Click here


I hope that helps.

To thank me for my efforts to help you, please mark my post as an accepted solution so that it benefits several others.

Cheers.

Sandytechy20
I am an HP Employee

† The opinions expressed above are the personal opinions of the authors, not of HP. By using this site, you accept the <a href="https://www8.hp.com/us/en/terms-of-use.html" class="udrlinesmall">Terms of Use</a> and <a href="/t5/custom/page/page-id/hp.rulespage" class="udrlinesmall"> Rules of Participation</a>.