-
×InformationNeed Windows 11 help?Check documents on compatibility, FAQs, upgrade information and available fixes.
Windows 11 Support Center. -
-
×InformationNeed Windows 11 help?Check documents on compatibility, FAQs, upgrade information and available fixes.
Windows 11 Support Center. -
- HP Community
- Notebooks
- Notebook Boot and Lockup
- Bios corrupted and not taking recovery usb

Create an account on the HP Community to personalize your profile and ask a question
Your account also allows you to connect with HP support faster, access a personal dashboard to manage all of your devices in one place, view warranty information, case status and more.

It has been a while since anyone has replied. Simply ask a new question if you would like to start the discussion again.
04-26-2018 02:01 AM
 HP Recommended
Product: Pavilion G4 - 1303AU
Operating System: Microsoft Windows 7 (64-bit)
My bios suddenly got corrupted and then i recovered it from bios recovery flash drive but then after some days it again corrupted and now it is not taking recovery flash drive. What to do now?
6 REPLIES 6
04-26-2018 07:53 AM
HP Recommended
If the BIOS on your notebook PC becomes corrupted, the computer might show one or more of the following symptoms:
- The computer displays the error message BIOS APPLICATION ERROR 501.
- The computer stops at a black or blank screen and does not enter any of the start options, such as the BIOS Setup Utility, Hardware Diagnostic Tools, or System Recovery.
- The computer does not start the operating system and the Caps Lock or Num Lock light blinks twice, or the computer emits beep codes.
- The computer turns on, for example the fan might spin, but there is no video on the internal display or external monitor, and the computer does not start the operating system.
If the computer shows any of these symptoms and it does not start the operating system, recover the BIOS.
Step 1: Recover the BIOS using a key press combination
Many HP notebook computers have an emergency BIOS recovery feature that allows you to recover and install the last known good version of the BIOS from the hard drive, as long as the hard drive remains functional. This emergency recovery feature is separate from the BIOS and is designed to work in the event of a catastrophic BIOS failure.
NOTE:If you know the hard disk partition is deleted or inaccessible, skip to the next step to Download a replacement BIOS file.
- Turn off the notebook.
- Plug the notebook into a power source using the power adapter.
- With the notebook off, press and hold the Windows logo key
 and the B key at the same time.
NOTE:
On some notebook models, it might be necessary to press and hold the Windows logo key and the V key. - While pressing those keys, press and hold the Power button on the computer for 2 to 3 seconds, and then release the Power button but continue to hold the Windows logo key and the B or V key until the HP BIOS update screen displays or you hear a beeping sound (usually 8 beeps).The HP BIOS Update screen displays, and the BIOS update begins automatically. This might take several minutes, and you might hear additional beeping sounds.
- If the HP BIOS Update screen does not display, repeat the previous steps. If the issue persists after repeating the steps, skip to the next step to Download a replacement BIOS file.
- If the Power light turns off, the notebook has turned off because the Power button was held too long. Repeat the previous steps, making sure to hold the Power button for 2 to 3 seconds only.
- If your notebook starts Windows, update the BIOS to the latest version using the standard BIOS update procedure. For more information about updating your notebook BIOS, go to Updating the BIOS (Notebooks).
Figure : The HP BIOS Update screen
- Click Continue Startup to prompt the notebook to restart immediately, or allow the notebook to restart automatically when the timer reaches zero.Figure : Clicking Continue Startup

- After the notebook restarts, press Enter to continue.
NOTE:
If the notebook repeatedly displays a message that the BIOS has been recovered, go to HP BIOS Application Selected is Corrupt or Missing for troubleshooting steps. - After Windows starts, if a message displays stating that the notebook was improperly shut down or that a boot problem was detected, follow the on-screen instructions.You can now to enter the BIOS menu or start the Windows operating system.
Step 2: Download a replacement BIOS file
If the HP_TOOLS volume (Windows 7) or UEFI partition (Windows 10, 😎 on your hard drive has been deleted, or if the emergency BIOS recovery feature did not resolve the issue, download a replacement BIOS file.
To complete this step, you need another working computer with an active Internet connection.
- Type the model number of the notebook that is not starting in the Enter your HP product name, product number or serial number box, for example, HP ProBook 645, and then click Find.If a list of model numbers displays, select your model number from the list.
NOTE:
The notebook model number is usually printed on a sticker on the bottom of the notebook. For more information about finding your model number, see How Do I Find My Model Number or Product Number?. - In the Software and drivers results page for your model, make sure the Detected operating system is correct. If necessary, click Change, select your operating system and version, and then click Change.
- Click BIOS.If you want to view more information about the BIOS update package, click Details.
- Click Download next to the BIOS update file, and then save the file to your computer when the download completes.Make sure to note the location of the saved file.If multiple BIOS files are available, click Download next to the most recently released file or the one you need (if a specific BIOS file was recommended for restoring your notebook).
Step 3: Create a BIOS recovery flash drive
Use HP BIOS Update and Recovery to create a BIOS recovery flash drive.
To complete this step, you need a blank USB flash drive. The flash drive does not need to be bootable.
- Connect a blank flash drive to the working computer.
- Navigate to the BIOS file you downloaded and saved, and then double-click the file.If a User Account Control window displays, click Yes.The InstallShield Wizard opens.
- Click Next.Figure : Clicking Next

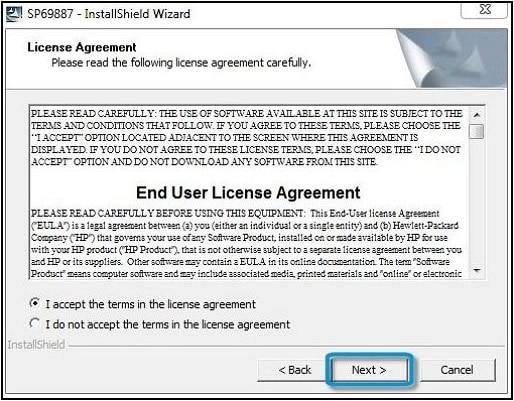
- Select I accept the terms in the license agreement, and then click Next.Figure : Accepting the End User License Agreement terms and clicking Next
- Choose to remove or not to remove the files from the flash drive after recovering the BIOS, and then click Next.HP BIOS Update and Recovery opens.
- Select Create Recovery USB flash drive, and then click Next.Figure : Selecting Create Recovery USB flash drive and clicking Next

- Select the flash drive, and then click Next.The computer copies the BIOS files to the flash drive.Figure : Selecting the flash drive and clicking Next

- When The recovery flash drive was created successfully displays, click Finish.The recovery BIOS is saved on the flash drive.Figure : Clicking Finish

- Remove the flash drive from the computer.
Step 4: Recover the BIOS using the recovery flash drive
Use the HP emergency BIOS recovery feature and the recovery flash drive to restore the BIOS.
- Shut down the notebook that is not starting, and then wait 5 to 10 seconds.
- Plug the notebook into a power supply using the AC adapter.
- Connect the BIOS recovery flash drive to the notebook.
- With the notebook off, press and hold the Windows logo key and the B key at the same time.
NOTE:
On some notebook models, it might be necessary to press and hold the Windows logo key and the V key. - While pressing those keys, press and hold the Power button on the notebook for 2 to 3 seconds, and then release the Power button but continue to hold the Windows logo key and the B or V key until the HP BIOS update screen displays or you hear a beeping sound (usually 8 beeps).The HP BIOS Update screen displays, and the BIOS update begins automatically. This might take several minutes, and you might hear additional beeping sounds.If the HP BIOS Update screen does not display after repeated attempts, your notebook might not support this function, or there might be a hardware problem preventing the tool from opening. Skip to the next step to Contact HP Customer Support.Figure : The HP BIOS Update screen
- Click Continue Startup to prompt the notebook to restart immediately, or allow the notebook to restart automatically when the timer reaches zero.Figure : Clicking Continue Startup
- After the notebook restarts, press Enter to continue.
NOTE:
If the notebook repeatedly displays a message that the BIOS has been recovered, go to HP BIOS Application Selected is Corrupt or Missing for troubleshooting steps. - After Windows starts, if a message displays stating that the notebook was improperly shut down or that a boot problem was detected, follow the on-screen instructions.You can now to enter the BIOS menu or start the Windows operating system.
Step 5: And the final option is to contact HP Customer Support
Obtained from: https://support.hp.com/in-en/document/c02693833
04-26-2018 10:23 AM
HP Recommended
Still no luck... It seems the notebook is not reading usb flash drive or the keyboard is not working properly because when i try to do recovery by pressing WINDOWS KEY + B and POWER ON nothing is happening just a blank screen with caps lock blinking.
04-26-2018 05:11 PM
HP Recommended
Hello Anurag2you,
Could be some serious malware.
How did you tell it was a BIOS corruption?
Test the hardware in HP UEFI Diagnostics:
- Repeatedly press Esc upon startup
- Select F2 (System Diagnostics)
- Select the desired language
- Navigate to system tests
- Select fast test
Regards,
Eddy
I used to be an HP Expert. I no longer participate in this community.
09-03-2018 11:37 AM
HP Recommended
After updating BIOS per "HP Support Solution" important update needed, my Elitebook 8460p never recovered from this. I followed article
https://support.hp.com/us-en/document/bph07143
and was able to create the USB BIOS recover drive, however only after renaming "68SCF.CAB" to "ROM.CAB" before running "HPQFlash"
Using this recovery USB BIOS recovery drive, after pressing WINDOWS+B (Or WINDOWS+V) and releasing the power-on, 5 flashes of the CAPSLOCK & SCROLL/NUMLOCK keys light went on, the fan turned on high and remained high. The screen remained black. I noticed the front HDD light remains in amber, which means the hard drive is "temporarily" parked.
Since nothing worked, I also pulled the hard drive to check using an external SATA-to-USB connector-cable and MiniTool "surface test." The hard drive passed this test.
(I have done BIOS update previously on the same computer without issue but this time, the "important update" from HP Support Solutions bricked my computer.) At this point, any instructions would be appreciated.
Be alert for scammers posting fake support phone numbers and/or email addresses on the community.
If you think you have received a fake HP Support message, please report it to us by clicking on "Flag Post".
† The opinions expressed above are the personal opinions of the authors, not of HP. By using this site, you accept the Terms of Use and Rules of Participation.


Didn't find what you were looking for?
Ask the community
† The opinions expressed above are the personal opinions of the authors, not of HP. By using this site, you accept the <a href="https://www8.hp.com/us/en/terms-of-use.html" class="udrlinesmall">Terms of Use</a> and <a href="/t5/custom/page/page-id/hp.rulespage" class="udrlinesmall"> Rules of Participation</a>.