• ×
    Information
    Need Windows 11 help?
    Check documents on compatibility, FAQs, upgrade information and available fixes.
    Windows 11 Support Center.
  • post a message
  • ×
    Information
    Need Windows 11 help?
    Check documents on compatibility, FAQs, upgrade information and available fixes.
    Windows 11 Support Center.
  • post a message
Guidelines
Are you having HotKey issues? Click here for tips and tricks.
HP Recommended
Example: Pavilion 6530hp 27er
Microsoft Windows 10 (64-bit)

I want to profile and calibrate på 27er and the program asks me what technology the monitor uses. Anybody knows? 

IMG_20211103_185415.jpg

2 REPLIES 2
HP Recommended


Hi@Joa5466


Welcome to the HP Support Community!


  1. Use the Windows key + I keyboard shortcut to open the Settings app.
  2. Click Display.
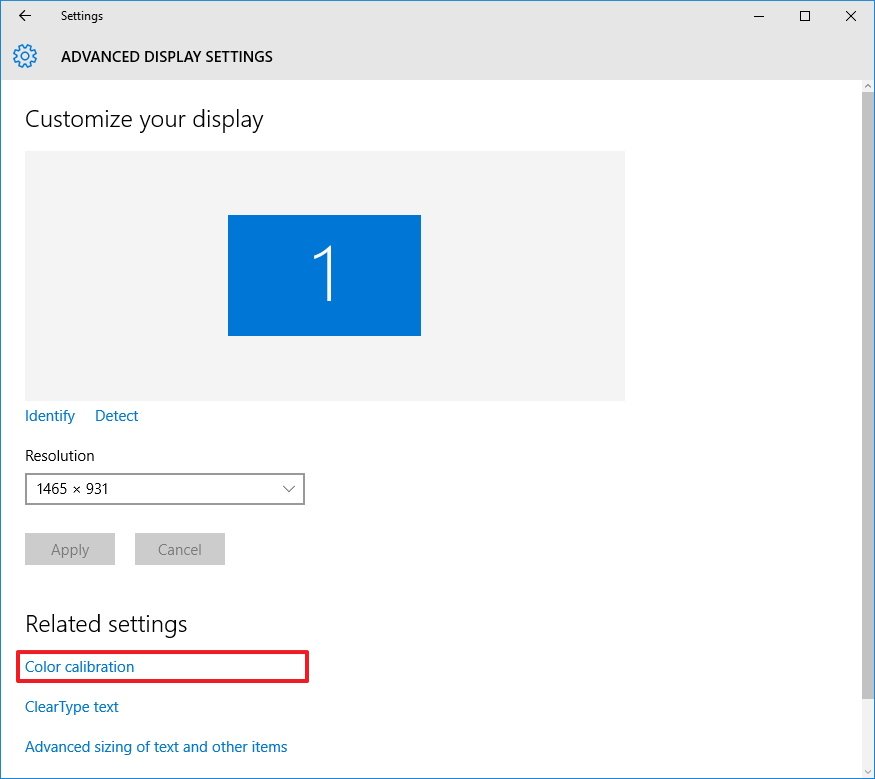
  3. Click the Advanced display settings link.

  4. Make sure you're using the Recommended screen resolution for your display, and click the Color calibration link to launch the utility.

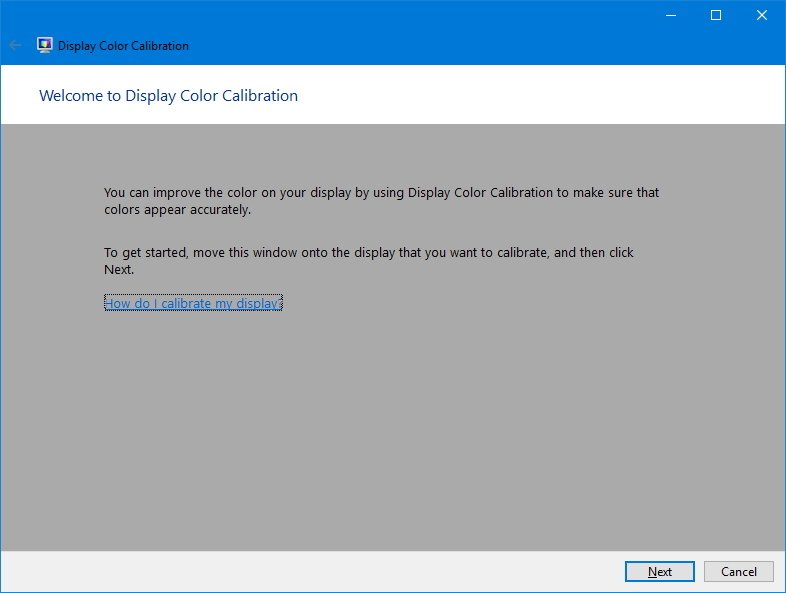
  5. Click Next to start the process.

  6. The wizard will now walk you through the steps to access the on-screen display menu on your monitor to set specific color settings. Click Next to continue.

    Quick Tip: Before moving to the next step, the utility recommends restoring the default display color settings whenever possible. If you're using a custom configuration, it's a good idea to note those settings in case you want to revert the changes.

  7. Click Next again.
  8. Adjust the gamma settings by moving the slider up or down until the small dots are barely visible, and click Next.

  9. Click Next again.
  10. Find the brightness controls on your monitor and adjust the brightness higher or lower as described in the image below, and click Next to continue.

  11. Click Next again.
  12. Find the contrast controls on your monitor and set it high enough as described in the image below, and click Next to continue.

  13. Click Next again.
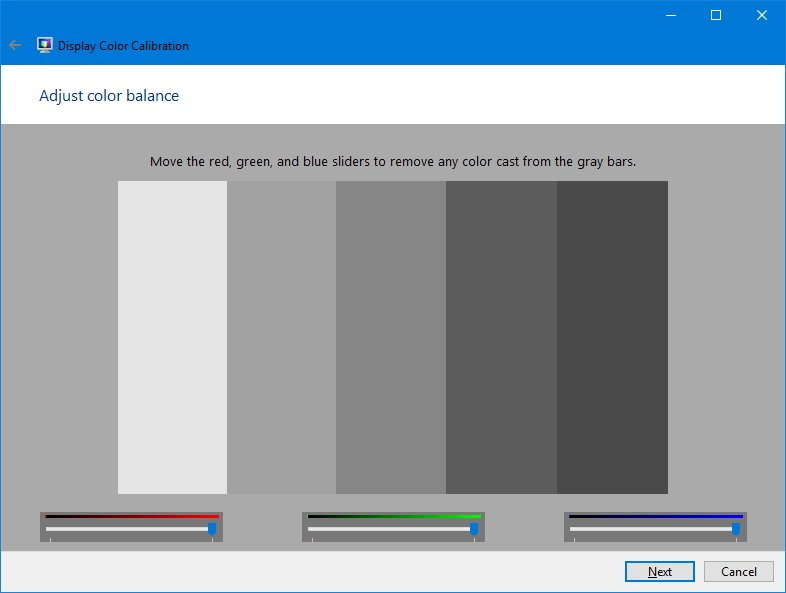
  14. Adjust the color balance by moving the slider for the red, green, and blue colors until removing any color cast from the gray bars, and click Next.

  15. Click the Previous calibration or Current calibration button to compare the new changes. If the new color configuration is reasonable, click Finish to apply the settings or Cancel to discard the new configuration.

Note: You'll also notice that you can start the ClearType Tuner in this last step to make sure text is displayed correctly.

Remember that changes made through the display menu will be kept even if you click Cancel. However, if you're not happy with the new settings, you can revert the changes manually, or reset your display to the default settings.

It's worth pointing out that there are many other paid and free tools available to calibrate your computer's monitor, but the utility that comes bundled with Windows should be more than enough for most users to ensure images look at their best colors and with accurate black levels.


Hope this helps! Keep me posted.


Please click “Accept as Solution” if you feel my post solved your issue, it will help others find the solution.

Have a great day! 

† The opinions expressed above are the personal opinions of the authors, not of HP. By using this site, you accept the <a href="https://www8.hp.com/us/en/terms-of-use.html" class="udrlinesmall">Terms of Use</a> and <a href="/t5/custom/page/page-id/hp.rulespage" class="udrlinesmall"> Rules of Participation</a>.