-
×InformationNeed Windows 11 help?Check documents on compatibility, FAQs, upgrade information and available fixes.
Windows 11 Support Center. -
-
×InformationNeed Windows 11 help?Check documents on compatibility, FAQs, upgrade information and available fixes.
Windows 11 Support Center. -
- HP Community
- Notebooks
- Notebook Video, Display and Touch
- monitor display problem

Create an account on the HP Community to personalize your profile and ask a question
09-19-2019 05:20 PM
My wife has an Envy x360 with a display of 3200 by 1800. She has an HP 2310m monitor. All of a sudden the 2310 monitor displays the image greater than the 1900 by 1080 resolution image which chops the top, bottom, and sides off. If I take my Dell monitor off of my computer and connect it to her computer it works properly. If I take her HP monitor off her computer and connect it to my computer, it works properly. My wife would like her monitor back (it has built in speakers), but I can't seem to find the solution to the problem.
09-22-2019 03:42 PM
Thank you for posting on the HP Support Community.
- Did this happen after a recent window or software update?
- Did you make any changes on the settings of your PC prior to the issue?
- Have you tried the Auto-Adjustment Function?
While you respond to that, let's try these steps:
- If the monitor is not already on, press the Power button to turn on the monitor.
- To access the OSD menu, press the Menu button. The OSD Main Menu displays.
- To navigate through the Main or sub-menu, press the + (Plus) button on the monitor's side panel to scroll up, or the – (Minus) button to scroll in reverse. Then press the Auto/OK button to select the highlighted function. NOTE: The menu moves to the top if you scroll down at the bottom of the selections. The menu moves to the bottom if you scroll up at the top of the selections.
- To adjust the scale of a selected item ( , press the + or – button.
- Select Save and Return. If you don't want to save the setting, select Cancel from the sub-menu or Exit from the Main Menu.
- Press the Menu button to exit the OSD.
NOTE: When a menu is displayed, if the buttons are untouched for 30 seconds (factory default), adjustments and settings are saved and the menu closes.
-
You can also press the Menu button, then select Image Control > Auto Adjustment from the OSD Main Menu. Refer to Adjusting the Monitor Settings in this chapter.
Hope this helps! Keep me posted for further assistance.
Please click “Accept as Solution” if you feel my post solved your issue, it will help others find the solution.
ECHO_LAKE
I am an HP Employee
09-27-2019 02:28 PM
Thanks for your feedback. I do not believe that there was a window or software update between when it was working properly and now. I did not make any system changes on settings prior to this issue. Also I could not find any auto-adjustment function on the OSD.
09-27-2019 10:26 PM
@nbkaufman
Thank you for posting back.
Let's try:
-
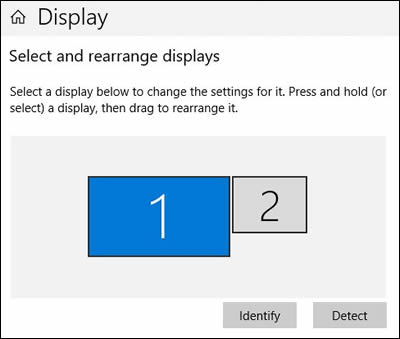
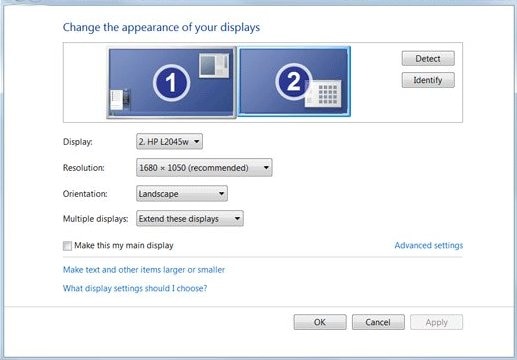
Right-click anywhere on the desktop, and then click Display settings (Windows 10) or Screen Resolution (Windows 8).
-
Make sure the correct number of monitors displays.
Windows 10

Windows 8

-
If all of your monitors display, continue with these steps.
NOTE: Two monitors might display as one, with 1|2 in the center, indicating the same screen duplicated on two monitors. To change to an extended desktop display, continue with these steps.
-
If not all of your monitors display, make sure the cables are securely inserted, and then click Detect.
-
-
Scroll down to Multiple displays, if necessary, click the drop-down menu, and then select a display option.
To set up a wireless monitor, click Connect to a wireless display.
If you cannot change the display options, go to the section to Configure the display with the graphics driver.
-
Adjust the screen resolution and orientation, as necessary.
-
Extended desktop only: Match the monitors on the display to how they are physically positioned. To identify the monitors, click Identify. Numbers display on the monitors to help you arrange them.
-
Windows 10: Click Keep changes, if necessary, to save the new display settings.
Windows 8: Click Apply, and then click OK.
Hope this helps! Keep me posted for further assistance.
Please click “Accept as Solution” if you feel my post solved your issue, it will help others find the solution.
ECHO_LAKE
I am an HP Employee
