-
×InformationNeed Windows 11 help?Check documents on compatibility, FAQs, upgrade information and available fixes.
Windows 11 Support Center. -
-
×InformationNeed Windows 11 help?Check documents on compatibility, FAQs, upgrade information and available fixes.
Windows 11 Support Center. -
- HP Community
- Archived Topics
- Printers Archive
- Re: just bought printer no visual guide

Create an account on the HP Community to personalize your profile and ask a question
Your account also allows you to connect with HP support faster, access a personal dashboard to manage all of your devices in one place, view warranty information, case status and more.
2 REPLIES 2
04-20-2017 09:19 AM - edited 04-20-2017 09:20 AM
Hi,
Thanks for using the HP Forums.
Please refer to this:
https://support.hp.com/sg-en/document/c04639102
Step 1: Replace the ink cartridges
Remove and replace critically low or empty ink cartridges.
NOTE:If you are enrolled in the HP Instant Ink program, you receive special HP Instant Ink cartridges. Some HP Instant Ink cartridges are larger than standard ink cartridges, but they fit in the carriage in the same way. HP Instant Ink is not available in all regions/countries or for all printer models. For more information, go to HP Instant Ink.Figure : Standard and HP Instant Ink cartridges
- Press the Power button to turn on the printer, if it is not already on.
- Load plain white paper into the input tray.
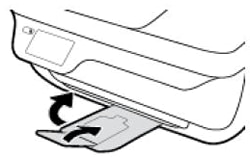
- Close the output tray extender, and then push the output tray back into the printer.Figure : Close the output tray extender, and then push the output tray into the printer
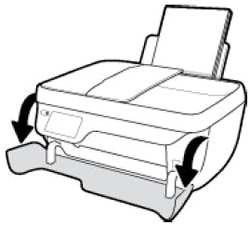
- Open the exterior door.Figure : Open the exterior door
- Open the ink cartridge access door.The carriage moves to the center of the printer.Figure : Open the ink cartridge access door
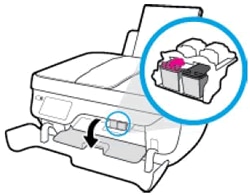
- Wait until the carriage is idle and silent before you continue.
- Lightly press down on the ink cartridge to release it, and then pull the ink cartridge out of its slot.Figure : Remove the ink cartridge

- Remove the new ink cartridge from its packaging, and then remove the plastic tape.
CAUTION:
Do not try to remove the copper electrical strip.Do not touch the copper-colored contacts or the ink nozzles. Do not replace the protective tape on the contacts. Handling these parts can result in clogs, ink failure, and bad electrical connections.Figure : Remove the plastic tape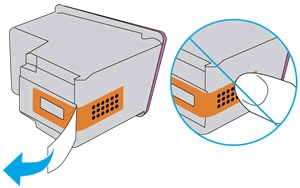
- Hold the ink cartridge by its sides with the nozzles toward the printer, and then insert the ink cartridge into its slot. Make sure the ink cartridge is inserted in the correct slot.
- The tri-color ink cartridge (
 ) goes in the slot on the left.
 - The black ink cartridge (
 ) goes in the slot on the right.
- Push the ink cartridge forward into its slot until it snaps into place.Figure : Snap the ink cartridge into place
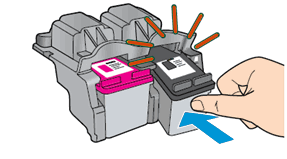
- Repeat these steps to replace the other ink cartridge, if necessary.
- Close the ink cartridge access door.Figure : Close the ink cartridge access door
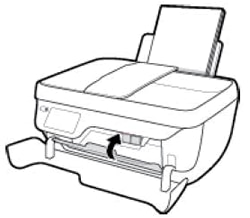
- Close the exterior door.Figure : Close the exterior door
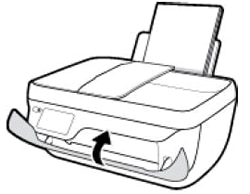
- Pull out the output tray, and then lift the output tray extender.Figure : Pull out the output tray, and then lift the output tray extender
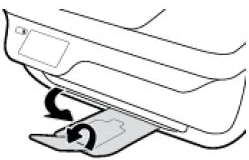
- Press OK to align the ink cartridges.An alignment page prints.
Hope that helps!
I am an HP Employee. Although I am speaking for myself and not for HP.
Click Helpful = Yes to say Thank You.
Question / Concern Answered, Click "Accept as Solution"


Click Helpful = Yes to say Thank You.
Question / Concern Answered, Click "Accept as Solution"


04-20-2017 09:23 AM
The steps in the document here may help installing the cartridges. See step three:
Step 3: Install the ink cartridges
Install the HP ink cartridges that shipped in the box with your printer.
- Open the exterior door, and then the ink cartridge door.The printer carriage moves to the center of the printer.Figure : The printer carriage moves to the center of the printer

- Wait until the printer is idle and silent before you continue.
- Remove one of the ink cartridges from its package. Be careful to touch only the black plastic on the ink cartridge.
- Remove the protective tape.
CAUTION:
Do not touch the copper-colored contacts or the ink nozzles. Do not replace the protective tape on the contacts. Handling these parts can result in clogs, ink failure, and bad electrical connections.Figure : Remove the tape and avoid touching the ink cartridge contacts or ink nozzles
- Slide the new ink cartridge at a slight upward angle into the empty slot, and then gently push up on the ink cartridge until it snaps into place.
- Insert the tri-color ink cartridge (
 ) into the left slot.
 - Insert the black ink cartridge (
 ) into the right slot.
Figure : Insert the new ink cartridge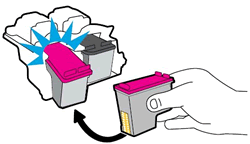
- Repeat these steps to install the other ink cartridge.
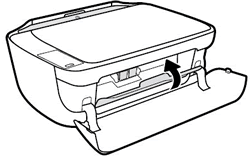
- Close the ink cartridge access door, and then close the exterior door.Figure : Close the ink cartridge access door
Bob Headrick, HP Expert
I am not an employee of HP, I am a volunteer posting here on my own time.
If your problem is solved please click the "Accept as Solution" button
If my answer was helpful please click "Yes" to the "Was this post helpful" question.
† The opinions expressed above are the personal opinions of the authors, not of HP. By using this site, you accept the Terms of Use and Rules of Participation.
Didn't find what you were looking for?
Ask the community
† The opinions expressed above are the personal opinions of the authors, not of HP. By using this site, you accept the <a href="https://www8.hp.com/us/en/terms-of-use.html" class="udrlinesmall">Terms of Use</a> and <a href="/t5/custom/page/page-id/hp.rulespage" class="udrlinesmall"> Rules of Participation</a>.

