• ×
    Information
    Need Windows 11 help?
    Check documents on compatibility, FAQs, upgrade information and available fixes.
    Windows 11 Support Center.
  • post a message
  • ×
    Information
    Need Windows 11 help?
    Check documents on compatibility, FAQs, upgrade information and available fixes.
    Windows 11 Support Center.
  • post a message
Guidelines
Are you having HotKey issues? Click here for tips and tricks.
HP Recommended
HP2310m

I connected the HP monitor to an acer Windows 10 PC via HDMI cable.  I am using the latest graphics and monitor drivers.  My problem is that the video image is too big.  Important parts of the image are outside the viewing area.  For example, I can only see the top edge of the Windows taskbar.


When I use the monitor menu and open Image Control, the Custom Scaling control is not selectable-- it is grayed out.  I can use a lower-than-recommended resolution to see the whole desktop, but if I do, the image is squashed out of proper proportion.  I would like to be able to use 1920x1080.  Thanks,


Gnuser

1 REPLY 1
HP Recommended

@Gnuser,


Welcome to the HP Support Community!


I reviewed your post and I understand that you are facing issues with the monitor resolutions on your computer.


Don’t worry, I assure you I will try my best to get this sorted.


What is the recommended resolution on your laptop when the monitor is not connected?

Are you using the screen duplicate option or extend option when you connect the monitor?

Have you tried using a different HDMI cable?


Meanwhile, I recommend you try using the auto adjustment feature on the monitor front panel and check if it helps.


Here is how it is done.


  1. Allow the monitor to warm up for 20 minutes before adjusting.

  2. Press the Auto/OK button on the monitor front panel.

    Alternatively:

    Press the Menu button on the monitor panel, select Image Control, and then select Auto Adjustment from the OSD menu.

    If the result is not satisfactory, continue with this procedure.

  3. Insert the CD in the computer CD drive.

    The CD menu displays.

  4. Select the language.

  5. Select Open Auto-Adjustment Software.

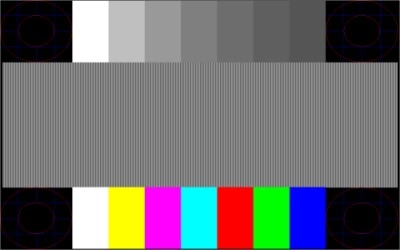
    The setup test pattern displays.

    Figure : Setup test pattern

    Image of the setup test pattern.
  6. Press the Auto/OK button on the monitor panel to produce a stable, centered image.

Let me know how it goes and you have a great day!


If you wish to show appreciation for my efforts, mark my post as Accept as Solution. Your feedback counts!


Cheers!

The_Fossette
I am an HP Employee

† The opinions expressed above are the personal opinions of the authors, not of HP. By using this site, you accept the <a href="https://www8.hp.com/us/en/terms-of-use.html" class="udrlinesmall">Terms of Use</a> and <a href="/t5/custom/page/page-id/hp.rulespage" class="udrlinesmall"> Rules of Participation</a>.