-
×InformationNeed Windows 11 help?Check documents on compatibility, FAQs, upgrade information and available fixes.
Windows 11 Support Center. -
-
×InformationNeed Windows 11 help?Check documents on compatibility, FAQs, upgrade information and available fixes.
Windows 11 Support Center. -
- HP Community
- Apps, Services & Software
- HP Instant Ink
- Carriage Jam

Create an account on the HP Community to personalize your profile and ask a question
10-01-2019 09:23 AM
10-03-2019 10:15 AM
Welcome to HP support community.
Remove paper from underneath the printer
-
-
Slide the tray in until it stops.
Make sure that the cartridges are not touching the printer cover
-
Press the Power button to turn on the printer if it is not already on.
-
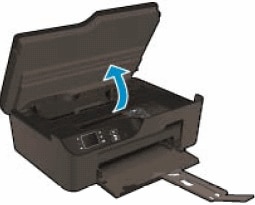
Open the cartridge access door.
Figure : Open the cartridge access door
-
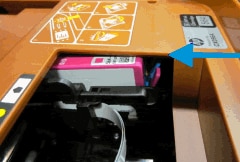
Check to see if any of the cartridges are jammed against the printer cover.
Figure : A cartridge jammed against the printer cover
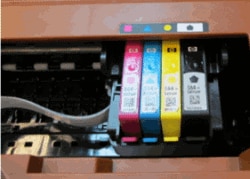
The cartridges are seated properly if there is a gap between the cartridges and the printer cover. Continue to the next solution.
Figure : Properly installed cartridges with a gap
-
Press the Power button to turn off the printer.
-
Disconnect the power cord from the rear of the printer.
WARNING:
You must disconnect the power cord before reaching inside the HP printer to avoid risk of injuries or electric shock.
-
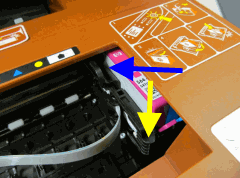
Gently press down on the carriage, and then slide the carriage to the left so that the top of the magenta cartridge is visible.
Figure : Press down on the front of the carriage, and then slide the carriage to the left
NOTE:
You might hear a click as the carriage drops.
-
Gently press down on the carriage, and then slide the carriage to the right. All of the cartridges should rest under the printer cover.
Important: Do not try to pull out the carriage.
-
Reconnect the power cord to the rear of the printer.
-
Plug the power cord back into the power source or electrical outlet.
-
Press the Power button to turn on the printer. The carriage moves freely.
Figure : The carriage moves freely
-
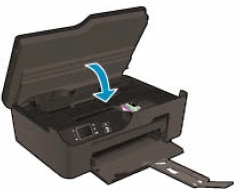
Close the cartridge access door.
Figure : Close the cartridge access door
You can refer this HP support document for more assistance:- Click here
Let me know how it goes.
To thank me for my efforts to help you, please mark my post as an accepted solution so that it benefits several others.
Cheers.
Sandytechy20
I am an HP Employee