-
×InformationNeed Windows 11 help?Check documents on compatibility, FAQs, upgrade information and available fixes.
Windows 11 Support Center. -
-
×InformationNeed Windows 11 help?Check documents on compatibility, FAQs, upgrade information and available fixes.
Windows 11 Support Center. -
- HP Community
- Printers
- LaserJet Printing
- HP LaserJet P1505 squeak sound

Create an account on the HP Community to personalize your profile and ask a question
12-17-2018 09:33 AM
How to fix this?? HP squeak sound
12-18-2018 01:38 PM
Welcome to the HP Forums 🙂 I would like to take a moment and thank you for using this forum, it is a great place to find answers.
Let's try to reset the Printer here as it helps in removing any stored static electricity from the Printer which might be causing these issues.
- Turn the printer on, if it is not already on.
- Wait until the printer is idle and silent before you continue.
- With the printer turned on, disconnect the power cord from the rear of the printer.
- Unplug the power cord from the wall outlet.
- Wait at least 60 seconds.
- Plug the power cord back into the wall outlet.
- NOTE: HP recommends connecting the printer power cord directly to the wall outlet.
- Reconnect the power cord to the rear of the printer.
- Turn on the printer, if it does not automatically turn on.
- Wait until the printer is idle and silent before you proceed.
You can also try cleaning the pickup roller:
-
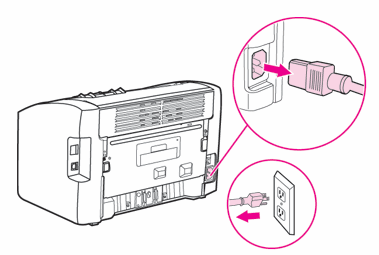
Press the Power switch to turn off the product, and then disconnect the power cord from the back of the product. Wait for the product to cool.
Figure : Disconnect the power cord
-
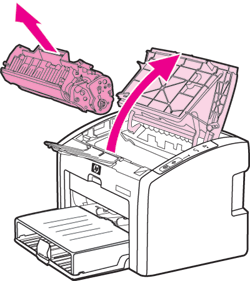
Open the print cartridge door, and then remove the print cartridge.
CAUTION:
To prevent damage to the print cartridge, minimize its exposure to direct light. Cover the print cartridge with a sheet of paper.
Figure : Remove the print cartridge
-
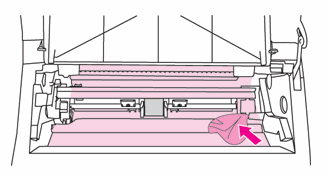
With a dry, lint-free cloth, wipe any residue from the paper path area and the print cartridge cavity.
Figure : Clean the print cartridge cavity
-
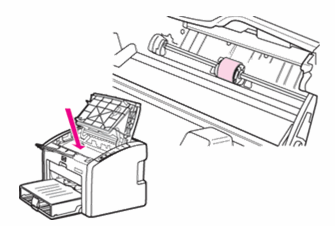
Find the pickup roller inside the product.
Figure : Pickup roller
-
Release the small, white tabs on either side of the pickup roller, and then rotate the pickup roller toward the front.
Figure : Release the tabs

-
Gently pull the pickup roller up and out.
Figure : Remove the pickup roller

-
Dab a clean, lint-free cloth in rubbing alcohol (isopropyl alcohol) or clean water, and then scrub the pickup roller.
NOTE:
Use only distilled, filtered, or bottled water to clean the pickup roller. Tap water might contain contaminants that can damage the pickup roller.
WARNING:
Rubbing alcohol is flammable. Keep the rubbing alcohol and cloth away from any open flame or heat source. Before you close the product, allow the rubbing alcohol to dry completely.
-
Using a clean, dry, lint-free cloth, wipe the pickup roller to remove loosened dirt.
-
Allow the pickup roller to dry completely before you reinstall it in the product
-
Position the pickup roller in the slot. The circular and rectangular slots on each side will prevent you from installing the roller incorrectly.
Figure : Position the pickup roller in the slot

-
Rotate the top of the pickup roller away from you until both sides snap into place.
Figure : Rotate the pickup roller into place

-
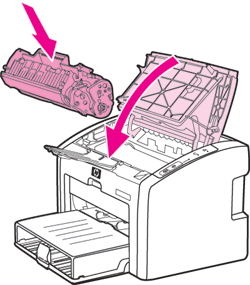
Reinstall the print cartridge, and then close the print cartridge door.
Figure : Reinstall the print cartridge
-
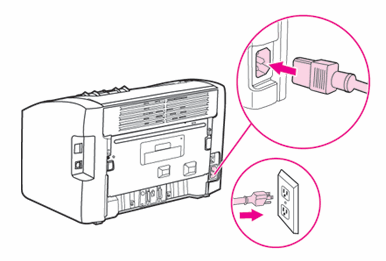
Reconnect the power cord to the back of the product, and then press the Power switch to turn on the product.
Figure : Reconnect the power cord
Let me know if this helps.
If the information I've provided was helpful, give us some reinforcement by clicking the Accepted Solution and Kudos buttons, that'll help us and others see that we've got the answers!
Thanks!
Have a great day!
I am an HP Employee
12-19-2018 11:59 PM
Hey this is not work. Problem is inside print. I check back and sound is louder
I can't take off cover right. Sound is from top right or down right. Mayby this is for replace???
12-20-2018 02:29 PM
Please try updating the firmware: https://support.hp.com/in-en/document/c02919168
Let me know if this helps.
If the information I've provided was helpful, give us some reinforcement by clicking the Accepted Solution and Kudos buttons, that'll help us and others see that we've got the answers!
Thanks!
I am an HP Employee


