-
×InformationNeed Windows 11 help?Check documents on compatibility, FAQs, upgrade information and available fixes.
Windows 11 Support Center. -
-
×InformationNeed Windows 11 help?Check documents on compatibility, FAQs, upgrade information and available fixes.
Windows 11 Support Center. -
- HP Community
- Printers
- LaserJet Printing
- "Jam in output bin. Open rear door and clear jam" error mess...

Create an account on the HP Community to personalize your profile and ask a question
02-25-2018 06:56 PM
I have followed, several times, without success, the first 2 solutions (remove paper; reset) in the article
A 'Paper Jam' Message Displays for HP LaserJet Pro CM1415fn and CM1415fnw Color Multifunction Printers
found at the webpage
https://support.hp.com/us-en/document/c02206103
Nor have I yet dismantled the printer to see if there is a sheet of paper crumpled around the fuser, as suggested in replies to some prior questions ... in which I notice that an HP support person often undertakes to send a private message with further instructions to "reset the printer".
Has anyone really solved this problem yet? I would appreciate any suggestions ...
02-26-2018 01:32 PM
Hi @guerdon ,
Thank you for posting on HP Forums,
The Barachiel is at your service.
I understand you are in need of support,
I'll be glad to help you out, however, for an accurate solution I will need more details:
Have you attempted any steps on your own before posting on the HP Forums?
When was the last time it worked without these issues?
In the meantime, please try the steps mentioned below:
Solution one: Clear the jam
Paper jams can occur in multiple locations in the product. Follow these steps to resolve the issue. It might not be necessary to complete all the steps.
note:
Loose toner might remain in the product after a jam. This problem typically resolves itself after a few sheets have been printed.
Figure : Jam locations
-
Document feeder
-
Output tray
-
Tray 1
-
Rear door
caution:
Paper jams might result in loose toner on the page. If you get any toner on your clothes, wash them in cold water. Hot water permanently sets the toner into the fabric.
Do not use sharp objects, such as tweezers or needle-nose pliers, to remove jams. The warranty does not cover damage caused by sharp objects.
When you remove jammed paper, pull it straight out of the product. Pulling jammed paper out at an angle can damage the product.
Step one: Clear jams from the document feeder
-
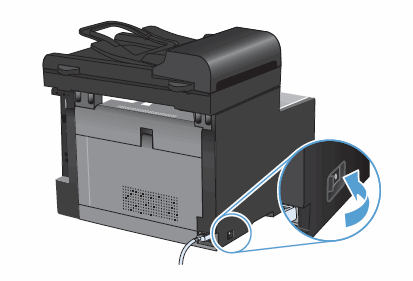
Turn the product off, and then disconnect the power cord from the rear of the product.
Figure : Turn the product off
-
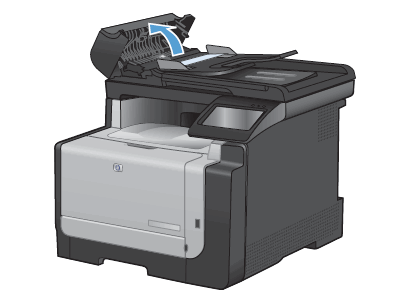
Open the document feeder cover.
Figure : Open document feeder cover
-
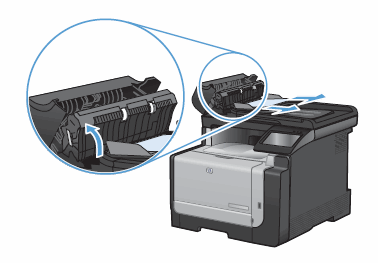
Lift the document feeder mechanism, and then gently pull the jammed paper out.
caution:
If the paper tears while removing it from the rollers, check the rollers for torn pieces of paper that might remain inside the product. If any torn pieces of paper remain inside the product, more paper jams are likely to occur.
Figure : Remove jammed paper from the document feeder
-
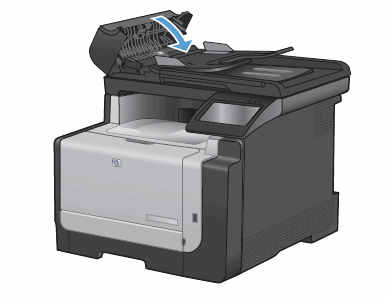
Close the document feeder cover.
Figure : Close the document feeder cover
Step two: Clear jams from the input tray
-
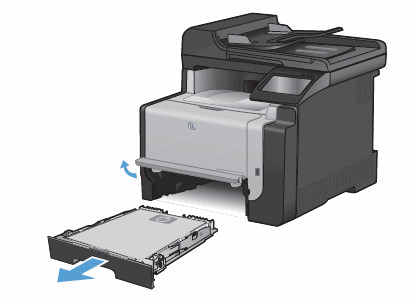
Remove tray 1, and then lift the jam access door above the tray.
Figure : Remove tray 1 and lift the jam access door
-
With both hands, grasp the paper where it is most visible, including the middle, and then carefully pull the paper straight out of the product.
Figure : Remove jammed paper from the input tray

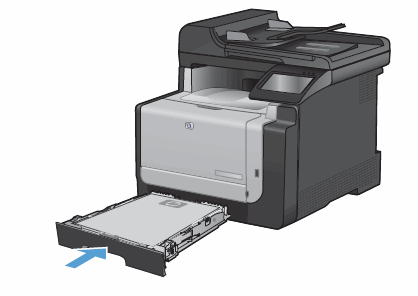
- Reinsert tray 1.
Figure : Reinsert tray 1
Step three: Clear jams from the rear of the printer
-
Open the rear door.
caution:
The fuser, located in the back of the product, is hot. Wait for the fuser to cool before continuing.
Figure : Open the rear door

-
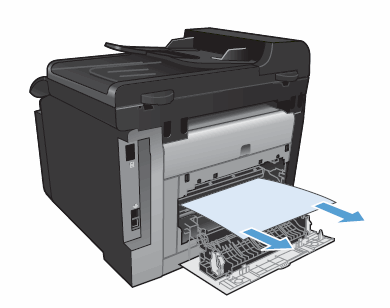
With both hands, grasp the paper where it is most visible, including the middle, and then carefully pull the paper straight out of the product.
Figure : Remove jammed paper from the product
-
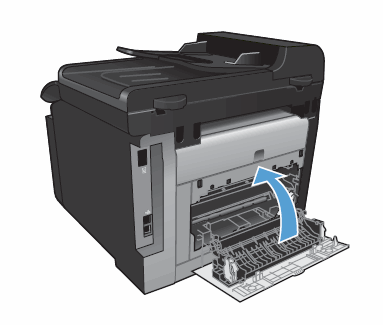
Close the rear output door.
Figure : Close the rear output door
Step four: Clear jams from the output tray
-
With both hands, grasp the paper where it is most visible, including the middle, and then carefully pull the paper straight out of the output tray.
Figure : Remove jammed paper from the output tray

-
Reconnect the power cord to the rear of the product.
-
Press the Power button (
 ) to turn on the product.
Let me know how that pans out. 🙂
I hope you have a good day ahead,
And Feel free to ask any other queries as well,
Considering, this forum has some of the best people in the world available and ready to help. 😉
Barachiel
I am an HP Employee
