-
×InformationNeed Windows 11 help?Check documents on compatibility, FAQs, upgrade information and available fixes.
Windows 11 Support Center. -
-
×InformationNeed Windows 11 help?Check documents on compatibility, FAQs, upgrade information and available fixes.
Windows 11 Support Center. -
- HP Community
- Notebooks
- Notebook Hardware and Upgrade Questions
- Re: Upgrade to SSD

Create an account on the HP Community to personalize your profile and ask a question
Your account also allows you to connect with HP support faster, access a personal dashboard to manage all of your devices in one place, view warranty information, case status and more.
Common problems for Battery
We would like to share some of the most frequently asked questions about: Battery Reports, Hold a charge, Test and Calibrating Battery . Check out this link: Is your notebook plugged in and not charging?

It has been a while since anyone has replied. Simply ask a new question if you would like to start the discussion again.
02-24-2021 05:06 AM - edited 02-25-2021 08:54 AM
 HP Recommended
Product: Pavilion 14-bf109ne
Operating System: Microsoft Windows 10 (64-bit)
I would like to add SSD to my laptop 14-bf109ne. Already have 1TB installed ,would like to add SSD and load and run OS from SSD and keep 1 TB as storage space to increase performance .What type of SSD ( model number) to buy and how to move my OS to new SSD
Solved! Go to Solution.
1 ACCEPTED SOLUTION
Accepted Solutions
02-27-2021 10:48 AM - edited 02-27-2021 10:50 AM
HP Recommended
Hi@Vinitviswam, Welcome to HP Community!
I have gone through your post and would like to help!
As per the Service Guide, the Notebook supports up to 2 TB.

HP Pavilion 14 Laptop PC Maintenance and Service Guide Link
Keep me posted. Happy to help!
Please click “Accept as Solution” if you feel my post solved your issue, it will help others find the solution.
Click the “Kudos, Thumbs Up" on the bottom right to say “Thanks” for helping!
Have a great day!
4 REPLIES 4
02-27-2021 10:48 AM - edited 02-27-2021 10:50 AM
HP Recommended
Hi@Vinitviswam, Welcome to HP Community!
I have gone through your post and would like to help!
As per the Service Guide, the Notebook supports up to 2 TB.
HP Pavilion 14 Laptop PC Maintenance and Service Guide Link
Keep me posted. Happy to help!
Please click “Accept as Solution” if you feel my post solved your issue, it will help others find the solution.
Click the “Kudos, Thumbs Up" on the bottom right to say “Thanks” for helping!
Have a great day!
03-08-2021 02:28 PM
HP Recommended
Hi@Vinitviswam, Welcome to the HP Support Community!
It's a free download from Microsoft stores for the operating system your have HP cloud recovery option. Please i request follow the instructions
-
Windows 10 only
-
From your PC, go to the Microsoft Store and search for HP Cloud Recovery Tool.
-
Select the HP Cloud Recovery Tool App from the search results, and then click Get. Microsoft downloads and installs the App.

-
-
Windows 10 or Windows 7
-
To download the recovery software, click HP Cloud Recovery Tool.
NOTE:
Alternatively, you can go to the HP Customer Support page and search for Cloud Recovery.
-
Download and install the HP Cloud Recovery Tool. If you are prompted with a choice to run or save the file, click Run.
-
Step 3: Run the HP Cloud Recovery Tool
Use these steps to run the recovery software.
-
Insert a blank USB drive (minimum 32 GB) into the computer, and then make sure the computer is connected to the Internet.
NOTE:
Any data on the USB device is permanently deleted during this process. When the process is complete, the USB device contains only the recovery software.
-
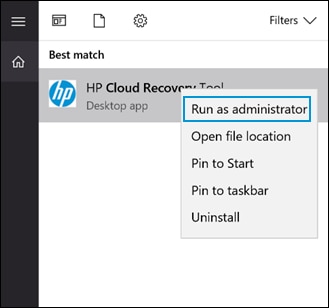
In Windows, search for Cloud Recovery, right-click HP Cloud Recovery Tool, and then select Run as administrator.
If a Do you want to allow this app from an unknown publisher to make changes to your device? message displays, click Yes to continue.
-
Carefully read the message on the HP Cloud Recovery Tool Welcome page, and then click Next to continue.

-
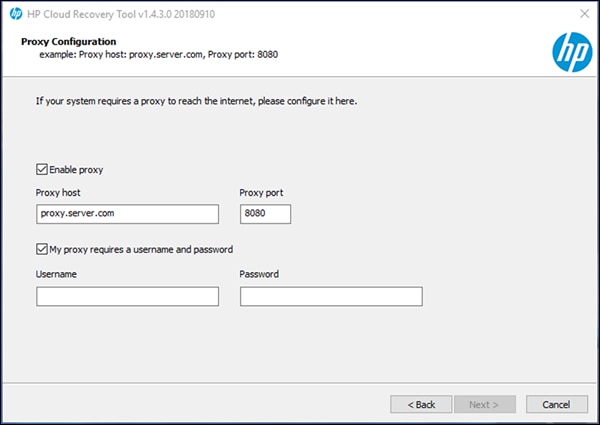
Proxy Configuration window:
-
If you are downloading the recovery software on a secure network, the tool automatically detects and populates the proxy information. Click Next.
NOTE:
If the proxy information does not automatically populate, check with your network administrator for the proxy information, and then enter it in the appropriate fields.
-
If you are downloading the recovery software on an unsecured network, skip to the next step.
-
-
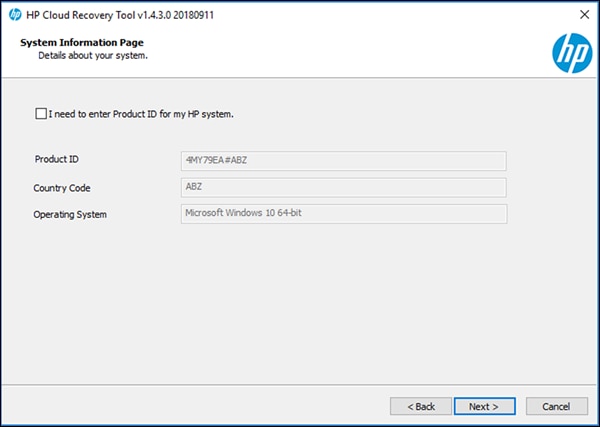
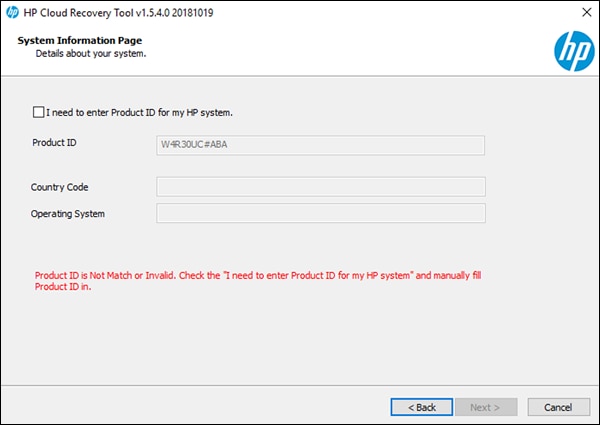
Complete the System Information.
-
If you are running the tool on the computer to be restored, when the HP Cloud Recovery Tool detects the system information for your device, click Next.
-
To manually enter the system information, check the box next to I need to enter Product ID for my HP System, enter the information for the computer to be restored, and then click Next.
NOTE:
If the Product ID has an ‘AV’ before the pound sign # and the three-digit number, do not include the #xxx (where ‘xxx’ represents a number). For example, a Product ID such as JGT75AV#123, you would not include #123. Doing so generates an error.
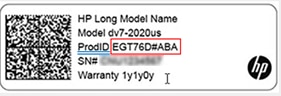
The Product ID might be located on the back cover of the PC. Otherwise, go to How Do I Find My Model Number or Product Number? (Desktop) or How Do I Find My Model Number or Product Number? (Notebook) for more information.
-
If the message Product ID is Not Match or Invalid. Check the "I need to enter Product ID for my HP system" and manually fill Product ID in. displays, your device is not yet available in the Cloud Recovery Tool. Go to HP Customer Support - Software and Driver Downloads for other available recovery options.
-
-
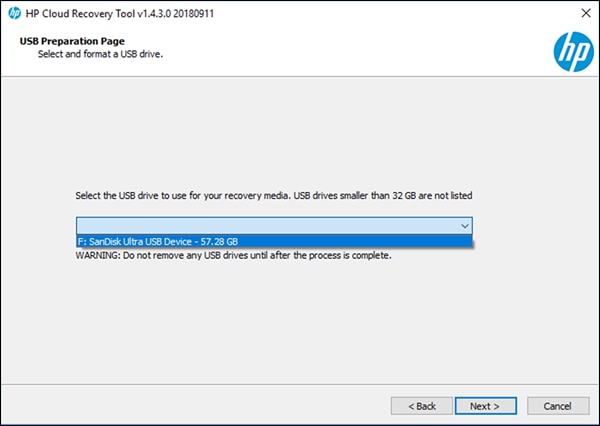
Select your USB device from the drop-down menu, and then click Next.
-
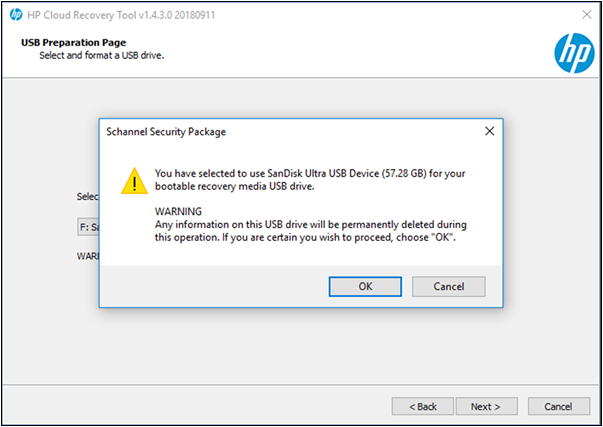
Carefully read the confirmation message informing you that any information on the USB drive is deleted during the process, and then click OK, Back, or Cancel.
-
Click Next to continue.
-
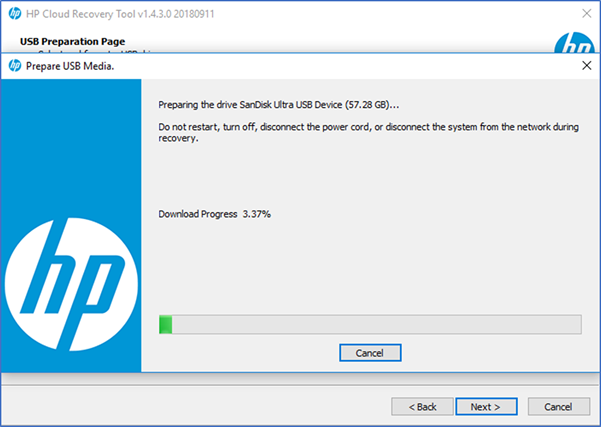
Wait while HP Cloud Recovery Tool creates the Recovery Image on your USB drive.
A progress bar showing the preparation of the selected USB drive as an HP Recovery boot device displays. Click Cancel at any time to terminate the process and exit the utility.
NOTE:
This process might take several hours depending on the system configuration of your PC. Do not interrupt the progress by removing the drive(s) or rebooting the machine. If the process is interrupted, an error message displays.
-
If the message The recovery USB Flash drive is ready. Do you want to delete the downloaded temporary files to save space in the drive? displays, click Accept to continue.
-
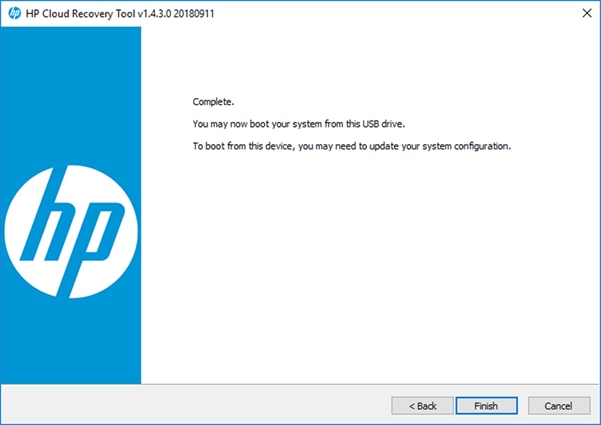
When the process completes, click Finish.
Step 4: Recover the system
Use the recovery boot device that you created using the HP Cloud Recovery Tool to recover your system.
-
Back up your personal files if you have not already done so. Go to HP PCs - Backing Up Your Files (Windows 10, 😎 or HP PCs - Backing Up Your Files (Windows 7) for more information.
-
Disconnect all connected devices and cables such as Personal Media Drivers, USB drivers, printers, or faxes.
-
Remove media from internal drives and remove any recently added internal hardware.
NOTE:
Keep the monitor, keyboard, mouse, and power cord connected to the computer.
-
Insert the USB boot device that you created, and then turn off the computer.
-
Turn on the computer, and then immediately press the Esc key repeatedly, about once every second, until the Startup Menu opens.
-
Press the F9 key to open Boot Device Options.
-
Use the up or down arrow keys to select the USB drive, and then press Enter.
NOTE:
More than one USB drive might be available from the list of devices. If so, select one of the USB drive options from the list to see if HP Recovery starts. If recovery does not start or a non-system disk error displays, restart the computer by pressing the power button, and then repeat these steps to select another USB drive. When recovery starts, continue with these steps to complete recovery.
If you cannot select the recovery media drive from the Boot Menu, disable Secure Boot and enable Legacy Mode in the BIOS.
-
When prompted to run Recovery Manager from the hard drive or from media, select Run program from media, and then click Next.
-
Select a language, and then click OK.
-
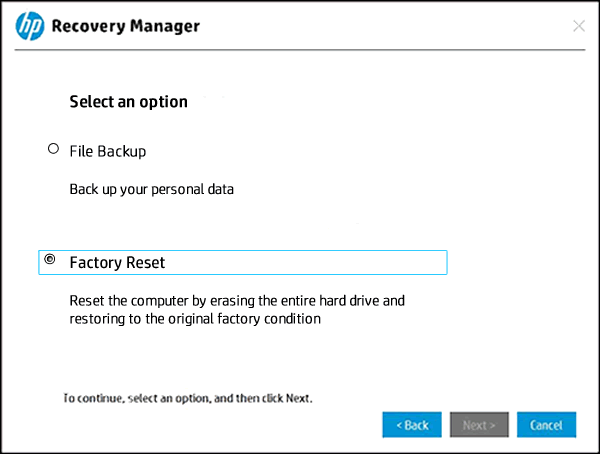
Select Factory Reset, and then click Next.
-
On the Welcome screen, click Next.
-
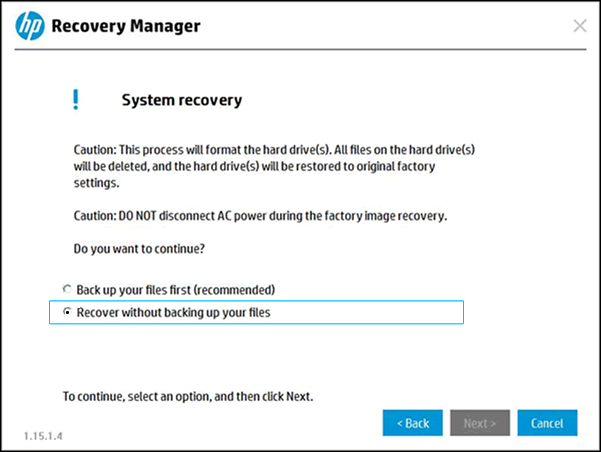
Select Recover without backing up your files, and then click Next.
-
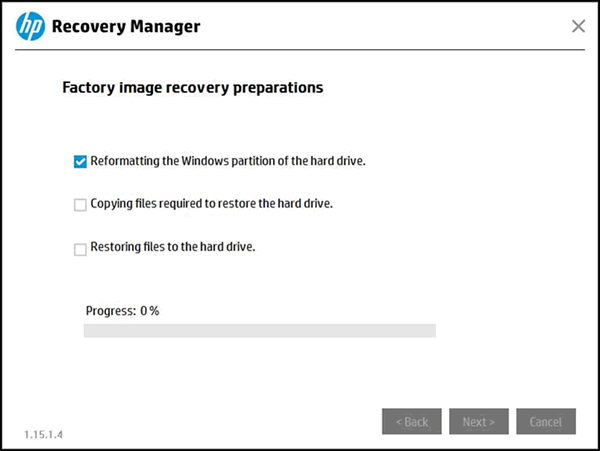
Wait while HP Recovery Manager prepares the computer for recovery and copies the files to the hard drive.
-
Click Skip when asked if you received a supplemental recovery USB drive from HP Support.
-
Click Continue when the recovery preparation completes.
CAUTION:
Do not stop the process while the Windows partition is being reformatted and the files to restore the hard drive are being copied.
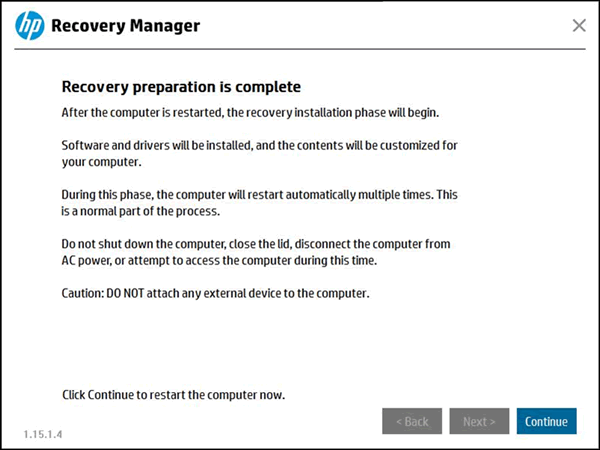
-
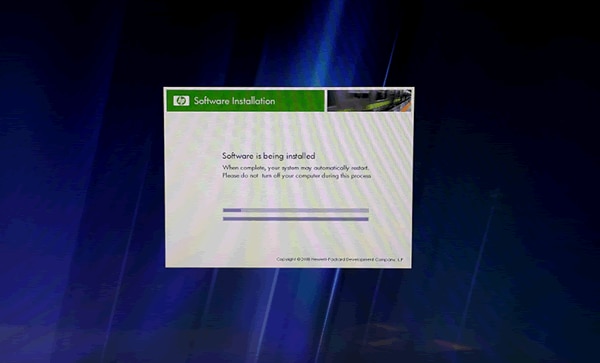
Do not remove the USB flash drive or turn off your computer during this process. The computer might go through several Software Installation screens, including black screens with the HP logo, Windows system screens, and Admin screens. This is normal.
NOTE:
The recovery process might take several hours to complete depending on the system configuration of your PC.
-
After the recovery completes, click Finish to restart the system.
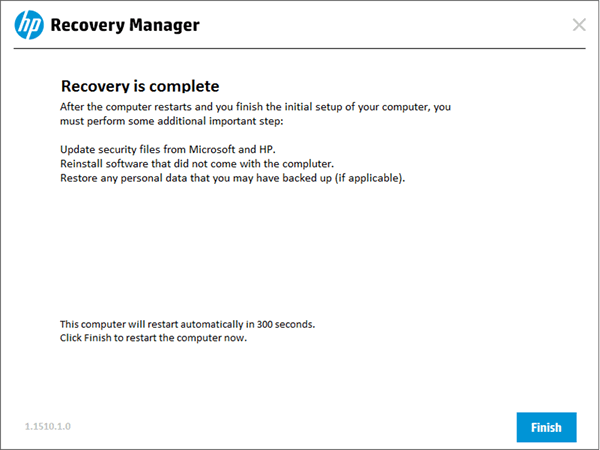
-
You can remove the USB flash drive after the PC initial setup begins.
Using the HP Cloud Recovery Tool (Windows 10) Link
Keep me posted. Happy to help!
Please click “Accept as Solution” if you feel my post solved your issue, it will help others find the solution.
Click the “Kudos, Thumbs Up" on the bottom right to say “Thanks” for helping!
Have a great day!
Be alert for scammers posting fake support phone numbers and/or email addresses on the community.
If you think you have received a fake HP Support message, please report it to us by clicking on "Flag Post".
† The opinions expressed above are the personal opinions of the authors, not of HP. By using this site, you accept the Terms of Use and Rules of Participation.


Didn't find what you were looking for?
Ask the community
† The opinions expressed above are the personal opinions of the authors, not of HP. By using this site, you accept the <a href="https://www8.hp.com/us/en/terms-of-use.html" class="udrlinesmall">Terms of Use</a> and <a href="/t5/custom/page/page-id/hp.rulespage" class="udrlinesmall"> Rules of Participation</a>.