-
×InformationNeed Windows 11 help?Check documents on compatibility, FAQs, upgrade information and available fixes.
Windows 11 Support Center. -
-
×InformationNeed Windows 11 help?Check documents on compatibility, FAQs, upgrade information and available fixes.
Windows 11 Support Center. -
- HP Community
- Notebooks
- Notebook Video, Display and Touch
- Brightness setting in power plan options disapeared after Wi...

Create an account on the HP Community to personalize your profile and ask a question
09-18-2019 01:38 AM - edited 09-18-2019 11:28 AM
The OS in my laptop was updated a few weeks ago. In the past I was able to set the brightness level for the screen while on battery differently from the brightness level when plugged in. After the update, when I go to "Control Panel\System and Security\Power Options\Edit Plan Settings" I only see settings for Turn Off Display and Put Computer to Sleep. The brightness settings are gone.
Now I can only set the brightness manually and select reduce brightness on battery (which only reduces it slightly and makes batter discharge quicker).
How can I get the settings back? I prefer 100% brightness when plugged in and 10% when on battery.
Please help.
09-20-2019 04:53 PM
@ajayb8412 Welcome to HP Community!
Note: Please ensure the complete product name/number for a quicker response from the community, as we need to know what we are dealing with to provide an accurate solution:
Click here for steps on finding the information we need!
Remember: Do not share any of your personal information such as serial, phone number, email ID, etc.
Meanwhile, update the graphics card from the HP website: click here to find and install the same,
And If brightness option isn’t available on your Windows 10 PC, the issue might be your monitor driver. Sometimes there is an issue with your driver, and that can lead to this and other problems.
However, you can fix the problem simply by uninstalling your monitor driver. To do that, just follow these steps:
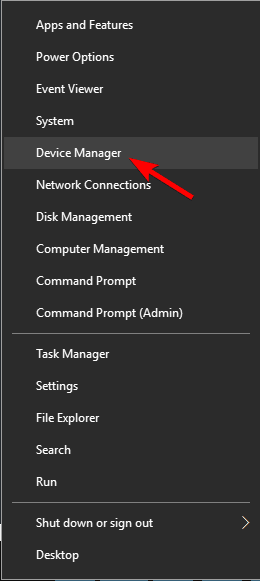
- Press Windows Key + X to open Win + X menu. Choose Device Manager from the list.
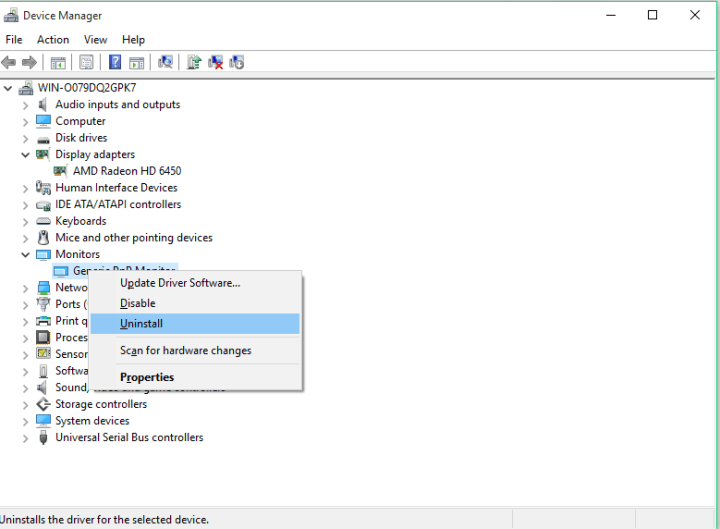
- Go to Monitors section and expand it.
- Find your monitor driver, right-click it and choose Uninstall.
- Check Delete the driver software for this device and click OK.
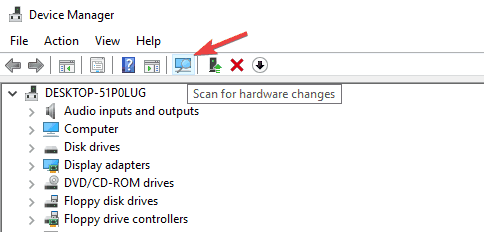
- Your monitor driver is uninstalled, so now you need to click Scan for hardware changes icon.
- This will install the default monitor driver and your brightness settings should work now.
After installing the default monitor driver, check if the problem is still there. This issue can also occur if your monitor driver is disabled. To check if that’s the case, do the following:
- Open Device Manager.
- Go to Monitors section and expand it.
- If your monitor is disabled, right-click it and choose Enable from the menu.
After enabling your monitor, the issue should be resolved and you’ll be able to adjust your brightness once again.
Riddle_Decipher
I am an HP Employee
Learning is a journey, not a destination.
Let's keep asking questions and growing together.
09-20-2019 08:51 PM
Thank you for your response. I have tried all this but it still does not allow me to set brightness level for battery and brightness for plugged in separately. The only thing I get is a checkbox "reduce brightness level when on battery" but it hardly reduces brightness when on battery.
Interestingly, the driver for my display adapter was a later version than what I got from the website you suggested. I installed the older one but still no change.
The monitor driver/uninstall/reinstall did not make any difference.
This used to work BEFORE the Windows 10 update. Too bad it stopped working now.
Ajay
09-23-2019 11:07 AM
@ajayb8412 I suggest you revert back to the last known date it had been working fine and disable the automatic windows updates for the time being, normally, Microsoft releases a patch to fix such issues, however, if you've already installed all available updates after this issue occurred and yet the issue persists, this could mean there are no patches released and its best we make use of the system restore: click here for details.
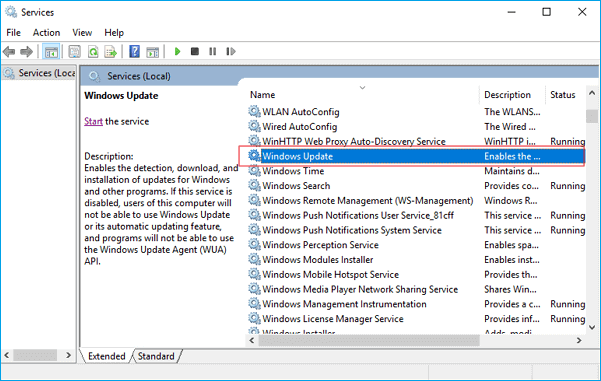
And mentioned below are the steps to disable auto-updates:
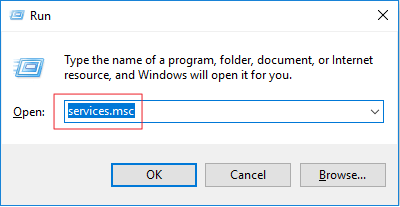
1. Press the Windows logo key + R at the same time to invoke the Run box.
2. Type services.msc and press Enter.
3. Scroll down to Windows Update, and double-click it.
4. In Startup type, select "Disabled". Then click "Apply" and "OK" to save the settings.
If you wish to thank me for my efforts, you could click on "Accept as solution" on my post as the solution should help others too.
Riddle_Decipher
I am an HP Employee
Learning is a journey, not a destination.
Let's keep asking questions and growing together.