-
×InformationNeed Windows 11 help?Check documents on compatibility, FAQs, upgrade information and available fixes.
Windows 11 Support Center. -
-
×InformationNeed Windows 11 help?Check documents on compatibility, FAQs, upgrade information and available fixes.
Windows 11 Support Center. -
- HP Community
- Printers
- Printer Paper Jams & Feed Issues
- Paper exiting has edges that crease often.

Create an account on the HP Community to personalize your profile and ask a question
01-11-2021
12:06 PM
- last edited on
01-11-2021
01:02 PM
by
![]() RodrigoB
RodrigoB
I have a brand new OfficeJet Pro 9025, it is very nice, but oftentimes papers that are exiting the printer with the edges folded over by about 1/2 inch. This does not happen on every document, but it is very bothersome.
Anybody with help on this?
Much appreciated.
[Personal Information Removed]
01-16-2021 09:13 AM
Hi @JackP1,
I'd like to help!
Try the below suggestions -
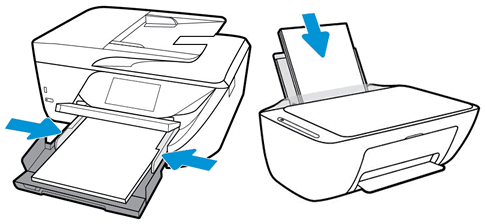
Check the paper, and then reload it
Check the paper stack for defects such as wrinkled, torn, or bent pieces that might cause a pick-up issue.
-
Remove any paper from the paper tray.
-
Remove any severely bent, wrinkled, or torn paper found in the stack.
-
Check for obstructions inside the paper tray. Make sure nothing blocks the paper from engaging with the rollers.
-
Make sure the paper stack is even on all sides.
-
Load the stack of paper into the paper tray.

-
Close or push in the paper tray.
-
Select the correct paper size on the printer control panel or in the printer software.
Clean the paper pick rollers
-
Get a flashlight.
-
Turn off the printer.
-
Wait until the printer is idle and silent, and then disconnect the power cord from the rear of the printer.
-
Remove the paper stack from the input tray.
-
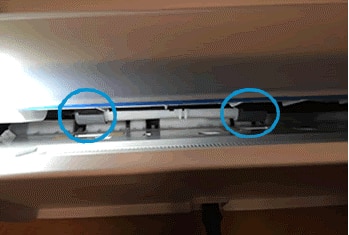
With the flashlight, look down into the input tray and find the paper pick rollers.

-
Lightly dampen a cotton swab with water, and then squeeze it to remove any excess water.
-
Clean the rollers with the swab, rotating the rollers with your fingers to completely clean them.
-
Allow the rollers to dry for two minutes.
-
Reconnect the power cord, and then turn on the printer.
Clean the paper pick rollers (under printer)
Clean the paper pick rollers on a printer where the paper tray is located on the bottom.
-
Turn off the printer.
-
Wait until the printer is idle and silent, and then disconnect the power cord and any cables from the rear of the printer.
-
Remove the paper stack from the input tray.
-
Lift the printer and place it on its side or back.
-
Pull out the paper tray, and then locate the gray paper pick rollers.

-
Lightly dampen a cotton swab with water, and then squeeze it to remove any excess water.
-
Clean the rollers with the swab, rotating the rollers with your fingers to completely clean them.
-
Allow the rollers to dry for two minutes.
-
Set the printer upright.
-
Reconnect the power cord, and then turn on the printer.
Clean the paper pick rollers (inside printer)
Clean the paper pick rollers under the cartridges or inside the paper tray area.
-
Get a flashlight.
-
Turn off the printer.
-
Wait until the printer is idle and silent, and then disconnect the power cord and any cables from the rear of the printer.
-
Remove the paper stack from the input tray.
-
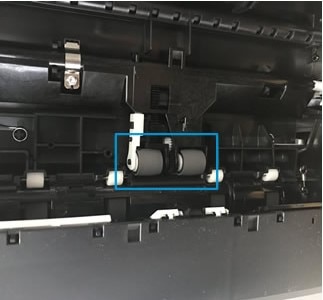
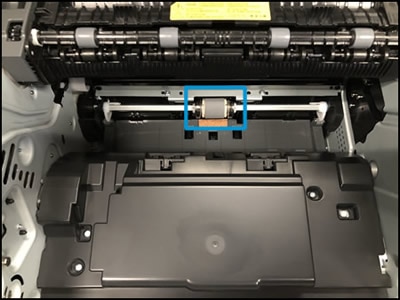
Depending on your printer model, use the flashlight to find the paper pick roller.
Figure : Printers with the roller under the cartridges

Figure : Printers with the roller above the input tray

-
Lightly dampen a cotton swab with water, and then squeeze it to remove any excess water.
-
Clean the rollers with the swab, rotating the rollers with your fingers to completely clean them.
-
Allow the rollers to dry for two minutes.
-
Reconnect the power cord and cables, and then turn on the printer.
Reset the printer
Reset the printer to recover from printer errors or failures.
-
With the printer turned on, disconnect the power cord from the printer.
-
Unplug the power cord from the power source.
-
Wait 60 seconds.
-
Reconnect the power cord to a wall outlet and to the printer.
NOTE:
HP recommends plugging the printer directly into a wall outlet.
-
Turn on the printer to complete the reset.
Also, try updating the printer's firmware -HP Printers - Updating or Upgrading Printer Firmware
Hope this helps! Keep me posted.
And, Welcome to the HP Support Community.
Please click “Accept as Solution” if you feel my post solved your issue, it will help others find the solution.
Click the “Kudos, Thumbs Up" on the bottom right to say “Thanks” for helping
