-
×InformationNeed Windows 11 help?Check documents on compatibility, FAQs, upgrade information and available fixes.
Windows 11 Support Center. -
-
×InformationNeed Windows 11 help?Check documents on compatibility, FAQs, upgrade information and available fixes.
Windows 11 Support Center. -
- HP Community
- Printers
- Printer Setup, Software & Drivers
- running Mac OS 12.0 - Easy Start won't find 3830 printer

Create an account on the HP Community to personalize your profile and ask a question
Your account also allows you to connect with HP support faster, access a personal dashboard to manage all of your devices in one place, view warranty information, case status and more.
Check some of the most frequent questions about Instant Ink: HP INSTANT INK, HP+ PLANS: INK AND TONER.
Check out our WINDOWS 11 Support Center info about: OPTIMIZATION, KNOWN ISSUES, FAQs AND MORE.

It has been a while since anyone has replied. Simply ask a new question if you would like to start the discussion again.
12-03-2021 01:29 PM
 HP Recommended
Product: Officejet 3830 All in One
Operating System: Other
My printer used to work fine. It's repeatedly disconnected and I'd have to reconnect it. Now I can't communicate through the Smart app. I can print over wi-fi through the HP Utility. I've tried to download the latest Easy Start software but during the installation process it doesn't find my printer over wi-fi. I really need to scan a doc but the HP Utility doesn't have that option. Any suggestions?
Solved! Go to Solution.
1 ACCEPTED SOLUTION
Accepted Solutions
12-07-2021 02:52 AM
HP Recommended
Were you able to install the app from the app store or HP site?
Meanwhile,
You may also add the AirPrint printer to the Mac printer queue
Add the Air Print printer to the Mac printer queue
Confirm you are using Air Print by adding the printer in System Preferences.
- Click the Apple menu, click System Preferences, and then click Print & Scan or Printers & Scanners.
- Check if your printer name displays in the Printers list, and then do one of the following steps.
- If your printer is listed, remove and re-add the printer to confirm it is set up for Air Print. Click the printer name, click the minus sign "-" to delete the printer, click the plus sign "+"click Add Printer or Scanner, click the printer name and then continue to the next step.
- If your printer is not listed, click the plus sign, click Add Printer or Scanner, click the name of your printer, and then continue to the next step.
- Confirm Air Print or Secure Air Print displays in the Use or Print Using menu, and then click Add.
- Open a document or photo, click File, and then click Print.
Scan images in Image Capture on Mac
After connecting a scanner to your Mac, use Image Capture to scan images.
-
Connect your scanner to your computer, then turn on your scanner.
-
In the Image Capture app
 on your Mac, select your scanner in the Devices or Shared list.
If you don’t see your scanner in the list, see Set up a scanner.
-
Scan your images.
If you have a scanner with an automatic document feeder or flatbed scanner, see Scan images or documents using a scanner.
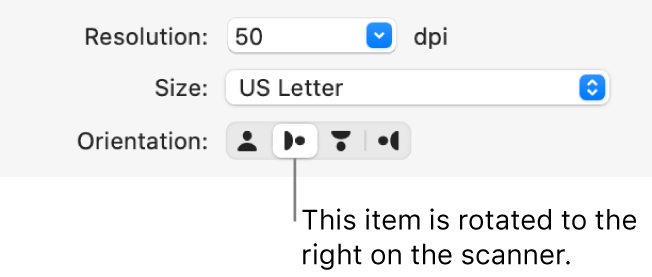
Tip: Some scanners indicate how an item is positioned on the scanner, so you can adjust it on the scanner before scanning. If you don’t see the Orientation buttons in the Scanner window, click Show Details.
Let me know how this goes!
5 REPLIES 5
12-06-2021 08:47 AM
HP Recommended
Hi @michael0102,
I'd like to help!
I understand you are unable to scan.
Try updating mac and printer firmware
To update the printer's firmware, refer - HP Printers - Updating or Upgrading Printer Firmware
To update Mac, try these steps - How to update the software on your Mac
Try installing HP Smart from the App Store and use the application to scan
Refer to -https://support.hp.com/us-en/document/ish_2073929-1413451-16
Scan with the HP Smart app (Windows, Mac)
Scan documents and photos from the printer, capture items with the computer camera, or use the scan tools with files saved on the computer.
-
Click the Scan tile on the HP Smart app home screen.
-
If a Get Started screen opens, click Get Started.
NOTE:The Get Started screen displays when you select Scanner, Import, or Camera for the first time.
-
Select an option from the top menu bar.
-
Scanner: Place the original on the printer scanner glass or into the automatic document feeder (ADF). Select scan job type, size, color, and resolution settings, and then click Scan in the lower right corner.
-
Import: Select photos saved on your computer to apply a boundary, and then use the settings to edit, print, and share.
-
Camera: Uses the computer camera or a webcam to capture, edit, and print or share a photo or document.
-
-
From the Scan window, change settings, such as source, presets (document or photo type), page size or scan area, output type, and resolution to match the scan job.
-
Select the Auto Enhancements icon
to toggle the enhancement features on or off.
-
Auto-Enhancements: Automatically brightens colors and sharpens image contrast.
-
Auto-Orientation: Automatically rotates images to their correct orientation.
-
-
Click Scan.
A preview of the scan displays.
-
If the Detect Edges window opens, adjust the boundaries by clicking and dragging the blue dots, and then click Apply.
-
Select from the following options and settings in the Preview window.
-
Add another page by clicking + Add.
-
Drag and drop the images to reorder multi-page scans.
-
Click the Menu
icon to edit, replace, or delete the scanned items.
-
Click the Rotate
icon to rotate the item.
-
-
In the Edit window, adjust or enhance the file by cropping, changing the color, rotating, or adding filters, text, and markup, and then click Done.
-
Select an option to save, print, share, or fax the scan file.
-
Print: Send the scan to the printer.
-
Save: The default save location for scanned documents is the Documents folder and the Pictures library for scanned photos. Save the scan in the default location or browse to a different folder.
-
Share: Send the scan in an email, share via social media accounts such as Twitter, Facebook, or Instagram, or save the scan in a cloud storage account, such as Box or OneDrive. You can also look for other apps in the Windows or Mac store.
-
Shortcuts: Create or use an existing shortcut for printing, emailing, or saving scanned files to cloud accounts.
-
Fax: Send the scan via fax.
-
-
In the Save or Share window, change the file name, file type, and compression settings, and then click Save.
-
After saving the scan, click OK, and then click the Back button to return to the Home screen.
Scan images in Image Capture on Mac
After connecting a scanner to your Mac, use Image Capture to scan images.
-
Connect your scanner to your computer, then turn on your scanner.
-
In the Image Capture app
on your Mac, select your scanner in the Devices or Shared list.If you don’t see your scanner in the list, see Set up a scanner.
-
Scan your images.
If you have a scanner with an automatic document feeder or flatbed scanner, see Scan images or documents using a scanner.
Hope this helps! Keep me posted.
And, Welcome to the HP Support Community.
Please click “Accept as Solution” if you feel my post solved your issue, it will help others find the solution.
Click the “Yes" on the bottom right to say “Thanks” for helping
12-06-2021 03:11 PM
HP Recommended
Hello @Jay_G24,
I followed the instructions in the link. My printer is connected to my Wi-Fi so I used the on-board menu and tools to check for updates on the printer. It was up to date. Then I checked my MacBook for software updates and it was up to date. Next I removed HP Smart and reinstalled it just in case there was a newer version on the web. After the installation, the app ran and I chose to install a new printer. the app found my printer and I guess installed it. Then the app closed. I reopened the app and it opens to a box that is completely blank!
Any other ideas?
Thanks,
Michael
12-07-2021 02:52 AM
HP Recommended
Were you able to install the app from the app store or HP site?
Meanwhile,
You may also add the AirPrint printer to the Mac printer queue
Add the Air Print printer to the Mac printer queue
Confirm you are using Air Print by adding the printer in System Preferences.
- Click the Apple menu, click System Preferences, and then click Print & Scan or Printers & Scanners.
- Check if your printer name displays in the Printers list, and then do one of the following steps.
- If your printer is listed, remove and re-add the printer to confirm it is set up for Air Print. Click the printer name, click the minus sign "-" to delete the printer, click the plus sign "+"click Add Printer or Scanner, click the printer name and then continue to the next step.
- If your printer is not listed, click the plus sign, click Add Printer or Scanner, click the name of your printer, and then continue to the next step.
- Confirm Air Print or Secure Air Print displays in the Use or Print Using menu, and then click Add.
- Open a document or photo, click File, and then click Print.
Scan images in Image Capture on Mac
After connecting a scanner to your Mac, use Image Capture to scan images.
-
Connect your scanner to your computer, then turn on your scanner.
-
In the Image Capture app
on your Mac, select your scanner in the Devices or Shared list.If you don’t see your scanner in the list, see Set up a scanner.
-
Scan your images.
If you have a scanner with an automatic document feeder or flatbed scanner, see Scan images or documents using a scanner.
Tip: Some scanners indicate how an item is positioned on the scanner, so you can adjust it on the scanner before scanning. If you don’t see the Orientation buttons in the Scanner window, click Show Details.
Let me know how this goes!
12-09-2021 05:09 AM
HP Recommended
You're welcome 🙂
I am glad the issue is resolved.
If you need further assistance feel free to reach out to us.
Have a great day ahead!
Please click “Accept as Solution” if you feel my post solved your issue, it will help others find the solution.
Click the “Yes" on the bottom right to say “Thanks” for helping!
Be alert for scammers posting fake support phone numbers and/or email addresses on the community.
If you think you have received a fake HP Support message, please report it to us by clicking on "Flag Post".
† The opinions expressed above are the personal opinions of the authors, not of HP. By using this site, you accept the Terms of Use and Rules of Participation.


Didn't find what you were looking for?
Ask the community
† The opinions expressed above are the personal opinions of the authors, not of HP. By using this site, you accept the <a href="https://www8.hp.com/us/en/terms-of-use.html" class="udrlinesmall">Terms of Use</a> and <a href="/t5/custom/page/page-id/hp.rulespage" class="udrlinesmall"> Rules of Participation</a>.