-
×InformationNeed Windows 11 help?Check documents on compatibility, FAQs, upgrade information and available fixes.
Windows 11 Support Center. -

-
×InformationNeed Windows 11 help?Check documents on compatibility, FAQs, upgrade information and available fixes.
Windows 11 Support Center. -
- HP Community
- Printers
- Scanning, Faxing, and Copying
- Printing issues

Create an account on the HP Community to personalize your profile and ask a question
12-11-2019 11:13 AM
Hello,
it might be a stupid question but after reinstalling my pc and printer i needed to realign the pages etc.
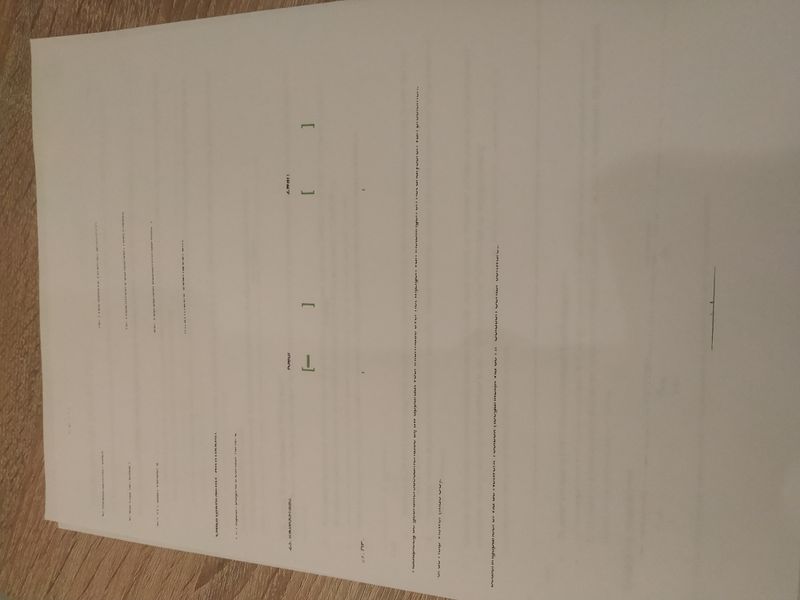
at first it gave an error that i needed to refill the inktcardridges, so i bought new ones and tried to align the pages again, but the problem is it is printing out like half pages with alignments so i cant do sh*t with that.. how do i solve this?
the printer is 1,5 years old..
thanks in advance
Solved! Go to Solution.
Accepted Solutions
12-13-2019 05:24 PM
Welcome to HP support community.
Manually clean the area around the ink nozzles
-
Gather the following materials:
-
A clean, lint-free cloth or a clean, dry cotton swab
-
Distilled or bottled water
CAUTION:
Do not use tap water because it might contain contaminants that can damage the printhead.
-
-
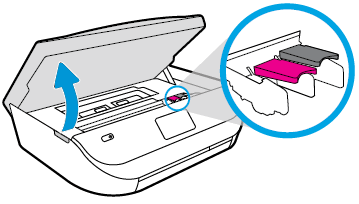
Gently grasp the handles on either side of the printer, and then raise the ink cartridge access door until it locks into place.
The carriage moves to the center of the printer.

-
Wait until the printer is idle and silent before you continue.
-
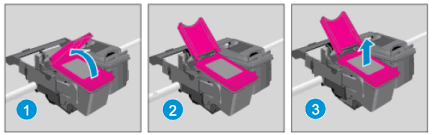
Lift up the lid on the ink cartridge slot, and then pull up on the ink cartridge to remove it from the slot.

-
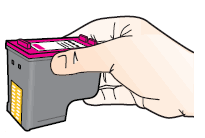
Hold the ink cartridge by its sides.

-
Lightly dampen a clean, lint-free cloth or swab with bottled or distilled water.
-
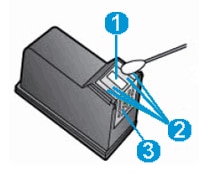
Clean the face and edges around the ink nozzle with the cloth or swab.
CAUTION:
Do not clean the ink nozzle plate.

-
Nozzle plate - Do not clean
-
Area surrounding ink nozzle - Do clean
-
Ink cartridge contacts - Do not clean
-
-
Wait for the cleaned area to dry before you continue (approximately 10 minutes).
-
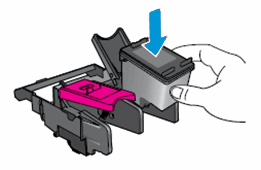
With the nozzles toward the printer, insert the ink cartridge into its slot until it snaps into place.
NOTE:
Install the color ink cartridge on the left and the black ink cartridge on the right.

-
Close the lid on the ink cartridge slot to secure the ink cartridge into place.
-
Repeat these steps to clean around the nozzles on the other ink cartridge.
-
Close the ink cartridge access door.
Align the printer
-
Load the input tray with plain white paper.
-
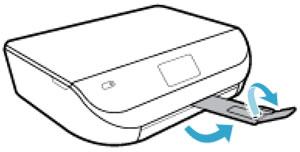
Pull out the output tray, and then lift the output tray extender.

-
On the printer control panel, swipe left on the display, and then touch Setup
. -
Touch Tools.
-
Swipe up on the display, and then touch Align Printer.
An alignment page prints.
-
Wait for the alignment page to fully eject from the printer.
-
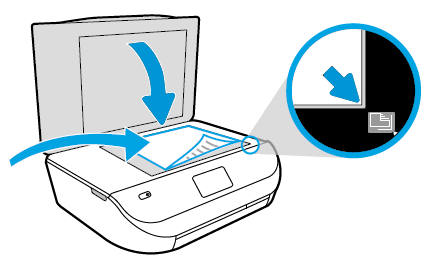
After the alignment page prints, lift the scanner lid, place the alignment page with the print side down on the scanner glass. Position it according to the engraved guides around the glass.

-
Close the scanner lid, and then touch OK.
The printer aligns the ink cartridges.
-
Try to print again.
You can refer this HP document for more assistance:- Click here
I hope that helps.
To thank me for my efforts to help you, please mark my post as an accepted solution so that it benefits several others.
Cheers.
Sandytechy20
I am an HP Employee
12-13-2019 05:24 PM
Welcome to HP support community.
Manually clean the area around the ink nozzles
-
Gather the following materials:
-
A clean, lint-free cloth or a clean, dry cotton swab
-
Distilled or bottled water
CAUTION:
Do not use tap water because it might contain contaminants that can damage the printhead.
-
-
Gently grasp the handles on either side of the printer, and then raise the ink cartridge access door until it locks into place.
The carriage moves to the center of the printer.

-
Wait until the printer is idle and silent before you continue.
-
Lift up the lid on the ink cartridge slot, and then pull up on the ink cartridge to remove it from the slot.

-
Hold the ink cartridge by its sides.

-
Lightly dampen a clean, lint-free cloth or swab with bottled or distilled water.
-
Clean the face and edges around the ink nozzle with the cloth or swab.
CAUTION:
Do not clean the ink nozzle plate.

-
Nozzle plate - Do not clean
-
Area surrounding ink nozzle - Do clean
-
Ink cartridge contacts - Do not clean
-
-
Wait for the cleaned area to dry before you continue (approximately 10 minutes).
-
With the nozzles toward the printer, insert the ink cartridge into its slot until it snaps into place.
NOTE:
Install the color ink cartridge on the left and the black ink cartridge on the right.

-
Close the lid on the ink cartridge slot to secure the ink cartridge into place.
-
Repeat these steps to clean around the nozzles on the other ink cartridge.
-
Close the ink cartridge access door.
Align the printer
-
Load the input tray with plain white paper.
-
Pull out the output tray, and then lift the output tray extender.

-
On the printer control panel, swipe left on the display, and then touch Setup
. -
Touch Tools.
-
Swipe up on the display, and then touch Align Printer.
An alignment page prints.
-
Wait for the alignment page to fully eject from the printer.
-
After the alignment page prints, lift the scanner lid, place the alignment page with the print side down on the scanner glass. Position it according to the engraved guides around the glass.

-
Close the scanner lid, and then touch OK.
The printer aligns the ink cartridges.
-
Try to print again.
You can refer this HP document for more assistance:- Click here
I hope that helps.
To thank me for my efforts to help you, please mark my post as an accepted solution so that it benefits several others.
Cheers.
Sandytechy20
I am an HP Employee