-
1
×InformationNeed Windows 11 help?Check documents on compatibility, FAQs, upgrade information and available fixes.
Windows 11 Support Center. -
-
1
×InformationNeed Windows 11 help?Check documents on compatibility, FAQs, upgrade information and available fixes.
Windows 11 Support Center. -
- HP Community
- Printers
- Scanning, Faxing, and Copying
- Scanner Keeps Jamming

Create an account on the HP Community to personalize your profile and ask a question
03-21-2018 09:20 AM
Recently every time I try to scan any document it jams as it starts. It get crumpled up in the plastic film right as it is going through the curve on the scanner drum. Any way to clean or stop this from happening?
03-22-2018 09:47 AM
Hi @SilverFox116,
Welcome to HP Forums,
This is a great place to get support, find answers and tips,
Thank you for posting your query, I'll be more than glad to help you out 🙂
Follow the steps given below:
Solution one: Clear the paper jam
Follow these steps in the order presented to clear a paper jam from the ADF.
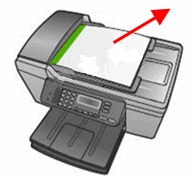
Step one: Remove any loose paper
Remove any loose paper from the ADF input and output trays.
CAUTION:
Do not remove jammed paper at this stage.
Figure : Remove any loose paper
 Step two: Check the rollers in the automatic document feeder (ADF)
-
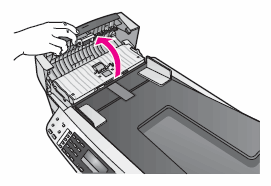
Lift the top cover of the ADF.
Figure : Lift the ADF cover
-
Gently pull any jammed paper out of the rollers.
CAUTION:
If the paper tears while removing it from the rollers, check the rollers and wheels for torn pieces of paper that might remain inside the product. If any torn pieces of paper remain inside the product, more paper jams are likely to occur.
-
Close the ADF cover.
-
Press OK to continue the current task and clear the 'Original Jam' error message.
-
If the product does not continue the task, try the task again.
-
If these steps resolved the issue, you do not need to continue troubleshooting.
-
If the issue persists, continue to the next solution.
Solution two: Check the ADF mechanism
Follow these steps in the order presented to check the ADF mechanism for a paper jam.
-
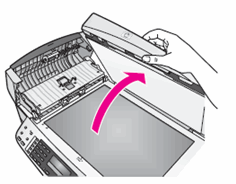
Lift the scanner lid.
Figure : Lift the scanner lid
-
Lift the ADF mechanism.
Figure : Lift the ADF mechanism

-
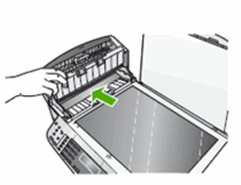
Check for jammed paper in the ADF mechanism. Check both the input and output sides of the ADF mechanism for jammed or torn paper.
Figure : Check the ADF mechanism
-
Gently pull the paper out of the ADF mechanism.
CAUTION:
If the paper tears while removing it from the mechanism, check the mechanism for torn pieces of paper that might remain inside the product. If any torn pieces of paper remain inside the product, more paper jams are likely to occur.
-
Gently lower the ADF mechanism.
-
Close the ADF cover, and then close the scanner lid.
-
Reload the original document print side up in the input tray.
Figure : Reload the document

-
Press OK to continue the current task.
-
If the product does not continue the task, try the task again.
-
If these steps resolved the issue, you do not need to continue troubleshooting.
-
If the issue persists, continue to the next solution.
Solution three: Reset the product
Follow these steps to reset the product.
Step one: Perform a power reset
-
Press the Power button (
 ) to turn on the product.
 -
With the product turned on, disconnect the power cord from the rear of the product.
-
Unplug the power cord from the wall outlet.
-
Wait at least 15 seconds.
-
Plug the power cord back into the wall outlet.
-
Reconnect the power cord to the rear of the product.
-
If the product does not turn on by itself, press the Power button (
 ) to turn it on.
Step two: Make a copy using the ADF
-
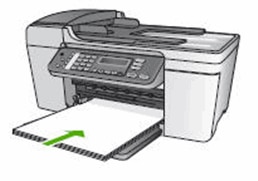
Load unused, plain white paper in the input tray.
Figure : Load the input tray
-
Load one sheet from the original document print side up in the ADF input tray.
Figure : Load one sheet from the original

-
Press Start Copy Black or Start Copy Color. The product prints a copy of the page.
Let me know how that pans out.
I hope you have a good day ahead,
And Feel free to ask any other queries as well,
Considering, this forum has some of the best people in the world available and ready to help. 😉
Barachiel
I am an HP Employee
