-
×InformationNeed Windows 11 help?Check documents on compatibility, FAQs, upgrade information and available fixes.
Windows 11 Support Center. -
-
×InformationNeed Windows 11 help?Check documents on compatibility, FAQs, upgrade information and available fixes.
Windows 11 Support Center. -
- HP Community
- Printers
- Mobile Printing & Cloud Printing
- Black ink will not print from Photosmart 5520

Create an account on the HP Community to personalize your profile and ask a question
03-25-2019 03:22 PM - edited 03-25-2019 05:57 PM
I have a HP Photosmart 5520 printer that will not print black ink. I uninstalled and reinsalled the drives, tryed two different HP ink cartridges,pulled the printer head out and cleaned with hot distilled water, blew out with air. HP print doctor scan says all is ok. Still will not print any black. Only other three colors. What's left to try?
03-26-2019 11:00 AM
Hi! @Mr60703,
Does the issue persist when you make a copy from your printer?
Have you tried printing from a different application?
Have you tried printing using a different ink cartridge?
Replace low, empty or faulty ink cartridges on your printer.
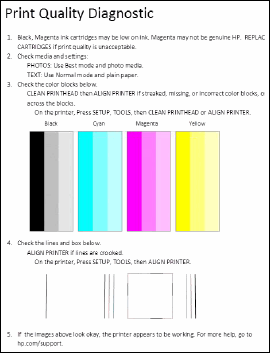
Print a Print Quality Diagnostic report
Print a Print Quality Diagnostic report, and then evaluate the results.
-
Load plain, white paper in the tray.
-
From the control panel home screen, touch the Settings icon
 .
. -
Touch Tools, and then touch Print Quality Report.
The printer prints the Print Quality Diagnostic report.
Figure : Example of a Print Quality Diagnostic report with no defects

Clean the printhead
If you found defects on the Print Quality Diagnostic report, run an automated tool to clean the printhead.
-
Make sure that plain white U.S. letter or A4 size paper is loaded in the tray.
-
From the control panel home screen, touch the Settings icon (
 ), and then touch Tools.
 -
Touch the Down Arrow (
 ), and then touch Clean Printhead. The product cleans the printheads, and then prints a test page.
 -
Review the print quality on the test page.
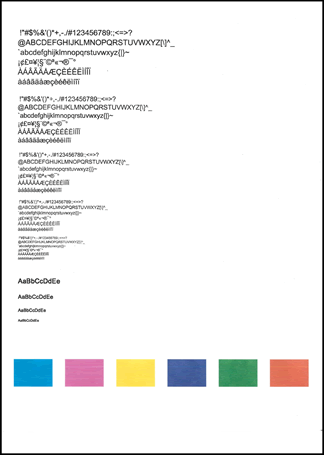
Figure : Example of the printhead cleaning test page

-
If the print quality on the test page is satisfactory, return to the current print job.
-
If the print quality on the test page is unsatisfactory, perform a secondary cleaning of the printhead.
If the printhead is badly clogged, it might require another cleaning cycle. If so, wait 30 minutes after the last cleaning stage to start the first stage of the cleaning process over again.
-
-
If these steps resolved the issue, there is no need to continue troubleshooting. The following precautions might prevent the issue in the future.
-
Avoid leaving unprotected ink cartridges out of the printer for an extended period of time.
-
Always use the Power button to turn off the printer. This protects the ink cartridges from exposure to air.
-
Refer this article to further troubleshoot print quality issues with the printer. Click Here
Let me know if this helps!
Have a beautiful day ahead! 🙂
Please click “Accept as Solution” if you feel my post solved your issue, it will help others find the solution.
Click the “Kudos, Thumbs Up" on the bottom right to say “Thanks” for helping!
A4Apollo
I am an HP Employee
