-
×InformationNeed Windows 11 help?Check documents on compatibility, FAQs, upgrade information and available fixes.
Windows 11 Support Center. -
-
×InformationNeed Windows 11 help?Check documents on compatibility, FAQs, upgrade information and available fixes.
Windows 11 Support Center. -
- HP Community
- Printers
- Printer Ink Cartridges & Print Quality
- Cyan cartridge not printing

Create an account on the HP Community to personalize your profile and ask a question
04-10-2023 01:55 PM
Cyan color not printing. I've run through the cleaning process several times and replaced the cartridge with a new one. I've also run through the steps provided in a previous thread where you turn the printer off, remove the power cord, remove the cartridges, let it sit for several minutes and then press the on button for 30 seconds before repowering and putting the cartridges back in. I've had no success.
04-13-2023 01:06 PM
Welcome to the HP support community.
,
I understand that you are facing issue with HP OfficeJet Pro 8025 All-In-One Printer. Don't worry, together we will try to sort this out.
Let's start by cleaning the printheads:
Use an automated tool to clean the printheads:
NOTE: Never turn off the printer when ink cartridges are missing. Make sure you replace any missing ink cartridges as soon as possible to avoid print quality issues and possible extra ink usage or damage to the ink system. To avoid issues that require cleaning the printhead, always turn the printer off with the Power button on the printer itself.
Load plain white paper into the tray.
Press the Power button to turn on the printer, if it is not already on.
On the control panel, touch the right arrow  to display the second navigation screen.
Touch Setup  , and then touch Tools.
Touch Clean Printheads.
The printer cleans the printheads.
Wait while the printer completes the printhead cleaning process, and then touch OK. You might have to clean the printheads more than once for the best print quality.
Evaluate the ink supply tubing
Follow these steps to evaluate the ink supply tubing.
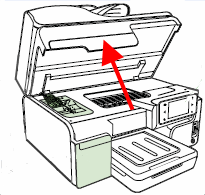
Open the carriage access door, and then touch Change Printhead on the control panel. The carriage moves to the left side of the printer.

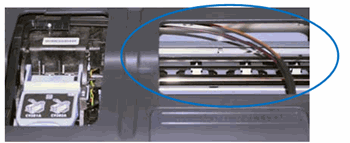
Look in the center of the printer for the four ink tubes that connect to the printhead, and then evaluate the ink tubes. The ink tubes should be bundled neatly, and they should not appear kinked or bent. Do not touch, pull, or reposition the ink tubes. Just visually inspect them for kinks.
Figure: Ink tubes, correctly bundled and not kinked

If the ink tubes are bundled correctly and are not kinked, continue to the next step.
If the ink tubes are bundled incorrectly but do not appear to be kinked, the printer needs to be serviced.
NOTE: Incorrect bundling of the ink tubes does not directly cause print quality problems, but it is an issue that must be corrected. When the printer has been serviced, continue troubleshooting with the next step in this document.
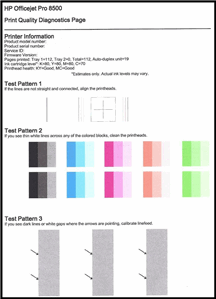
Print a Print Quality Diagnostics Page:
Load plain white paper into the tray.
On the control panel, touch the right arrow  to display the second navigation screen.
Touch Setup  , touch the down arrow
  , and then touch Reports.
Touch Print Quality Report.
The Print Quality Diagnostics Page prints.

Please perform these steps and Feel free to reply to your public post for any further assistance.
if these steps don't resolve your issue then Mostly the printhead may have gone bad.
Thank you for being a Valuable Member of our HP Family.
Please click “Accepted Solution” if you feel my post solved your issue, it will help others find the solution.
-Regards.
Raj2111
I am an HP Employee
