-
×InformationNeed Windows 11 help?Check documents on compatibility, FAQs, upgrade information and available fixes.
Windows 11 Support Center. -
-
×InformationNeed Windows 11 help?Check documents on compatibility, FAQs, upgrade information and available fixes.
Windows 11 Support Center. -
- HP Community
- Printers
- Printer Ink Cartridges & Print Quality
- HP Officejet 6950 print quality issues

Create an account on the HP Community to personalize your profile and ask a question
06-10-2022 11:13 AM
Every time I load insert new cartridges (from the plan so genuine HP), I have to run clean print heads levels 1,2 and 3 seven times over. This can't be right. I intermittently have to do this also between new cartridges. The printer is 4 years old now - should this be happening?
07-27-2022 11:09 AM
Not sure if anyone from HP is on this forum but an understanding of the life expectancy of an HP Officejet 6950 would be helpful. This issue is making the printer unusable and I don't want to replace it prematurely or with another that is likely to do the same thin?
07-29-2022 11:59 AM
@Pedro991
Welcome to the HP support community.
I understand that you are getting print quality issues, I am glad to assist you.
Make sure the ink cartridges are properly vented and seated correctly
- Turn on the printer, if it is not already turned on.
- Open the ink cartridge access door.
- The carriage moves to the center of the printer.
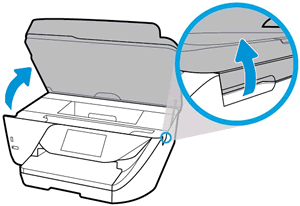
- Wait until the carriage stops moving before you continue.
- Press the tab inward on the front of the old ink cartridge to release it, and then pull up on the ink cartridge to remove it from the slot.
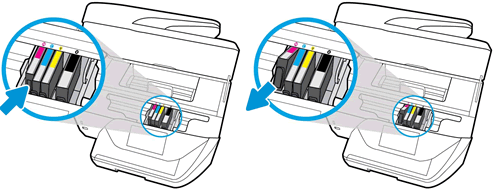
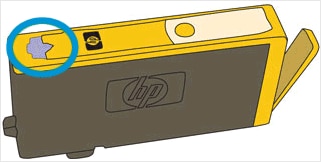
- Examine the vent area above the HP logo on the top of the ink cartridge.
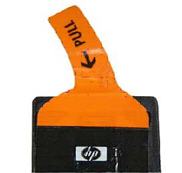
- If the ink cartridge still has the orange pull-tab attached, pull to remove it.
- If the vent is clogged, use a straight pin to gently remove excess adhesive from the vent.

- Clogged vent
- With a straight pin, gently remove excess adhesive from the vent
- Unclogged vent
- Turn the ink cartridge so that the ink cartridge contacts face downward, and then match the label color with the color dot on the carriage.
- Slide the ink cartridge into its slot, and then gently press the ink cartridge down until it snaps into place.
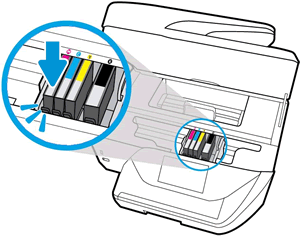
- Repeat these steps to inspect the vents on each of the ink cartridges.
- Make sure each ink cartridge is firmly installed in its slot. Run your finger along the top of the ink cartridges to feel for any that are protruding, and if any are, press down firmly until each ink cartridge snaps into place.
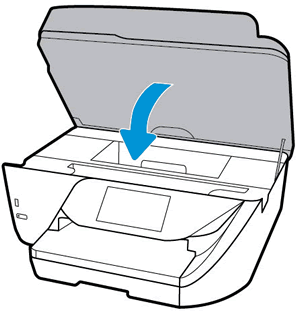
- Close the ink cartridge access door.
Refer to this HP document for further assistance:- Click here
Keep me posted.
If this helps, please mark the public post as an accepted solution so that it benefits several others.
Cheers.
Sandytechy20
I am an HP Employee
