• ×
    Information
    Need Windows 11 help?
    Check documents on compatibility, FAQs, upgrade information and available fixes.
    Windows 11 Support Center.
  • post a message
  • ×
    Information
    Need Windows 11 help?
    Check documents on compatibility, FAQs, upgrade information and available fixes.
    Windows 11 Support Center.
  • post a message
Guidelines
Join the HP Community Solve‑a‑thon | Help Others & Share Your Solutions | Live on Zoom | 2:30 PM to 2:30 AM IST | Every Wednesday Click here to know more
Check some of the most frequent questions about Instant Ink: HP INSTANT INK, HP+ PLANS: INK AND TONER.


Check out our Black or Color Ink Not Printing, Other Print Quality Issues info about: Print quality and Cartridge Issues.
HP Recommended
HP Officejet Pro 6968
Microsoft Windows 10 (64-bit)

These lines keep showing up every time I try to print. The test pages when I do the Clean Printhead option all turn out completely normal, I've tried the Clean Smear option as well with no luck. Cartridges look fine though I haven't tried to replace them yet (they still show as nearly full). It seems the streaks usually show up magenta when printing a vibrant deep blue but you can see streaks on the red parts as well. Please help!
Edit: I've now replaced magenta and cyan ink cartridges with no luck. Don't see how replacing yellow or black will do anything but I don't know what else to do lol
PXL_20210904_163301274.jpgPXL_20210904_163305501.jpg

1 REPLY 1
HP Recommended

@mchvoss


Welcome to the HP support community.


I am glad to assist you with the print quality issues on your printer.


Make sure the ink cartridges are properly vented and seated correctly

(Check the vents on the top of the ink cartridges. If they are clogged or obstructed, the ink cartridges might not work properly, which can affect print quality)

  1. Turn on the printer, if it is not already turned on.

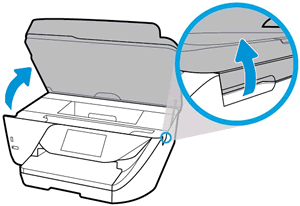
  2. Open the ink cartridge access door.

    The carriage moves to the center of the printer.

    Open the cartridge access door

  3. Wait until the carriage stops moving before you continue.

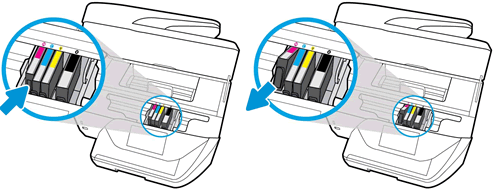
  4. Press the tab inward on the front of the old ink cartridge to release it, and then pull up on the ink cartridge to remove it from the slot.

    Pushing the ink cartridge inward and then pulling up to remove it

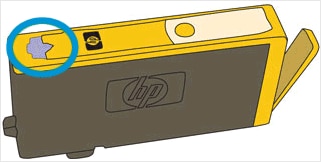
  5. Examine the vent area above the HP logo on the top of the ink cartridge.

    Image: Examine the vent area on the top of the cartridge

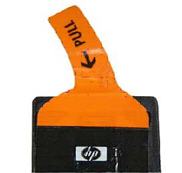
  6. If the ink cartridge still has the orange pull-tab attached, pull to remove it.

    Image: Remove the orange pull-tab

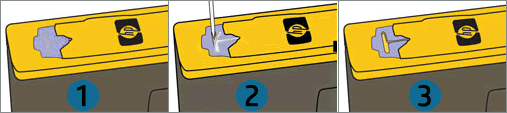
  7. If the vent is clogged, use a straight pin to gently remove excess adhesive from the vent.

    1.  

      Clogged vent
    2. With a straight pin, gently remove excess adhesive from the vent

    3. Unclogged vent

  8. Turn the ink cartridge so that the ink cartridge contacts face downward, and then match the label color with the color dot on the carriage.

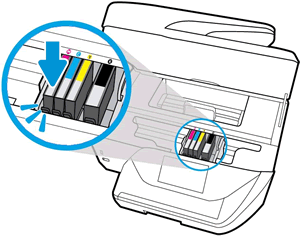
  9. Slide the ink cartridge into its slot, and then gently press the ink cartridge down until it snaps into place.

    Reinserting the ink cartridge

  10. Repeat these steps to inspect the vents on each of the ink cartridges.

  11. Make sure each ink cartridge is firmly installed in its slot. Run your finger along the top of the ink cartridges to feel for any that are protruding, and if any are, press down firmly until each ink cartridge snaps into place.

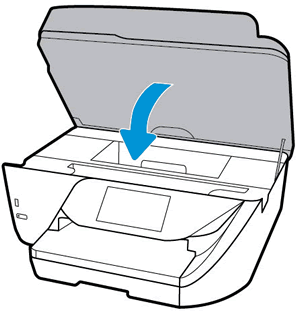
  12. Close the ink cartridge access door.

    Closing the ink cartridge access door

Try step 1 and step 4 in this HP document for more assistance:- Click here


Let me know how it goes.

To thank me for my efforts to help you, please mark my post as an accepted solution so that it benefits several others.

Cheers.

Sandytechy20
I am an HP Employee

† The opinions expressed above are the personal opinions of the authors, not of HP. By using this site, you accept the <a href="https://www8.hp.com/us/en/terms-of-use.html" class="udrlinesmall">Terms of Use</a> and <a href="/t5/custom/page/page-id/hp.rulespage" class="udrlinesmall"> Rules of Participation</a>.