-
×InformationNeed Windows 11 help?Check documents on compatibility, FAQs, upgrade information and available fixes.
Windows 11 Support Center. -
-
×InformationNeed Windows 11 help?Check documents on compatibility, FAQs, upgrade information and available fixes.
Windows 11 Support Center. -
- HP Community
- Printers
- Printer Ink Cartridges & Print Quality
- hp laserjet pro mfp m281cdw prints too faintly

Create an account on the HP Community to personalize your profile and ask a question
10-18-2021 02:12 PM
My HP Laserjet Pro MFP M281cdw printer just began to print very faintly, then it got a black streak down the side. I was able to clean that using the Setup Menu, but it is still printing so faintly, I can barely read the printout. It shows that I still have plenty of toner. I haven't made any changes to the printer or to my computer for it to do this. I have bolded everything I can find to bold but it doesn't make any difference. I tilted each of the toner cartridges (black and all colors) from side to side and replaced them but it had no effect. How can I make it print darker? This all begas e
11-13-2021 12:19 AM
Welcome to the HP support community.
I understand that you are getting print quality issues, I am glad to assist you.
Print a cleaning page
The printing mechanism and printing path inside the printer might need to be cleaned to resolve issues like repeating dots, fuzzy print, or smeared toner.
-
From the Home screen on the printer control panel, swipe left, and then touch Setup.
-
Touch Service, and then touch Cleaning Page.
-
Load plain, white paper when you are prompted.
-
Touch OK to begin the cleaning process.
-
Try to print again to see if the issue is resolved,
Inspect the toner cartridges
Examine the toner cartridge imaging drums and memory chips for damage.
-
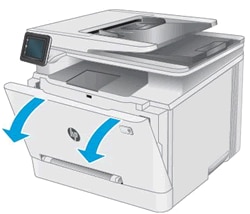
Open the front door.
Figure : Opening the front door
-
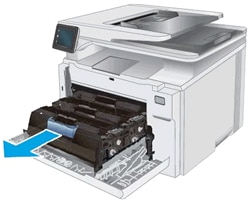
Grasp the blue handle on the toner cartridge drawer, and then pull out the drawer.
Figure : Pulling out the toner cartridge drawer
-
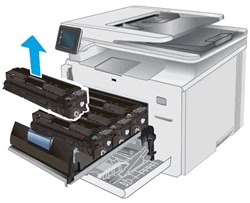
Grasp the handle on the toner cartridge, and then pull the toner cartridge straight up to remove it.
Figure : Removing the toner cartridge
-
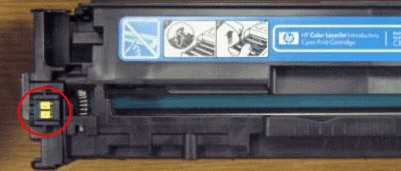
Examine the memory chip for damage.
Figure : Location of the memory chip
-
If the memory chip is damaged, refer to the previous steps in this document to replace the toner cartridge.
-
If the memory chip is not damaged, continue with these steps.
-
-
Examine the surface of the imaging drum.
CAUTION:
Do not touch the imaging drum. Fingerprints on the imaging drum can cause print quality problems.
Figure : Location of the imaging drum

-
If you see any scratches, fingerprints, or other damage on the imaging drum, refer to the previous steps in this document to replace the toner cartridge.
-
If the imaging drum is not damaged, continue with these steps.
-
-
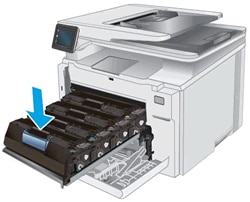
Insert the toner cartridge into the drawer. Make sure that the color chip on the cartridge matches the color chip on the drawer.
Figure : Inserting the toner cartridge into the printer
-
Repeat these steps for the other toner cartridges.
-
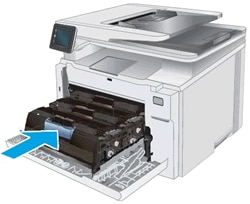
Push the toner cartridge drawer into the printer.
Figure : Pushing the toner cartridge drawer into the printer
-
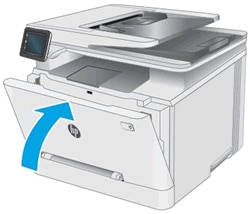
Close the front door.
Figure : Closing the toner cartridge drawer
Here is the HP document for your future reference:- Click here
Keep me posted.
To thank me for my efforts to help you, please mark my post as an accepted solution so that it benefits several others.
Cheers.
Sandytechy20
I am an HP Employee
