-
×InformationNeed Windows 11 help?Check documents on compatibility, FAQs, upgrade information and available fixes.
Windows 11 Support Center. -
-
×InformationNeed Windows 11 help?Check documents on compatibility, FAQs, upgrade information and available fixes.
Windows 11 Support Center. -

Create an account on the HP Community to personalize your profile and ask a question
01-13-2019 02:04 PM
Welcome to the HP Forums 🙂 I would like to take a moment and thank you for using this forum, it is a great place to find answers.
Let's try to reset the Printer here as it helps in removing any stored static electricity from the Printer which might be causing these issues.
- Turn the printer on, if it is not already on.
- Wait until the printer is idle and silent before you continue.
- With the printer turned on, disconnect the power cord from the rear of the printer.
- Unplug the power cord from the wall outlet.
- Wait at least 60 seconds.
- Plug the power cord back into the wall outlet.
- NOTE: HP recommends connecting the printer power cord directly to the wall outlet.
- Reconnect the power cord to the rear of the printer.
- Turn on the printer, if it does not automatically turn on.
- Wait until the printer is idle and silent before you proceed.
Unseat the printhead from the carriage, and then reseat the printhead.
NOTE:You do not need to remove the printhead from the carriage.
-
Open the ink cartridge access door.
-
Unplug the power cord from the rear of the printer. Unplugging the printer prevents the carriage from moving.
WARNING:
You must disconnect the power cord before reaching inside the printer to avoid risk of injuries or electric shock.
-
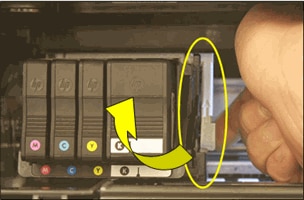
Lift the carriage latch.
Figure : Lift the carriage latch

-
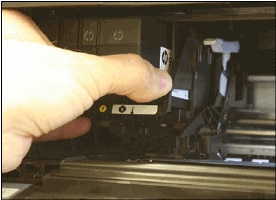
Grasp the sides of the printhead, and then slightly lift the printhead without fully removing it from the carriage.
Figure : Slightly lift the printhead

Reseat the printhead, and then lower the carriage latch
Reseat the printhead to make sure the printhead and carriage contacts are positioned correctly.
-
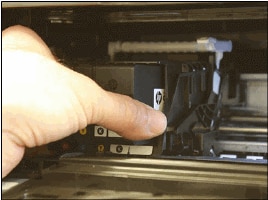
Reinsert the printhead into the carriage to reseat it. As you guide the printhead into the carriage, it settles into the carriage as it seats.
Figure : Reseat the printhead

-
Gently rock the printhead to the left and right to make sure the printhead fully seats in the carriage.
-
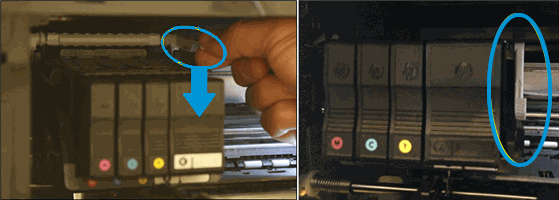
Lower the carriage latch.
Figure : Lower the carriage latch

-
Make sure the carriage latch is down.
Figure : Carriage latch positions
-
Carriage latch is up
-
Carriage latch is down
-
-
Close the ink cartridge access door.
-
Reconnect the power cord to the rear of the printer.
-
If the printer does not turn on by itself, press the Power button to turn it on.
-
Wait until the warm-up period finishes and your printer is idle and silent before you proceed.
Sometimes error messages persist after inserting the printhead. To clear any error messages, repeat the previous steps to reseat the printhead up to three times.
If the issue persists, please perform the remaining steps from this document: https://support.hp.com/in-en/product/hp-officejet-pro-8710-all-in-one-printer-series/7902014/documen...
Let me know if this helps.
If the information I've provided was helpful, give us some reinforcement by clicking the Accepted Solution and Kudos buttons, that'll help us and others see that we've got the answers!
Thanks!
Have a great day!
I am an HP Employee
