-
×InformationNeed Windows 11 help?Check documents on compatibility, FAQs, upgrade information and available fixes.
Windows 11 Support Center. -
-
×InformationNeed Windows 11 help?Check documents on compatibility, FAQs, upgrade information and available fixes.
Windows 11 Support Center. -
- HP Community
- Printers
- Printing Errors or Lights & Stuck Print Jobs
- Blurry print for black lines on 8610

Create an account on the HP Community to personalize your profile and ask a question
07-04-2018 01:13 PM
I get blurry black letters on the printout from my 8610. The print on some lines is better than others, but none of the black lines are crisp. Colors on the test page are clear and crisp. Blurry is across the full page width. Degree of blur is not consistent.
I have replaced cartridges, cleaned printheads, aligned printheads, calibrated line feeds. No improvement.
Any suggestions?
07-05-2018 03:51 PM
Thank you for joining HP Forums.
This is a great place to get support, find answers to your technical queries.
I understand that you are facing a print quality issue, need not worry I'll be glad to assist you.
To provide you with an accurate solution, I'll need a few more details:
Are you using genuine Hp ink cartridge?
How long are you facing this issue?
Is copy working fine?
However, I suggest you do a Hard Reset
(1) Turn the printer on, if it is not already on.
(2) Wait until the printer is idle and silent before you continue.
(3) With the printer turned on, disconnect the power cord from the rear of the printer.
(4) Unplug the power cord from the wall outlet.
(5) Wait at least 60 seconds.
(6) Plug the power cord back into the wall outlet.NOTE: HP recommends connecting the printer power cord directly to the wall outlet.
(7) Reconnect the power cord to the rear of the printer.
(8) Turn on the printer, if it does not automatically turn on.
The printer might go through a warm-up period. The printer lights might flash, and the carriage might move.
Wait until the warm-up period finishes and your printer is idle and silent before you proceed.
Step 1: Check the estimated ink levels
Check the estimated ink levels through the control panel.
On the printer control panel, touch the Ink Level Indicator icon  .
.
The control panel displays estimated ink levels.
Figure : Example of the ink level display with full cartridges

note:
Ink level warnings and indicators provide estimates for planning purposes only. When an indicator shows low ink levels, consider having a replacement ink cartridge available to avoid possible printing delays. You do not need to replace ink cartridges until you are prompted to.
-
If none of the ink cartridges are low on ink, you do not need to replace them yet. Continue to the next solution.
-
If any of the ink cartridges are low on ink, continue to the next step to replace them.
Step 2: Replace any depleted cartridges
Replace any depleted cartridges, and then try to print again.
-
Turn on the printer.
-
Place your fingers into the slot on the left side of the printer, and then pull to open the cartridge access door.
The carriage moves to the left side of the printer.
Figure : Open the cartridge access door
-
Slot for opening the cartridge access door
-
-
Wait until the carriage is idle and silent.
-
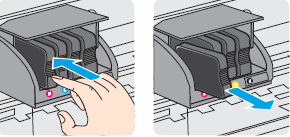
Push in on the front of the cartridge to release it, and then pull it toward you to remove it from its slot.
Figure : Remove the cartridge from its slot

-
Remove the new cartridge from its package.
-
Hold the new cartridge so that the cartridge contacts face the printer.
-
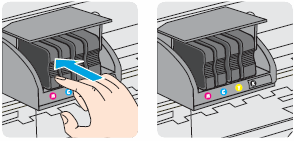
Slide the new ink cartridge into its slot, and then gently push it forward until it snaps into place. Make sure the letter on the ink cartridge matches the letter on the slot.
caution:
Do not lift the latch handle on the carriage to insert ink cartridges. Doing so could cause the printhead or ink cartridges to be incorrectly seated, which could damage the print mechanism and cause printing problems.
Figure : Inserting the cartridge into its slot

-
Repeat these steps to install any other new cartridges.
-
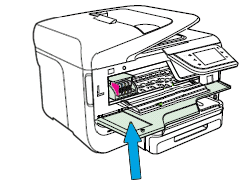
Close the cartridge access door.
Figure : Close the cartridge access door

Align the printhead
Use an automated tool to align the printhead.
-
Load plain white paper into the tray.
-
On the printer control panel, swipe the display to scroll to Setup, and then touch the Setup icon (
 ). The Setup menu displays.
 -
Swipe the display to scroll to Tools, and then touch Tools.
-
Touch Align Printhead.
-
After the printer prints the alignment page, touch OK, and then recycle or discard the alignment page.
Calibrate the linefeed
Use an automated tool to calibrate the linefeed.
-
On the printer control panel, swipe the display to scroll to Setup, and then touch the Setup icon (
 ). The Setup menu displays.
 -
Swipe the display to scroll to Tools, and then touch Tools.
-
Touch Calibrate Linefeed.
-
After the printer prints a test page, touch OK, and then recycle or discard the test page.
-
Print another Print Quality Diagnostic Page to see if the issue is resolved.
For more troubleshooting steps use this link: https://support.hp.com/us-en/product/hp-officejet-pro-8610-e-all-in-one-printer-series/5367603/docum...
Keep me posted, how it goes! However, I'll try and follow up in next 24 to 48 hours to doublecheck on the issue.
If the information I've provided was helpful, give us some reinforcement by clicking the Accepted Solution and Kudos buttons, that'll help us and others see that we've got the answers!
Have a great day!
Cheers
Raj1788
I am an HP Employee
07-06-2018 12:18 PM
It looks like you were interacting with @Raj1788, but he is out for the day & I'll be glad to help you out, I'm the Riddle_Decipher & I'm at your service (Like a Genie without magic powers) 😉
I reviewed your concern and the entire conversation, did some research and I recommend you check if the copier works fine? and also run a test print to check if that works fine? if it does work on the copier either, it's a hardware malfunction, however, if it works: follow the guidelines provided by the previous tech: Click here to view (again)
If the issue persists, I suggest you check this:
I'm sending out a Private message with the information you need to get this sorted,
Please check your Private message icon on the upper right corner of your HP Forums profile
Next, to your profile Name, you should see a little blue envelope, please click on it
(The reason we are utilizing the private message now, is because the instructions are critical).
Keep me posted,
If the information I've provided was helpful,
Give us some reinforcement by clicking the solution and kudos buttons,
that'll help us and others see that we've got the answers!
Good Luck.
Riddle_Decipher
I am an HP Employee
Learning is a journey, not a destination.
Let's keep asking questions and growing together.

