-
×InformationNeed Windows 11 help?Check documents on compatibility, FAQs, upgrade information and available fixes.
Windows 11 Support Center. -
-
×InformationNeed Windows 11 help?Check documents on compatibility, FAQs, upgrade information and available fixes.
Windows 11 Support Center. -
- HP Community
- Printers
- Printing Errors or Lights & Stuck Print Jobs
- Envy 4500 Al in One not feeding paper

Create an account on the HP Community to personalize your profile and ask a question
11-13-2018 01:16 PM
I have an Envy 4500 All in One Inkjet Printer that has recently developed a problem picking up and feed the paper. I am not having trouble with standard 22 lb paper, but when I need to print a UPS shipping label, it feeds in a few inches and stops. If I reach in and try to assist it by pushing on the form it starts to feed but stops again when I stop. I also discovered it will not feed card stock at all.
I have tried to clean all the rollers acording to HP directions, but no improvement.
does anyone have any ideas as to how I can solve this problem?
11-15-2018 01:41 PM
Hey there! @GED8310, Welcome to HP forums.
I understand you have paper feed issues with your printer.
Don't worry I'll try to help you out.
Did you make any changes to your printer?
Have you tried checking on a different brand paper?
Excellent description and a great diagnosis done. It is greatly appreciated.
Try the steps recommended below.
Adjust the paper settings in the print driver
The product might not pick up paper if the paper size and type in the paper tray do not match the size and type settings in the print driver.
-
Reload the paper you were using when the issue occurred.
-
Return to the document you were trying to print when the issue occurred.
-
Click File or click the Microsoft Office Button (
 ), and then click Print. The Print dialog box opens.
 -
Select your product, and then click Properties or Preferences. The Properties or Preferences dialog box opens.
-
Click the Paper/Quality tab.
-
From the Paper Size drop-down, make sure that the selected option matches your paper size. For example, if you have legal paper loaded in your product, select Legal.
-
From the Media drop-down, select the paper type that matches the paper you have loaded in the product.
-
Click OK to apply the settings.
-
Click OK from the Print dialog box to start the print job.
Make sure that the carriage can move freely
Remove any jammed paper that is accessible from the rear of the printer.
-
With the printer turned on, disconnect the power cord from the rear of the printer.
WARNING:
You must disconnect the power cord before reaching inside the printer to avoid the risk of injuries or electric shock.
-
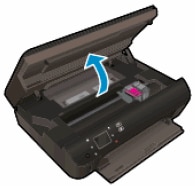
Open the cartridge access door.

-
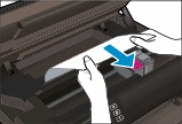
Remove any jammed paper from the cartridge access area, located toward the front of the printer. To avoid tearing any whole sheets of paper, pull the paper with both hands.

-
Use a flashlight to thoroughly check for torn pieces of paper that might remain inside the printer. If any torn pieces of paper remain inside the printer, more jams might occur.
-
Locate the paper path cover in the area behind the cartridge access area.

-
To remove the paper path cover, pinch the tabs together, and then lift up.
-
Pinch the tabs together
-
Lift up
-
-
Gently remove any jammed paper and bits of torn paper from the rear roller. To avoid tearing any whole sheets of paper, pull the paper with both hands.
NOTE:
Use a flashlight to thoroughly check for torn pieces of paper that might remain inside the printer. If any torn pieces of paper remain inside the printer, more jams might occur.

-
Locate the duplexer path cover, directly underneath the paper path cover.
-
Insert your finger into the opening at the rear of the cover, and then lift up. Lift until you hear the duplexer path cover click into the upright position.
-
Gently remove any jammed paper and bits of torn paper. To avoid tearing any whole sheets of paper, pull the paper with both hands.
NOTE:
Use a flashlight to thoroughly check for torn pieces of paper that might remain inside the printer. If any torn pieces of paper remain inside the printer, more jams might occur.
-
Lift the duplexer path cover
-
Remove any jammed paper
-
-
Gently push the duplexer path cover down until you hear it click into place.
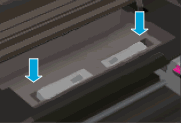
- Replace the paper path cover with the spring-loaded tabs facing toward the front of the printer. Gently press the cover down at the left and right edges. The cover clicks into place.
NOTE:
Make sure that both edges of the paper path cover are in place.

-
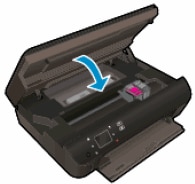
Close the cartridge access door.

Try to print.
Refer this article to further troubleshoot paper feed issues with your printer. Click Here
If the issue still persists after trying out the steps. It is a hardware issue with your printer.
Let me know if this helps!
Have a great day ahead! 🙂
Please click “Accept as Solution” if you feel my post solved your issue, it will help others find the solution.
Click the “Kudos, Thumbs Up" on the bottom right to say “Thanks” for helping!
A4Apollo
I am an HP Employee
