-
×InformationNeed Windows 11 help?Check documents on compatibility, FAQs, upgrade information and available fixes.
Windows 11 Support Center. -
-
×InformationNeed Windows 11 help?Check documents on compatibility, FAQs, upgrade information and available fixes.
Windows 11 Support Center. -
- HP Community
- Printers
- Printing Errors or Lights & Stuck Print Jobs
- HP Deskjet 3755 cartridge problem

Create an account on the HP Community to personalize your profile and ask a question
03-29-2020 02:44 PM
Error 3 on an HP Deskjet 3755 printer. The black ink cartridge will not stay in place. This is my second brand new printer and the last one had the same problem.
04-01-2020 04:40 PM
Welcome to HP support community.
Make sure the carriage can move freely
-
Open the ink cartridge access door.

-
Wait until the carriage is idle and silent before you continue.
-
With the printer turned on, disconnect the power cord and any other cables from the rear of the printer.
WARNING:
You must unplug the power cord to move the carriage by hand and reset the paper feed mechanism without the risk of electrical shock.
-
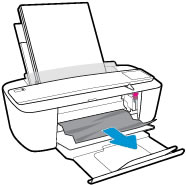
Check for any paper or objects in the ink cartridge access area, and then remove any paper or objects you find.
To avoid tearing any whole sheets of paper, pull the paper with both hands.

-
Firmly push the carriage to the right, and then remove any paper or objects blocking the carriage path.
-
Close the ink cartridge access door.

-
Reconnect the power cord and any other cables, and then turn on the printer.
Make sure the ink cartridges are correctly installed
-
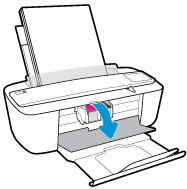
Open the ink cartridge access door.
The carriage moves to the center of the printer.
Figure : Opening the ink cartridge access door

-
Wait until the carriage is idle and silent before you continue.
-
Gently press down on one ink cartridge to release it, and then pull the ink cartridge out of its slot.
CAUTION:
Do not touch the copper-colored contacts or the ink nozzles. Touching these parts can result in clogs, ink failure, and bad electrical connections.
Figure : Removing the ink cartridge

Figure : Do not touch the contacts or nozzles

-
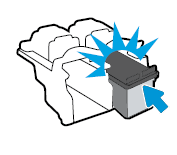
Hold the ink cartridge by its sides with the contacts toward the printer, reinsert the ink cartridge into its slot, and then gently push the ink cartridge until it snaps into place.
NOTE:
Install the color ink cartridge on the left and the black ink cartridge on the right.
Figure : Snapping the ink cartridge into place

-
Repeat these steps for the other ink cartridge.
-
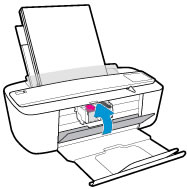
Close the ink cartridge access door.
Figure : Closing the ink cartridge access door

You can refer this HP document for more assistance:- Click here
I hope that helps.
To thank me for my efforts to help you, please mark my post as an accepted solution so that it benefits several others.
Cheers.
Sandytechy20
I am an HP Employee
04-02-2020 11:17 AM
Thank you. The ink cartridges clicked into place and the carriage moved but they weren't quite in place. They have to be angled just right to get them all the way in. This model is very deceiving as the cartridges look fully place but are not. I finally figured it out but, even with live tech support, the first printer was sent back as defective. This was no fault of mine. I spent all afternoon with tech support before the first time. I am letting you know this in case this model causes other people a problem. Thank you so much. I love the little printer now.
