-
×InformationNeed Windows 11 help?Check documents on compatibility, FAQs, upgrade information and available fixes.
Windows 11 Support Center. -
-
×InformationNeed Windows 11 help?Check documents on compatibility, FAQs, upgrade information and available fixes.
Windows 11 Support Center. -
- HP Community
- Printers
- Printing Errors or Lights & Stuck Print Jobs
- HP Envy 4520 Blurry Blank Printing

Create an account on the HP Community to personalize your profile and ask a question
04-16-2019 11:27 PM
My Envy 4520 is printing blurry text, mainly when the text being printed is black.
Example: (These are planner inserts):
I've run both the clean page smears and clean cartriges several times. After performing the cartridge clean, this is still the result I have:

Is there anything else I can do to fix the black? Do I need a new cartridge?
Thanks,
04-17-2019 01:51 AM
Hi Ematheson,
You may want to try performing a manual cleaninig of the area around the ink nozzles.
Please refer to Step 13: Manually clean the area around the ink nozzles in this document: https://support.hp.com/us-en/document/c04718409?jumpid=reg_r1002_usen_c-001_title_r0001
If my reply helped resolve your issue, then share the good news! Let others know this reply was helpful by “accepting this solution”. You can also show your appreciation by giving “kudos” (Thumbs Up).
04-21-2019 07:18 PM
Hi Ematheson,
In that case, I would suggest for you to continue with step 14.:
- Turn on the printer.
- Make sure to load the printer with plain, white paper.
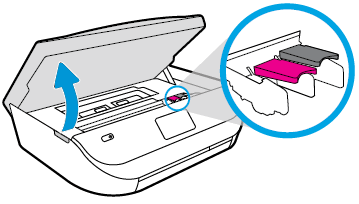
- Gently grasp the handles on either side of the printer, then raise the ink cartridge access door until it locks into place.The carriage moves to the center of the printer.

- Wait until the carriage is idle and silent before you proceed.
- To release the ink cartridge, lift the lid on the ink cartridge slot, then gently push the lid back until it stops.
- Pull up on the ink cartridge to remove it from the slot.

- Lift the lid
- Gently push the lid back
- Pull up on the ink cartridge
- Remove one of the new ink cartridges from its package. Be careful to only touch the black plastic on the ink cartridge.
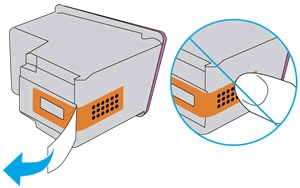
- Remove the plastic tape from the ink cartridge.
CAUTION:
Do not touch the copper-colored contacts or the ink nozzles. Do not replace the protective tape on the contacts. Handling these parts can result in clogs, ink failure, and bad electrical connections.
- Hold the ink cartridge by its sides with the nozzles toward the printer, then slide the ink cartridge forward into the slot.
- Close the lid on the ink cartridge slot to secure the ink cartridge into place.

- Insert the ink cartridge
- Close the lid
- The color ink cartridge is on the left, and the black ink cartridge is on the right
- Repeat the previous steps to install the other ink cartridge, if needed.
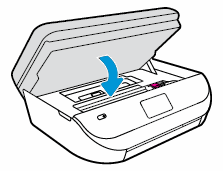
- Close the ink cartridge access door.After you install new ink cartridges, the printer automatically prints an alignment page.

- Wait for the alignment page to fully eject from the printer.
NOTE:
Before a print job, the printer automatically extends the output tray extender. Do not push in the output tray extender until the print job is complete. - Lift the scanner lid.
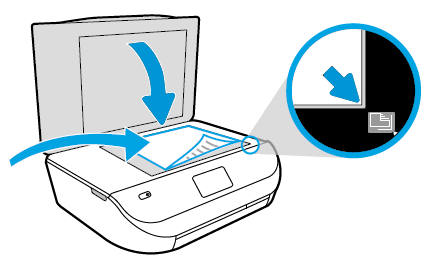
- Place the alignment page with the print side down on the scanner glass. Position it according to the engraved guides around the glass.

- Close the scanner lid, then touch OK.The printer aligns the ink cartridges.
If my reply helped resolve your issue, then share the good news! Let others know this reply was helpful by “accepting this solution”. You can also show your appreciation by giving “kudos” (Thumbs Up).


