@Mike-Ro
Welcome to the HP support community.
Clean the ink cartridge vents
-
Open the door to access to the ink cartridges.
-
Wait until the carriage stops moving before you continue.
-
Push the tab on an ink cartridge, and then pull the ink cartridge from its slot.
CAUTION:
Do not leave the ink cartridges outside the printer longer than 30 minutes. Doing so can result in damage to both the printer and the ink cartridges.

-
If the ink cartridge still has the orange pull-tab attached, pull to remove it.

-
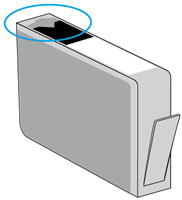
Examine the vent area above the HP logo on the top of the ink cartridge.

-
If the vent is clogged, use a straight pin to gently remove excess adhesive from the vent.
-
-

Clogged vent
-
With a straight pin, gently remove excess adhesive from the vent
-
Unclogged vent
-
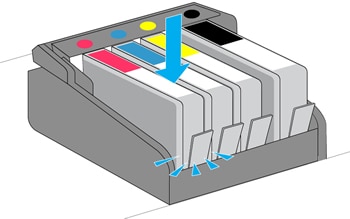
Slide the ink cartridge into its slot, and then press down on the ink cartridge until it snaps into place.

-
Repeat these steps to inspect the vents on each of the other ink cartridges.
-
Make sure each ink cartridge is firmly inserted in its slot. If any are protruding, press down until the ink cartridge snaps into place.
-
Close the ink cartridge access door.
You can refer this HP support document for more assistance:- Click here
I hope that helps.
To thank me for my efforts to help you, please mark my post as an accepted solution so that it benefits several others.
Cheers.
Sandytechy20
I am an HP Employee