-
×InformationNeed Windows 11 help?Check documents on compatibility, FAQs, upgrade information and available fixes.
Windows 11 Support Center. -
-
×InformationNeed Windows 11 help?Check documents on compatibility, FAQs, upgrade information and available fixes.
Windows 11 Support Center. -
- HP Community
- Printers
- Printing Errors or Lights & Stuck Print Jobs
- Photo Tray Blocked- HP Envy Inspire 7255e

Create an account on the HP Community to personalize your profile and ask a question
09-04-2024 12:37 PM
Hello,
My HP Envy Inspire 7200 series recently started saying the Photo Tray is blocked. I have tried readjusting the photo paper tray, reloading the paper tray, and restarting the printer. I have removed and reinstalled the output and input trays and looked for any blockage. I tried to download and install any firmware updates but it says that my printer is up-to-date.
The error message still appears and it won't print from the photo tray.
Please help,
Sarah
09-06-2024 09:59 AM
Hi @sbscum,
Welcome to the HP Support Community.
I'd be glad to help you!
Follow the below steps to fix this issue.
Restart the printer
Press the Power button to turn off the printer. If the printer does not turn off, disconnect the power cord from the rear of the printer.
Wait 60 seconds.
Reconnect the power cord to the rear of the printer.
Press the Power button to turn on the printer.
Make sure that the input tray is completely closed
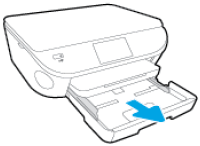
Grasp the handle on the input tray, and then pull the tray toward you to open it.
Figure : Pull out the input tray
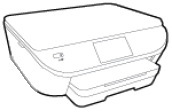
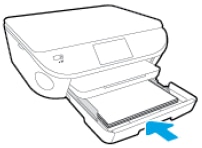
Close the input tray by pushing it into the printer until it locks into place.
Figure : Push in the input tray
Check for obstructions that prevent the input tray from closing
Press the Power button to turn off the printer.
Grasp the handle on the input tray, and then pull the tray toward you to open it.
Figure : Pull to open the paper tray
Remove any loose sheets of paper from the input tray or any paper that blocks the photo tray.
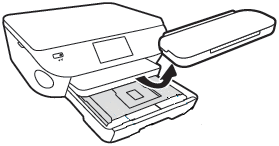
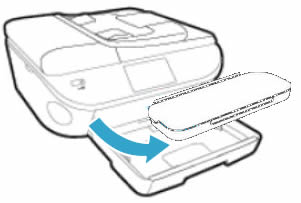
Remove the output tray, and then set it aside.
Figure : Remove the output tray
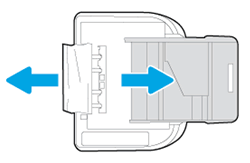
Turn the printer onto its right side so you can access its underside.
Check the gap where the input tray was. Remove any loose paper or other obstructions in the gap. If any paper is jammed inside the gap, grasp the paper with both hands, and then pull the paper slowly but firmly toward you to remove it. Gently remove any jammed paper and bits of torn paper.
Figure : Turn the printer onto its right side, and then remove any obstructions
CAUTION:
Remove paper from the gap as carefully as possible. If any torn pieces of paper remain inside the printer, a paper jam is likely to occur, which could damage the print mechanism.
Turn the printer back over to its normal position, and then reinsert the input tray, pushing it into the printer until it locks into place.
Figure : Push in the paper tray
NOTE:
The tray clicks into place when it is completely closed, and the printer makes noise.
Grasp the output tray by the sides, and then replace the output tray onto the input tray.
Press the Power button to turn on the printer.
Wait until the printer finishes warming up, and then check the control panel to see if the error message has cleared.
Make sure the photo tray is seated correctly
Make sure the printer is positioned on a flat surface.
Push in the output tray extender.
Pull out the input tray, but do not remove it.
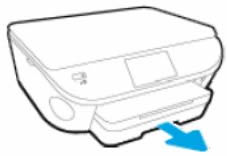
Remove the output tray.
Make sure the photo tray is seated correctly, and that the photo tray guide tabs (grey) are sliding beneath the main tray guides (black) on both the left and right side of the input tray.

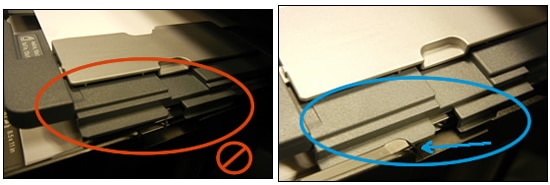
If they are not in the correct position, gently move the photo tray to align the tab gaps, and then gently press the tabs back into position.
The photo tray should move freely with no resistance.
Reinstall the output tray, and then make sure the edges line up with the input tray.
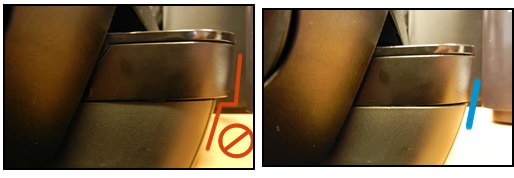
Try to print.
You can check your driver, update here: HP Customer Support - Software and Driver Downloads
Keep me posted for further assistance
Please mark this post as “Accepted Solution” if the issue is resolved and if you feel this reply was helpful click “Yes”.
Nal_NR-Moderator
I am an HP Employee
