-
×InformationNeed Windows 11 help?Check documents on compatibility, FAQs, upgrade information and available fixes.
Windows 11 Support Center. -
-
×InformationNeed Windows 11 help?Check documents on compatibility, FAQs, upgrade information and available fixes.
Windows 11 Support Center. -
- HP Community
- Printers
- Printing Errors or Lights & Stuck Print Jobs
- Photosmart 5520 Color inks not printing

Create an account on the HP Community to personalize your profile and ask a question
12-28-2018 12:19 PM
After not using this printer for some months the color ink is not printing but the black cartridge does. These are all new cartidges and I've run all the trouble shooting hints I can find, uninstalling, cleaning printer heads etc. The printer is recognizing the full cartridges.
Grateful for any other suggestions, this has been a very lightly used printer so should be functional.
Thanks
12-30-2018 12:04 PM
Welcome to the HP Forums!
Thank you for posting your query on this forum, it's a great place to find answers.
I reviewed your post and I understand that you are facing issues printing color.
Don’t worry, I assure you I will try my best to get this sorted.
In order that I may provide you with an accurate solution, I will need a few more details.
- When was the last time the printer was working fine?
- Are you able to make a color copy?
- Have you made any software or hardware changes on the computer?
While you respond to that, I recommend you follow the below steps and check whether the issue is resolved.
1.With the printer turned on, disconnect the power cord from the rear of the printer and also unplug the power cord from the wall outlet.
2.Remove USB cable, if present.
3.Wait for 2-3 minutes, press and hold the power button on your printer for about 30 seconds to remove any additional charge.
4.Now plug back the power cable straight to a wall outlet without any surge protector or an extension cord (This is important) and then plug back the power cord to the printer.
5.Turn on the printer and wait till warm-up period finishes and the printer is idle.
If you continue facing the issue, follow the below steps.
Print a Print Quality Diagnostic report, and then evaluate the results.
-
Load plain, white paper in the tray.
-
From the control panel home screen, touch the Settings icon
 .
. -
Touch Tools, and then touch Print Quality Report.
The printer prints the Print Quality Diagnostic report.
Figure : Example of a Print Quality Diagnostic report with no defects
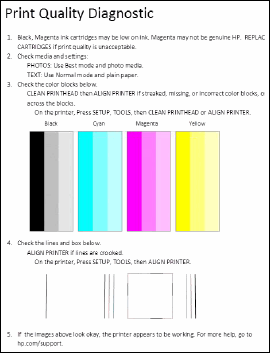
Examine the Print Quality Diagnostic report for defects
If the printer and the ink cartridges are working correctly, all the color bars should be complete, unstreaked, and uniform in color across the width of the page. The black text on the page should not have ink streaks.
Examples of defects on a Print Quality Diagnostic report
Defect
Example
Irregular streaks
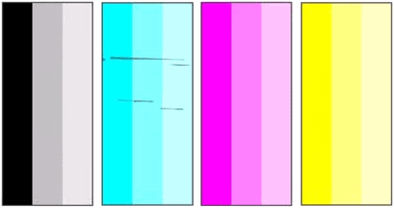
Faded color bars

Missing color
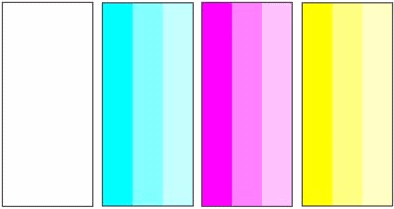
Color bars with regular white streaks
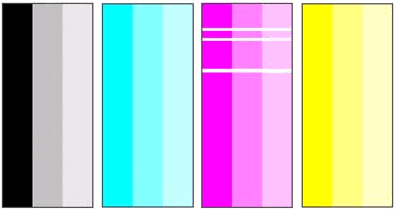
Jagged alignment patterns

-
If you do not see defects on the Print Quality Diagnostic Report, the print mechanism and ink cartridges work correctly. Return to the step to check the print settings.
-
If you see one or more of these defects on the print quality diagnostic report, continue to the next step.
Make sure the ink cartridges are properly vented and correctly seated
If the vent on the top of the ink cartridge is clogged or obstructed, the ink cartridge might not work properly. If you found defects on the Print Quality Diagnostic report, check that the ink cartridges are properly vented and correctly seated.
-
Press the Power button to turn on the printer, if it is not already turned on. Wait until the printer is idle and silent before continuing.
-
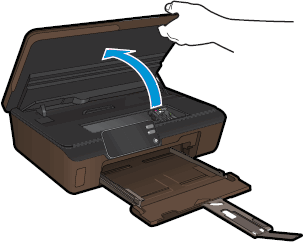
Open the cartridge access door. The carriage moves to the access area.
Figure : Open the cartridge access door
-
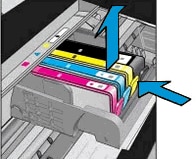
Press the tab on the front of the cartridge inward to release it, and then pull up on the cartridge to remove it from the slot.
Figure : Remove the cartridge from the slot
-
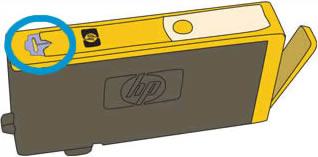
Examine the vent area on each cartridge, above the HP logo on the top of the cartridge.
Figure : Vent area on the top of the cartridge
-
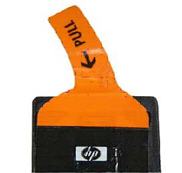
If the cartridge still has the orange pull-tab attached, pull to remove it.
Figure : Orange pull tab
-
If the vent is clogged, use a straight pin to gently remove excess adhesive from the vent.
Figure : Clean the clogged vent with a pin
-
Clogged vent
-
With a straight pin, gently remove excess adhesive from the vent
-
Unclogged vent
-
-
With the nozzle and contacts facing down, slide the cartridge into its slot. Press down on the cartridge until it clicks into place.
NOTE:
Make sure that each cartridge is installed in the correct slot. Match the shape of the icon and the color of the cartridge with the slot that has the same shaped icon and color.
Figure : Reinsert the cartridge

-
Repeat these steps to inspect the vents on each of the cartridges.
-
Make sure that each cartridge is firmly in place in its slot. Run your finger along the top of the cartridges to feel for any that are protruding, and if any are, press down firmly until each cartridge snaps into place.
-
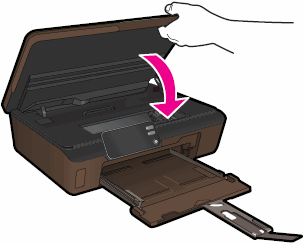
Close the cartridge access door.
Figure : Close the cartridge access door
-
Try the print job again.
If inspecting the vents on the ink cartridges did not resolve the issue, continue to the next step.
Let me know how it goes and you have a great day!
If you wish to show appreciation for my efforts, mark my post as Accept as Solution. Your feedback counts!
Cheers!
The_Fossette
I am an HP Employee
