-
×InformationNeed Windows 11 help?Check documents on compatibility, FAQs, upgrade information and available fixes.
Windows 11 Support Center. -
-
×InformationNeed Windows 11 help?Check documents on compatibility, FAQs, upgrade information and available fixes.
Windows 11 Support Center. -
- HP Community
- Printers
- Printing Errors or Lights & Stuck Print Jobs
- Printer Cartridge E light won't stop blinking on F300 All in...

Create an account on the HP Community to personalize your profile and ask a question
02-27-2022
09:05 AM
- last edited on
03-01-2022
09:38 AM
by
Ric_ob
HP F300 All in One Printer. I installed new cartridges. It printed 10 copies then Error light came on. I searched online for solutions. Some were no longer available. Virtual HP Agent's questions were not helping. I need a LIVE person OR someone in the community who has a solution. Thank you!
03-02-2022 09:00 AM
Welcome to the HP support community.
I understand that you are getting a cartridge error, I am glad to assist you.
Solution one: Close the cartridge access door securely
If the cartridge access door is open even slightly, the print cartridge light will blink. Follow these steps in the order given to close the cartridge access door securely.
Step one: Close the cartridge access door
-
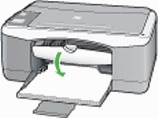
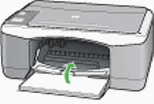
Open the cartridge access door. The carriage moves to the center of the product.
-
Check inside the product to make sure that there are no obstructions that are preventing the cartridge access door from closing securely.
-
Remove any obstructions you find.
-
Close the cartridge access door. Make sure that it closes completely.
Step two: Print a self-test page
-
Press and hold the Cancel button (
), and then press the Start Copy Color button (
).
-
Release both buttons at the same time. The self-test report prints.
Solution two: Remove and then reinstall the cartridges
Follow these steps in the order given to remove and then reinstall the cartridges.
Step one: Remove the cartridges
-
Press the Power button (
) to turn on the product.
-
Open the cartridge access door.The carriage moves to the center of the product.
-
Wait until the carriage is idle and silent.
-
Lightly press down on acartridge to release it, and then pull the cartridge toward you out of its slot.
-
Tri-color print cartridge
-
Black and photo print cartridge
-
Remove the tri-color cartridge from theslot on the left.
-
Remove the black or photo cartridgefrom the slot on the right.
-
-
Check the nozzles on the cartridges to see if the protective tape is still attached.
-
If there is no protective tape on the cartridge, continue to the next step in this solution.
-
If the protective tape is still on the cartridge, gently pull the pink pull tab to remove the protective plastic tape.
CAUTION:
Do not touch the copper-colored contacts or ink nozzles.Touching these parts can result in clogs, ink failure, and bad electricalconnections.
-
Copper-colored contacts
-
Plastic tape with pink pull tab
-
Ink nozzles under tape
-
-
-
Repeat these steps to remove the other cartridge.
Step two: Reinstall the cartridges
-
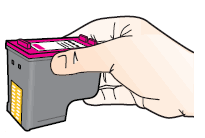
Hold the cartridge by its sides.
-
Slide the cartridge into its designated slot at a slightly upward angle. The black parallelogram icon (
) designates the slot for the black cartridge, and the magenta half circle icon (
) designates the slot for the color cartridge.
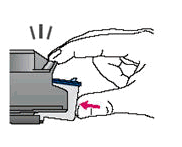
-
Press the cartridge inward until it snaps into place.
-
Repeat these steps to reinstall the other cartridge.
-
Close the cartridge access door.
Refer to this HP document for further assistance:- Click here
Keep me posted.
If this helps, please mark the public post as an accepted solution so that it benefits several others.
Cheers.
Sandytechy20
I am an HP Employee