-
1
×InformationNeed Windows 11 help?Check documents on compatibility, FAQs, upgrade information and available fixes.
Windows 11 Support Center. -
-
1
×InformationNeed Windows 11 help?Check documents on compatibility, FAQs, upgrade information and available fixes.
Windows 11 Support Center. -
- HP Community
- Printers
- Printing Errors or Lights & Stuck Print Jobs
- Printer alignment
Guidelines
Experiencing 'Printer Blocked' or 'Printer Error' message? Click here for more information.

Create an account on the HP Community to personalize your profile and ask a question
Your account also allows you to connect with HP support faster, access a personal dashboard to manage all of your devices in one place, view warranty information, case status and more.
Check some of the most frequent questions about Instant Ink: HP INSTANT INK, HP+ PLANS: INK AND TONER.
Check out our Black or Color Ink Not Printing, Other Print Quality Issues info about: Print quality and Cartridge Issues.

It has been a while since anyone has replied. Simply ask a new question if you would like to start the discussion again.
02-22-2018 07:42 PM
 HP Recommended
Product: Hp Envy 100 D410b
Operating System: macOS 10.13 High Sierra
On my Envy 100 D410b Print quality is real faint, plus I get a printer alingment failed message.
Solved! Go to Solution.
1 ACCEPTED SOLUTION
Accepted Solutions
02-25-2018 10:33 AM
HP Recommended
Hi @LJBRO
It looks like you were interacting with Raj1788, but he is out for the day & I'll be glad to help you out. I'm KrazyToad & I'm at your service.
I suggest you remove the cartridges, clean the electrical contacts with a Lint-Free cloth and reinstall them firmly.
Then perform a Printer Reset.
(1) Turn the printer on, if it is not already on.
(2) Wait until the printer is idle and silent before you continue.
(3) With the printer turned on, disconnect the power cord from the rear of the printer.
(4) Unplug the power cord from the wall outlet.
(5) Wait at least 60 seconds.
(6) Plug the power cord back into the wall outlet.
NOTE: HP recommends connecting the printer power cord directly to the wall outlet.
(7) Reconnect the power cord to the rear of the printer.
(8) Turn on the printer, if it does not automatically turn on.
The printer might go through a warm-up period. The printer lights might flash, and the carriage might move.
Wait until the warm-up period finishes and your printer is idle and silent before you proceed.
If the issue persist, clean the cartridges
-
On the product control panel, touch Setup (
 ), and then touch Tools. The Tools menu displays.
 -
On the Tools menu, touch Clean Cartridges. The product cleans the cartridges.
-
Try the print job again.
-
If these steps resolved the issue, there is no need to continue troubleshooting.
-
If the issue persists, see the next step.
Follow these steps to align the product.
-
Load plain white, U.S. letter or A4 size paper in the tray.
-
On the product control panel touch Setup (
). -
Touch Tools, and then touch Align Printer. The alignment page automatically prints.
Keep me posted how it goes.
Thank you. 🙂
If the information I've provided was helpful, give us some reinforcement by clicking the "Solution Accepted" and "Kudos" Buttons.
KrazyToad
I Am An HP Employee
5 REPLIES 5
02-23-2018 03:35 PM
HP Recommended
Welcome to HP Forums,
This is a great place to get support, find answers and tips to your technical queries.
Are you using genuine HP cartridge?
Have you tried any troubleshooting steps?
Solution one: Use genuine HP cartridges
HP recommends that you use genuine HP ink or toner supplies. HP cannot guarantee the quality or reliability of non-HP or refilled cartridges. If you do not use genuine HP cartridges, the steps in this document might not resolve the issue. To check the authenticity of your cartridges, go to hp.com/go/anticounterfeit.
Solution two: Allow the All-in-One to rest
Sometimes, print-quality issues can be resolved during a period of inactivity. Consider waiting for about 40 minutes, and then try the print job again.
Solution three: Check the paper
Use the following guidelines to make sure that the paper you are using is appropriate for the print job. If it is not, reload the product with an appropriate paper type.
NOTE:
See the specifications for your product for specific paper types that the product supports.
-
Load the paper print side down in the input tray. Many papers have printing and nonprinting sides.
-
Do not use wrinkled or curled paper. Load only clean, wrinkle-free paper into the product.
-
Use the correct paper type for your project. For everyday documents, plain paper works well. For documents with dense printing, such as high contrast graphics or photographs, use HP Advanced Photo Paper for the best results.
-
Try using a different paper. Paper that does not accept ink well is also prone to print defects. HP designs ink and paper to work together.
-
Do not leave photo paper in the tray for more than 5 to 30 minutes. Only leave photo paper in the tray when printing. Store the photo paper in a resealable bag when not in use.
If photo paper is left in the tray for too long, a reaction between the paper rollers and the photo paper might occur. This can result in lines or marks on the printed photo.
NOTE:
Inappropriate paper usually causes vertical streaks in printouts (or, if the problem occurs on a copy, dirty scanner glass usually causes the issue). Do not replace cartridges to fix vertical streaks.
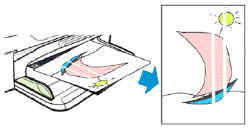
Examples of horizontal streaks and vertical streaks in the printout
Figure : Horizontal streaks in printout
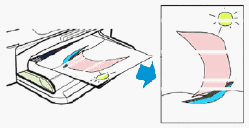
Figure : Vertical streaks in printout
Continue with the following troubleshooting steps if your printout contains horizontal streaks or other print quality issues besides vertical streaks.
Do not replace cartridges for vertical streaks in a printout. Instead, check the paper as described earlier in this document, or search for a document that covers this issue.
After trying the preceding guidelines, try printing again.
-
If these steps resolved the issue, you do not need to continue troubleshooting.
-
If the issue persists, continue to the next solution.
Solution four: Check the print settings
Follow these steps to check the print settings to make sure that they are appropriate for your print job.
-
In the software program you are trying to print from, click File, and then click Print. The Print dialog box opens.
-
Select your product, and then click Properties. The product Properties dialog box opens.
-
Click the Paper/Quality tab.
-
From the Media drop-down, select the paper type that matches the paper you have loaded in the product.
-
From the Paper Size drop-down, select the option that matches your paper size. For example, if you have legal paper loaded in your product, select Legal 8.5x14in.
-
Click Advanced. The Advanced Options dialog box opens.
-
Under Printer Features, make sure that Print in Grayscale is set to Off, unless you are printing in Grayscale intentionally.
-
Click OK, and then click OK again to apply the settings.
-
Click OK from the Print dialog box to start the print job.
For more troubleshooting steps use HP document
Let me know how it goes!
Eagerly waiting for the reply
Raj1788
I am an HP Employee
02-25-2018 10:33 AM
HP Recommended
Hi @LJBRO
It looks like you were interacting with Raj1788, but he is out for the day & I'll be glad to help you out. I'm KrazyToad & I'm at your service.
I suggest you remove the cartridges, clean the electrical contacts with a Lint-Free cloth and reinstall them firmly.
Then perform a Printer Reset.
(1) Turn the printer on, if it is not already on.
(2) Wait until the printer is idle and silent before you continue.
(3) With the printer turned on, disconnect the power cord from the rear of the printer.
(4) Unplug the power cord from the wall outlet.
(5) Wait at least 60 seconds.
(6) Plug the power cord back into the wall outlet.
NOTE: HP recommends connecting the printer power cord directly to the wall outlet.
(7) Reconnect the power cord to the rear of the printer.
(8) Turn on the printer, if it does not automatically turn on.
The printer might go through a warm-up period. The printer lights might flash, and the carriage might move.
Wait until the warm-up period finishes and your printer is idle and silent before you proceed.
If the issue persist, clean the cartridges
-
On the product control panel, touch Setup (
), and then touch Tools. The Tools menu displays. -
On the Tools menu, touch Clean Cartridges. The product cleans the cartridges.
-
Try the print job again.
-
If these steps resolved the issue, there is no need to continue troubleshooting.
-
If the issue persists, see the next step.
Follow these steps to align the product.
-
Load plain white, U.S. letter or A4 size paper in the tray.
-
On the product control panel touch Setup (
). -
Touch Tools, and then touch Align Printer. The alignment page automatically prints.
Keep me posted how it goes.
Thank you. 🙂
If the information I've provided was helpful, give us some reinforcement by clicking the "Solution Accepted" and "Kudos" Buttons.
KrazyToad
I Am An HP Employee
Be alert for scammers posting fake support phone numbers and/or email addresses on the community.
If you think you have received a fake HP Support message, please report it to us by clicking on "Flag Post".
† The opinions expressed above are the personal opinions of the authors, not of HP. By using this site, you accept the Terms of Use and Rules of Participation.


Didn't find what you were looking for?
Ask the community
† The opinions expressed above are the personal opinions of the authors, not of HP. By using this site, you accept the <a href="https://www8.hp.com/us/en/terms-of-use.html" class="udrlinesmall">Terms of Use</a> and <a href="/t5/custom/page/page-id/hp.rulespage" class="udrlinesmall"> Rules of Participation</a>.