• ×
    Information
    Need Windows 11 help?
    Check documents on compatibility, FAQs, upgrade information and available fixes.
    Windows 11 Support Center.
  • post a message
  • ×
    Information
    Need Windows 11 help?
    Check documents on compatibility, FAQs, upgrade information and available fixes.
    Windows 11 Support Center.
  • post a message
Guidelines
Experiencing 'Printer Blocked' or 'Printer Error' message? Click here for more information.
Check some of the most frequent questions about Instant Ink: HP INSTANT INK, HP+ PLANS: INK AND TONER.


Check out our Black or Color Ink Not Printing, Other Print Quality Issues info about: Print quality and Cartridge Issues.
HP Recommended
HP ENVY Photo 7155
Microsoft Windows 10 (64-bit)

When I try to print a color picture to a CD jewel case cover it prints as bands of color horizontally.  One will be dark and the next light and the next dark, etc. for about 2/3 of the image but the bottom seems to come out fine.

1 REPLY 1
HP Recommended

Hi @RONFHI


Welcome to the HP Support Community. I'd be happy to assist you with the "print quality" issue. 


To better assist you - 


1) What is the paper type and paper size you are using?

2) What's the application you are trying to print from? Have you tried printing from a different application or device? 

3)Is the quality better on regular paper?


While you respond to that, Refer to the link to know the supported paper types and paper sizes supported by your printer


Try the steps to improve print quality:


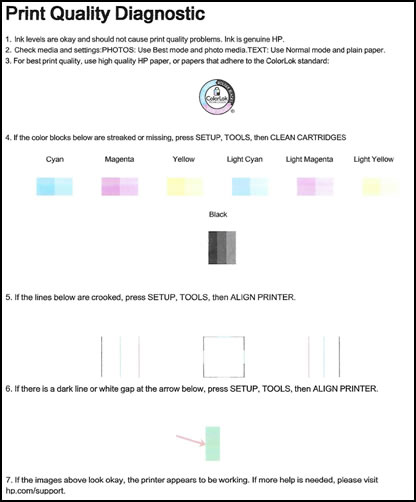
Step 1: Print a Print Quality Diagnostic Report, and then evaluate the results.

  1. On the control panel, swipe down to open the Dashboard, and then touch the Setupicon.

  2. Swipe up on the display, touch Reports, and then touch Print Quality Report.

    A Print Quality Diagnostic page prints.

    Print Quality Diagnostic report without defects

Step 9: Examine the color blocks for defects

Examine the color blocks on the Print Quality Diagnostic page to make sure the color blocks do not show white lines, and are not faded or missing.

Example of the color blocks without defects

  • If the color blocks do not show white lines, and are not faded or missing

  • If any of the color blocks show white lines, are faded, or are missing completely

Step 2 : Clean the ink cartridges

Use the automated tool to clean the ink cartridges.

NOTE: 

To avoid issues that require cleaning, always turn the printer off with the Power button.

  1. On the control panel, swipe down to open the Dashboard, and then touch the Setupicon.

  2. Swipe up on the display, and then touch Printer Maintenance.

  3. Touch Clean Cartridges, and then touch Continue.

    A Print Quality Diagnostic page prints.

  4. Examine the Print Quality Diagnostic page.

    • If the print quality is unacceptable, touch Clean Again to continue the next level of cleaning. Repeat these steps for the third cleaning stage, if necessary.

      NOTE: 

      If the printhead is badly clogged, it might require another cleaning cycle. If so, wait 30 minutes before you perform both levels of cleaning again.

    • If the print quality is acceptable, touch Done. You can stop troubleshooting.

If the print quality is unacceptable, continue to the next step.

Step 11: Examine the alignment lines and green color block for defects

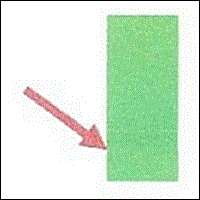
Examine the alignment lines and green color block on the Print Quality Diagnostic page you printed in the previous step. Make sure the lines are straight and connected and there are no dark lines or white gaps in the green color block.

Alignment  lines without any defects

 Green color block without any defects

  • If you see no defects on the Print Quality Diagnostic page, the print mechanism and ink cartridges are working correctly. If print quality is still not satisfactory, try these general print-quality guidelines. You do not need to continue the troubleshooting steps in this document.

    • Make sure the image you are printing has a high enough resolution. Images that have been enlarged might appear fuzzy or blurry.

    • If the problem is near the edge of a printout, use the print settings to rotate the image 180 degrees. The problem might not appear on the other end of the printout.

    • Do not leave unprotected ink cartridges out of the printer for an extended period of time.

    • Always use the Power button to turn the printer off. This protects the ink cartridges from exposure to air.

  • If any of the alignment lines are not straight and connected, or the green color block has dark lines or white gaps, continue to the next step.

Step 3: Align the printer

Use an automated tool to align the ink cartridges.

  1. On the printer control panel, swipe down to open the Dashboard, and then touch the Setupicon.

  2. Swipe up on the display, and then touch Printer Maintenance.

  3. Touch Align Cartridges and then touch Continue.

    The printer prints an alignment page.

After aligning the ink cartridges, try to print. If the print quality is unacceptable, continue to the next step.


You can refer to this link for more information.


Hope this helps! Keep me posted. 


Please click “Accept as Solution” if you feel my post solved your issue, it will help others find the solution.

Click the “Kudos, Thumbs Up" on the bottom right to say “Thanks” for helping!


Have a great day!

† The opinions expressed above are the personal opinions of the authors, not of HP. By using this site, you accept the <a href="https://www8.hp.com/us/en/terms-of-use.html" class="udrlinesmall">Terms of Use</a> and <a href="/t5/custom/page/page-id/hp.rulespage" class="udrlinesmall"> Rules of Participation</a>.