• ×
    Information
    Need Windows 11 help?
    Check documents on compatibility, FAQs, upgrade information and available fixes.
    Windows 11 Support Center.
  • post a message
  • ×
    Information
    Need Windows 11 help?
    Check documents on compatibility, FAQs, upgrade information and available fixes.
    Windows 11 Support Center.
  • post a message
Guidelines
Note: From May 1, 2024, the HP Scan and Capture app will no longer be available (retired) in the Microsoft Store and HP will not release any further app updates. Alternatively, you can download HP Smart from the Microsoft Store. For more information on how to set up your printer using the HP Smart app, go to HP printer setup (HP Smart app).
Common problems HP Solution Center not working : Adobe Flash Player Error and Unable to scan
We would like to share some of the most frequently asked questions about HP Solution Center not working : Adobe Flash Player Error and Unable to Scan.
HP Recommended
HP 9025e
Microsoft Windows 10 (64-bit)

Why can’t I scan  via MS outlook?


1 REPLY 1
HP Recommended

Hi@ EAL2,


Welcome to the HP Support Community!


Don't worry as I'll be glad to help, 


I understand that you need help to scan to ms outlook.


Firmware Versions BZP1CN1432DR, and LZP1CN1502AR

Setup and use scan to email using firmware versions BZP1CN1432DR, and LZP1CN1502AR.

Step 1: Set up Scan to Email

  1. Locate the product’s IP address. The IP address can be found on the control panel:

    x476, and X576 models only: Touch the network  icon at the top of the display.

  2. Enter the product's IP address into a web browser address line. Press the Enter key on the computer keyboard.

    Figure : Example of an IP address in a browser window

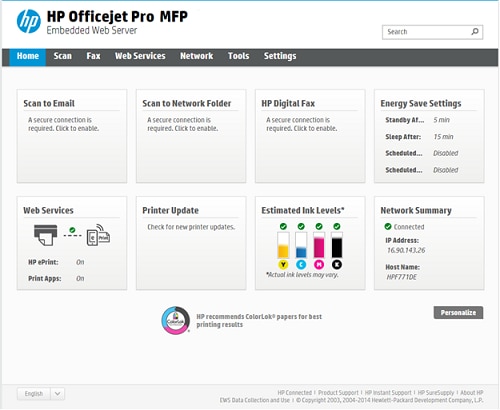
    The product's Embedded Web Server (EWS) home page displays.

    Figure : Example of EWS home page

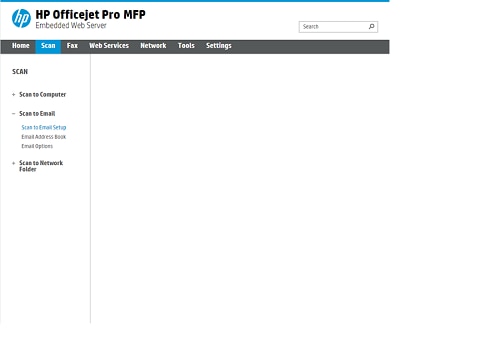
  3. Click the Scan tab.

    Figure : Example of scan screen

  4. On the left navigation pane, click Scan to Email Setup.

  5. On the Redirecting to Secure Page dialog box, click OK.

    The Redirecting to Secure Page dialog box indicates that the browser is being redirected to a secure Web page. The information on the secure Web page will be encrypted for protection and privacy purposes.

    The Web browser might display a message about the Web site's security certificate. Since the Web page is secure, click Continue to this website.

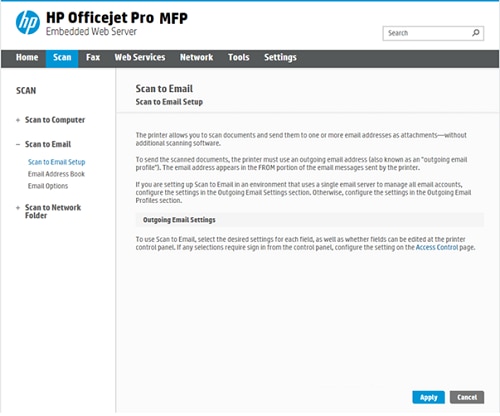
  6. Click on the Scan to Email Setup.

    Figure : Example of Outgoing Email Profiles screen

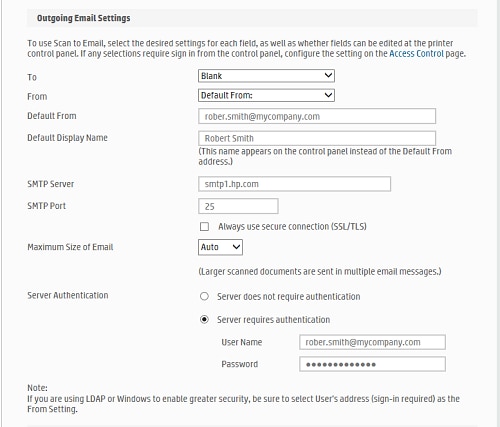
  7. On the Scan to Email Setup screen, complete the following:

    • Default From: The email address that will display as the sender of the email.

      Example: robert.smith@mycompany.com

    • Default Display Name: The name that will appear on the product control panel when the scan to email function is used.

      Example: Robert Smith

    • SMTP Server: The SMTP server address for the network.

    • SMTP Port: The SMTP port number is set to 25 by default.

      SMTP server addresses typically have this format: smtp.company.com or smtp.provider.com. SMTP server addresses may also contain a number or a geographic location.

      NOTE: 

      If you are unsure of the SMTP server address, check with your IT department, Internet service provider, or email service provider.

      NOTE: 

      The SMTP port number is set to 25 by default. You should not need to change it. However, if this setting if different from the default, your IT department or Internet service provider should be able to provide to correct setting.

    • Email Log-in Authentication: This information is required only if the email system or Internet service provider require additional security authentication. The User ID and password for email log-in authentication are encrypted. The product control panel will only display the sender's email address and the display name when the scan to email function is used.

      Figure : Example of Outgoing Profiles screen completed:

To test the configuration, use the Outgoing Email Test feature at the button of the screen, add a destination email address, and then click on Save and Test.

Figure : Example of Outgoing Email Test

NOTE: 

If the test fails, make sure to have a DNS address in the printer network configuration, this can be checked by going into the Network menu either on the EWS or the printer's front panel.

Step 2: Use the Scan to Email feature

  1. From the Home screen on the product control panel, touch Scan.

  2. Touch Email.

  3. Select the From address.

  4. To add a subject line to the email, touch the Subject button. Use the keyboard displayed on the control panel to type the subject and then touch Done.

  5. To enter the To address, touch the To button, and then:

    • Select the email address from the list of saved email addresses.

    • Touch New Email and use the keyboard displayed on the control panel to type the email address.

    Touch Done.

  6. Load the document onto the scanner glass or into the document feeder, and then touch Start Scan.

    The email is sent once all pages have been scanned.

Older Firmware Versions

Setup and use scan to email using older firmware versions.

Step 1: Set up Scan to Email (older firmware versions)

  1. Locate the product’s IP address. The IP address can be found on the control panel:

    X451 models only: From the Home screen, press the cancel  button.

    X551, x476, and X576 models only: Touch the network  icon at the top of the display.

  2. Enter the product's IP address into a web browser address line. Press the Enter key on the computer keyboard.

    Figure : Example of an IP address in a browser window

    The product's Embedded Web Server (EWS) home page displays.

    Figure : Example of EWS home page

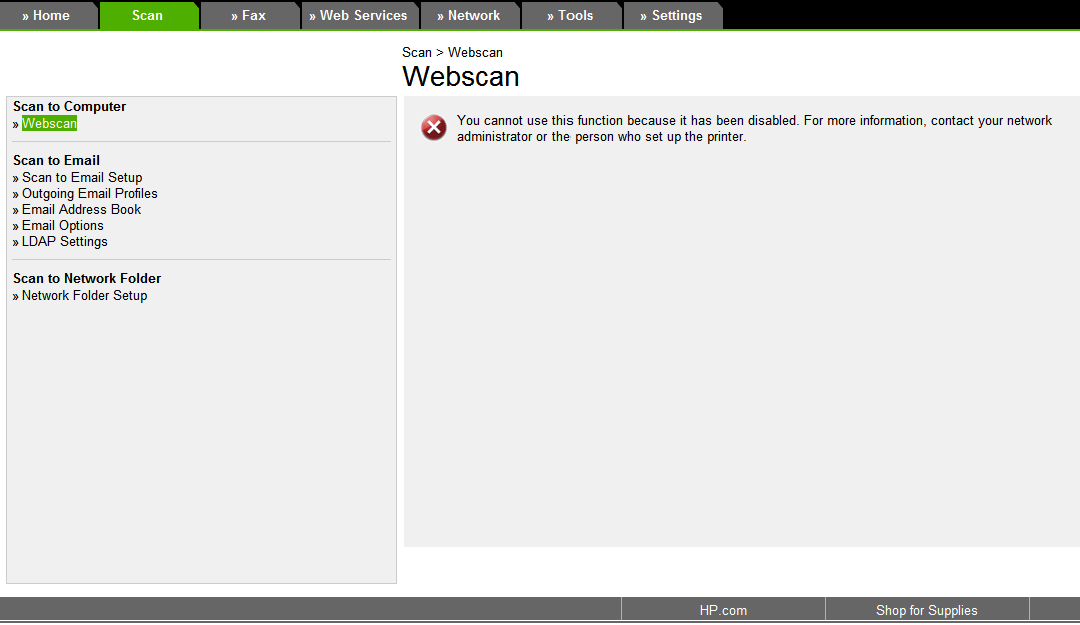
  3. Click the Scan tab.

    Figure : Example of scan screen

  4. On the left navigation pane, click Outgoing Email Profiles.

  5. On the Redirecting to Secure Page dialog box, click OK.

    The Redirecting to Secure Page dialog box indicates that the browser is being redirected to a secure Web page. The information on the secure Web page will be encrypted for protection and privacy purposes.

    The Web browser might display a message about the Web site's security certificate. Since the Web page is secure, click Continue to this website.

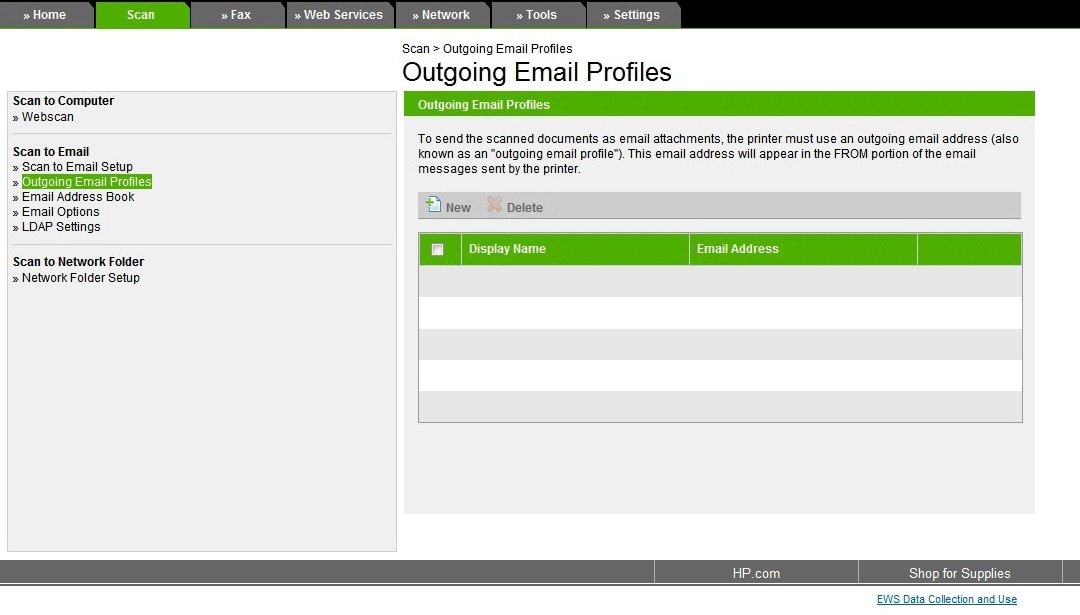
  6. On the Outgoing Email Profiles screen, click New.

    Figure : Example of Outgoing Email Profiles screen

  7. On the Step 1: Email Profile screen, complete the following:

    • Email Address: The email address that will display as the sender of the email.

      Example: robert.smith@mycompany.com

    • Display Name: The name that will appear on the product control panel when the scan to email function is used.

      Example: Robert Smith

    • Security PIN (Optional): A PIN will ensure that only authorized users can scan to the email address. When this feature is enabled, a PIN must be entered before the scan to email function will complete.

    Click Next.

    Figure : Example Email Profile screen

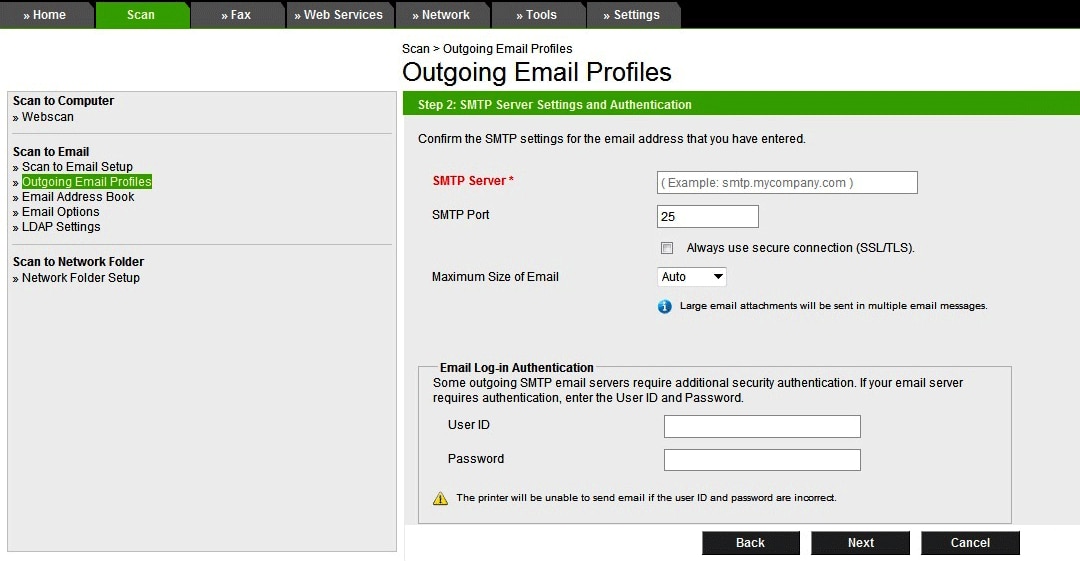
  8. On the Step 2: SMTP Server Settings and Authentication screen, complete the following:

    • SMTP Server: The SMTP server address for the network.

      SMTP server addresses typically have this format: smtp.company.com or smtp.provider.com. SMTP server addresses may also contain a number or a geographic location. Example: smtp4.east.acmenet.com.

      NOTE: 

      If you are unsure of the SMTP server address, check with your IT department, Internet service provider, or email service provider.

      NOTE: 

      The SMTP port number is set to 25 by default. You should not need to change it. However, if this setting if different from the default, your IT department or Internet service provider should be able to provide to correct setting.

    • Email Log-in Authentication: This information is required only if the email system or Internet service provider require additional security authentication. The User ID and password for email log-in authentication are encrypted. The product control panel will only display the sender's email address and the display name when the scan to email function is used.

    Click Next.

    Figure : Example SMTP Server Settings and Authentication screen

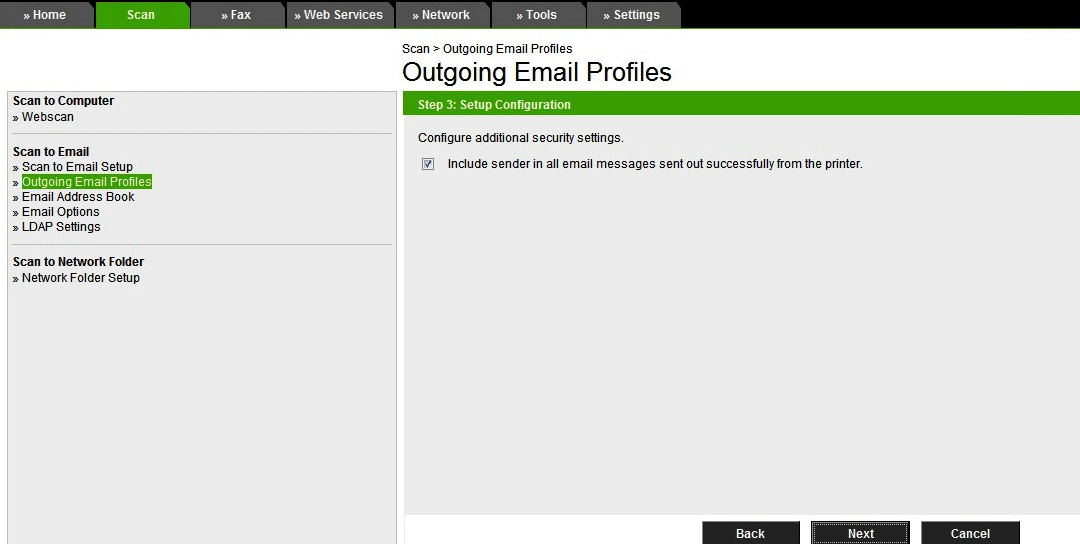
  9. On the Step 3: Setup Configuration screen, select the Include sender in all email messages sent out successfully from the printer check box to copy the sender on scan to email files sent under the sender's name.

    Click Next.

    Figure : Example Setup Configuration screen

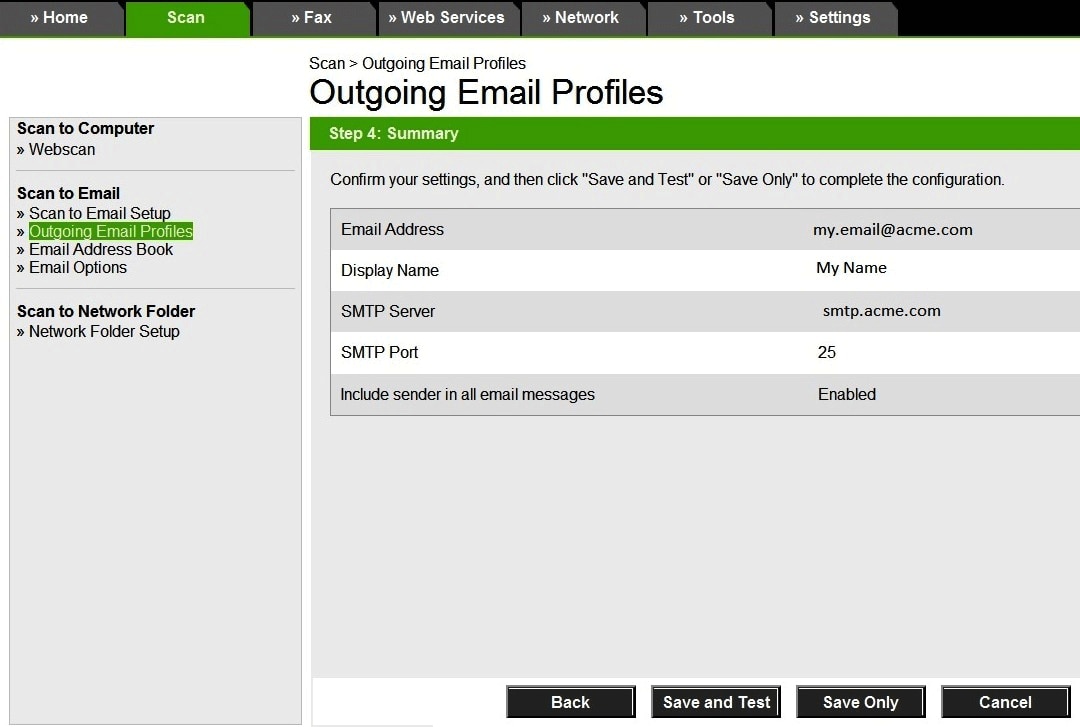
  10. On the Step 4: Summary screen, review the information to confirm that it was entered correctly.

    Click Save and Test.

    • If the test was successful a congratulations message will display and a verification email will be sent to the email address.

      Click Finish.

    • If the test was unsuccessful an error message will display.

      Contact the your IT department or Internet service provider to verify the settings, and then click Edit to modify the settings.

      Figure : Example Summary screen

Step 2: Use the Scan to Email feature

  1. From the Home screen on the product control panel, touch Scan.

  2. Touch Email.

  3. Select the From address.

    NOTE: 

    If the PIN feature has been set up, enter the PIN and then touch Done. However, a PIN is not required to use this feature.

  4. To add a subject line to the email, touch the Subject button. Use the keyboard displayed on the control panel to type the subject and then touch Done.

  5. To enter the To address, touch the To button, and then:

    • Select the email address from the list of saved email addresses.

    • Touch New Email and use the keyboard displayed on the control panel to type the email address.

    Touch Done.

  6. Load the document onto the scanner glass or into the document feeder, and then touch Start Scan.

    The email is sent once all pages have been scanned.

    Hope this helps! Keep me posted.


Please click “Accept as Solution” if you feel my post solved your issue, it will help others find the solution.

Click the “Kudos, Thumbs Up" on the bottom right to say “Thanks” for helping!

Have a great day! 

† The opinions expressed above are the personal opinions of the authors, not of HP. By using this site, you accept the <a href="https://www8.hp.com/us/en/terms-of-use.html" class="udrlinesmall">Terms of Use</a> and <a href="/t5/custom/page/page-id/hp.rulespage" class="udrlinesmall"> Rules of Participation</a>.