-
×InformationNeed Windows 11 help?Check documents on compatibility, FAQs, upgrade information and available fixes.
Windows 11 Support Center. -
-
×InformationNeed Windows 11 help?Check documents on compatibility, FAQs, upgrade information and available fixes.
Windows 11 Support Center. -
- HP Community
- Printers
- Printer Ink Cartridges & Print Quality
- HP Envy 5660 printer - Problem with Black Ink

Create an account on the HP Community to personalize your profile and ask a question
05-15-2022 03:00 PM
My black ink has been acting up as of late as it's printing streaks. I've aligned and cleaned the printer head multiple times. After cleaning, printer head, the black ink got worse and it's printing very faint with most of the ink missing.
My ink volume shows as good and doesn't need to be replaced. I don't know what to do here.
I'd appreciated some help.
05-20-2022 11:19 AM
@Spacemarble
Welcome to the HP support community.
I understand that you are getting print quality issues, and I am glad to assist you.
Clean the area around the ink nozzles
- Gather the following materials:
- Dry foam-rubber swabs, lint-free cloth, or any soft material that does not come apart or leave fibers (coffee filters work well)
- Distilled, filtered, or bottled water (tap water might contain contaminants that can damage the ink cartridges)
- CAUTION:
- Do not use platen cleaners or alcohol to clean the ink cartridge contacts. These can damage the ink cartridge or the printer.
- Turn on the printer.
- Open the ink cartridge access door by placing two fingers under one or both of the small handles on the sides of the ink cartridge access door and then lifting it up. Wait until the carriage is idle and silent before you continue.
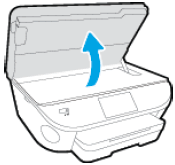
- The Door Open screen displays on the printer control panel with the message, 'The cover or door must be closed to print. Check that it is completely closed.' A Change Ink option also displays on the bottom right corner of the touchscreen. You do not need to select this option at this time.
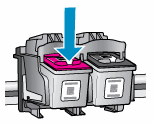
- Lightly press down on one of the ink cartridges to release it, and then pull the ink cartridge toward you out of its slot.
- CAUTION:
- Do not remove both ink cartridges at the same time. Remove and clean each ink cartridge one at a time. Do not leave an ink cartridge outside the printer for more than 30 minutes.
- Hold the ink cartridge by its sides.
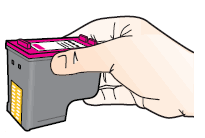
- Inspect the ink cartridge contacts for ink and debris buildup.
- CAUTION:
- Do not touch the copper-colored contacts or the ink nozzles. Touching these parts can result in clogs, ink failure, and bad electrical connections.

- Lightly moisten a foam-rubber swab or lint-free cloth with distilled water, and then squeeze any excess water from it.
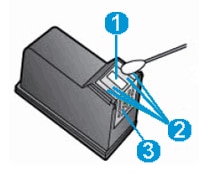
- Clean the face and edges around the ink nozzle with the swab.
- CAUTION:
- Do not clean the ink nozzle plate.
- Nozzle plate - Do not clean
- Area surrounding ink nozzle - Do clean
- Cartridge contacts - Do not clean
- Either let the ink cartridge sit for 10 minutes to allow the cleaned area to dry, or use a new swab to dry it.
- Reinsert the ink cartridge by sliding it at a slight upward angle into the empty slot, and then gently pushing up on the ink cartridge until it snaps into place.
- Reinsert the tri-color ink cartridge into the left slot.
- Reinsert the black ink cartridge into the right slot.
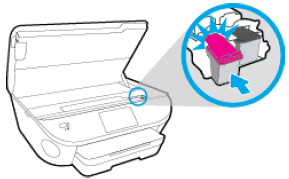
- Repeat these steps to clean around the nozzles on the other ink cartridge.
- Close the ink cartridge access door.
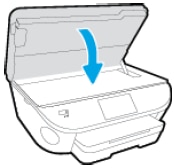
- Turn on the printer.
Refer to this HP document for further assistance:- Click here
Keep me posted.
If this helps, please mark the public post as an accepted solution so that it benefits several others.
Cheers.
Sandytechy20
I am an HP Employee
