-
×InformationNeed Windows 11 help?Check documents on compatibility, FAQs, upgrade information and available fixes.
Windows 11 Support Center. -
-
×InformationNeed Windows 11 help?Check documents on compatibility, FAQs, upgrade information and available fixes.
Windows 11 Support Center. -
- HP Community
- Printers
- Printing Errors or Lights & Stuck Print Jobs
- Deskjet 2633 only prints partial pages

Create an account on the HP Community to personalize your profile and ask a question
10-23-2021 05:19 AM
The printer is suddenly unable to print an entire page correctly. Instead, it prints some characters and lines here and there and it leaves most of the page empty.
The cartdriges are OK, and actually the colour one is brand new. I've already tried switching if off and unplugging it for 30 seconds, I've tried printing several times the auto-diagnose page, and also with the Print and Scan Doctor but nothing fixed the problem.
It seems to me as a firmware problem as the printer web page is also unreachable so: is there a way to completely reset the printer or force a firmware reinstall?
11-17-2021 04:04 AM
Welcome to the HP support community.
I understand that you are getting print quality issues while printing and you want to update the printer firmware.
I am glad to assist you, follow these steps to fix the issue:-
Clean the ink cartridges
-
Load plain paper into the input tray.
-
Search Windows for your printer model name, and then click the printer name in the list of results.
HP Printer Assistant opens.
-
Click Print & Scan, and then click Maintain Your Printer.
The printer toolbox opens.
-
On the Device Services tab, click Clean Cartridges
 .
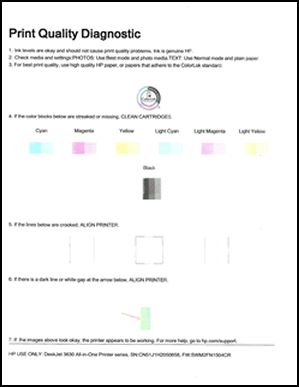
.A Print Quality Diagnostic page prints.
Figure : Print Quality Diagnostic page
-
Examine the Print Quality Diagnostic page.
-
If the print quality is acceptable, click Done. You can stop troubleshooting.
-
If the print quality is unacceptable, click Second-level Clean to continue the next level of cleaning.
-
Manually clean the area around the ink nozzles
-
Gather the following materials:
-
A clean, lint-free cloth or a clean, dry cotton swab
-
Distilled or bottled water
CAUTION:
Do not use tap water because it might contain contaminants that can damage the printhead.
-
-
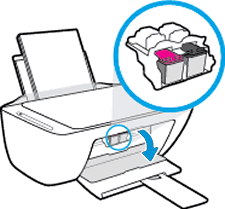
Open the ink cartridge access door.
The carriage moves to the center of the printer.
Figure : Opening the ink cartridge access door
-
Wait until the printer is idle and silent before you continue.
-
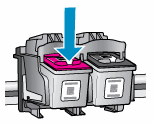
Lightly press down on one of the ink cartridges to release it, and then pull the ink cartridge toward you out of its slot.
Figure : Removing the ink cartridge
CAUTION:
Do not remove both ink cartridges at the same time. Remove and then clean each ink cartridge one at a time. Do not leave an ink cartridge outside the printer for more than 30 minutes.
-
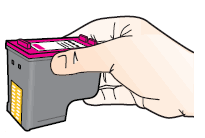
Hold the ink cartridge by its sides.
Figure : Holding the ink cartridge by its sides
-
Lightly dampen a clean, lint-free cloth or swab with bottled or distilled water.
-
Clean the face and edges around the ink nozzle with the cloth or swab.
CAUTION:
Do not clean the ink nozzle plate.
Figure : Cleaning the area around the ink nozzle
-
-
Nozzle plate - Do not clean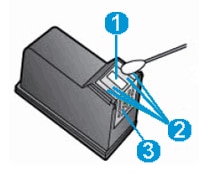
-
Area surrounding ink nozzle - Do clean
-
Ink cartridge contacts - Do not clean
-
-
Wait 10 minutes for the cleaned area to dry before you continue.
-
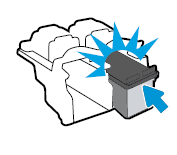
Hold the ink cartridge by its sides with the contacts toward the printer, insert the ink cartridge into its slot, and then gently push the ink cartridge until it snaps into place.
Figure : Snapping the ink cartridge into place
-
Repeat these steps to clean around the nozzles on the other ink cartridge.
-
Close the ink cartridge access door.
Here is the HP document for your future reference:- Click here
Keep me posted.
To thank me for my efforts to help you, please mark my post as an accepted solution so that it benefits several others.
Cheers.
Sandytechy20
I am an HP Employee
11-19-2021 10:33 AM
Thanks @Sandytechy20. It was finally a combination of a hardware issue with the black cartridge, that was completely dry, and some software issue that was fixed by resetting the printer to the default settings.
