• ×
    Information
    Need Windows 11 help?
    Check documents on compatibility, FAQs, upgrade information and available fixes.
    Windows 11 Support Center.
  • post a message
  • ×
    Information
    Need Windows 11 help?
    Check documents on compatibility, FAQs, upgrade information and available fixes.
    Windows 11 Support Center.
  • post a message
Guidelines
To resolve issues with 0xb90c05a4 error on your OfficeJet series: Click here to view.
Check some of the most frequent questions about Instant Ink: HP INSTANT INK, HP+ PLANS: INK AND TONER.


Check out our Black or Color Ink Not Printing, Other Print Quality Issues info about: Print quality and Cartridge Issues.
HP Recommended

My printer keeps saying that the ink carriage cannot move but it can and it is. I've tried EVERYTHING and I'm still getting this message and so nothing will print. The printer was working just fine until I moved it from one location to the next, so I had to unplug it and suddenly when I plug it back in, I'm g

1 REPLY 1
HP Recommended

Hi@Gem1987, Welcome to the HP Support Community!


I understand that you cannot move the carriage to get at the ink cartridges. Generally, when this happens it means that there is a paper jam, cartridges weren't installed correctly, the carriage is jammed or has malfunctioned.


Please pay special attention to these parts of the document: 

Solution three: Make sure that the carriage moves freely

Follow these steps to make sure that the carriage moves freely across the width of the printer.

Step one: Check the carriage path for obstructions

  1. If the printer is not turned on, press the Power button () to turn it on.

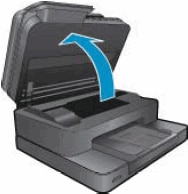
  2. Open the cartridge access door. The carriage might move into the center of the paper path. Wait until the carriage is idle and silent before continuing.

    Figure : Open the cartridge access door

    Image: Open the cartridge access door.
  3. With the printer turned on, disconnect the power cord from the rear of the printer.

  4. Unplug the power cord from the power source or electrical outlet.

     WARNING:

    You must unplug the power cord to move the carriage by hand and reset the paper feed mechanism without the risk of electrical shock.

  5. Check for any paper or objects that might be restricting the carriage, and then remove any paper or objects that you find.

     NOTE:

    If the paper tears when you remove it, check for torn pieces of paper that might remain inside the printer. If pieces of paper remain in the printer, more paper jams might occur.

  6. Reach inside the printer through the cartridge access door, and then manually move the carriage.

    • If the carriage is stuck on the right side, move the carriage to the left side of the printer.

    • If the carriage is stuck on the left side, move the carriage to the right side of the printer.

    • If the carriage is stuck in the middle, move the carriage to the right.

  7. Make sure that the carriage can move freely across the width of the printer by gently pushing the carriage to the left, and then to the right.

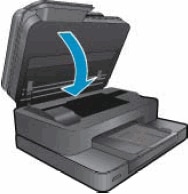
  8. Close the cartridge access door.

    Figure : Close the cartridge access door

    Image: Close the cartridge access door.
  9. Reconnect the power cord to the rear of the printer.

  10. Plug the power cord back into the power source or electrical outlet.

  11. Press the Power button () to turn on the printer.

  12. Open the cartridge access door again, and then make sure that the carriage is able to move to the center unassisted.

    • If the carriage moves to the center unassisted, skip to the step to print a Printer Status Report.

    • If the carriage does not move to the center, continue to the next step in this solution.

Step two: Resolve a carriage jam

Follow these steps to resolve a carriage jam.

  1. Open the cartridge access door. The printer control panel displays a 'Door Open' message.

    Figure : Open the cartridge access door

    Image: Open the cartridge access door.
  2. Press the Power button () to turn off the printer.

  3. Push and hold the carriage to the right with your hand. Hold the carriage tightly, because the carriage tries to move left when the printer is turned on, and you need to prevent it from moving.

    Figure : Push and hold the carriage to the right

    Image: Push and hold the carriage to the right.
  4. While holding the carriage against the right side, press the Power button () to turn on the printer, and then wait until the printer control panel displays a 'Door Open' message.

  5. Release the carriage, and then close the cartridge access door.

    Figure : Close the cartridge access door

    Image: Close the cartridge access door.

    The printer control panel displays a 'Carriage Jam' error message.

  6. Touch OK.

    The printer displays another error message regarding an improper shutdown. This is expected behavior.

  7. Touch OK.

Step three: Print a Printer Status Report

Print a test page to make sure that the hardware functions correctly.

How to print a Printer Status Report

  • If these steps resolved the issue, and the test page prints, there is no need to continue troubleshooting.

  • If the issue persists, continue with the next solution.

  • If the test page does not print, continue with the next solution.

Solution four: Remove and reinstall the cartridges

Improper placement or installation of the cartridges can cause the printer to indicate a carriage jam error. Follow these steps to remove and then reinstall the cartridges.

Step one: Remove the cartridges

  1. Press the Power button () to turn on the printer, if it is not already turned on.

  2. Open the cartridge access door. The carriage moves to the center of the printer. Wait until the carriage is idle and silent before continuing.

    Figure : Open the cartridge access door

    Image: Open the cartridge access door.
  3. Press the tab on the front of the cartridge, and then pull it up to remove it from its slot.

    Figure : Remove the cartridge from its slot

    Image: Remove the cartridge from its slot.
  4. Repeat the previous step to remove each of the cartridges.

Step two: Reinstall the cartridges

  1. With the cartridge contacts facing the printhead, slide the cartridge into the empty slot, and then press down on the cartridge until it clicks firmly into place.

     NOTE:

    Make sure that the color-coded icon on the cartridge matches the color-coded icon on the carriage slot.

    Figure : Reinstall the cartridge

    Image: Reinstall the cartridge.
  2. Repeat the previous step to reinstall the other cartridges.

  3. Close the cartridge access door.

    Figure : Close the cartridge access door

    Image: Close the cartridge access door.

Step three: Print a Printer Status Report

Print a test page to make sure that the hardware functions correctly.

How to print a Printer Status Report

  • If these steps resolved the issue, and the test page prints, there is no need to continue troubleshooting.

  • If the issue persists, continue with the next solution.

  • If the test page does not print, continue with the next solution.


The below link contains a self-help document  'Carriage Jam' Message Displays for HP Photosmart 7520 e-All-in-One Printer Serie


Link:-https://support.hp.com/us-en/document/c03405144


Hope this helps! Keep me posted. 


Please click “Accept as Solution” if you feel my post solved your issue, it will help others find the solution.

Click the “Kudos, Thumbs Up" on the bottom right to say “Thanks” for helping!

† The opinions expressed above are the personal opinions of the authors, not of HP. By using this site, you accept the <a href="https://www8.hp.com/us/en/terms-of-use.html" class="udrlinesmall">Terms of Use</a> and <a href="/t5/custom/page/page-id/hp.rulespage" class="udrlinesmall"> Rules of Participation</a>.