-
×InformationNeed Windows 11 help?Check documents on compatibility, FAQs, upgrade information and available fixes.
Windows 11 Support Center. -
-
×InformationNeed Windows 11 help?Check documents on compatibility, FAQs, upgrade information and available fixes.
Windows 11 Support Center. -
- HP Community
- Printers
- Printing Errors or Lights & Stuck Print Jobs
- New Officejet Pro 6960 wont accept Compatible inks

Create an account on the HP Community to personalize your profile and ask a question
11-07-2018 04:41 AM

11-08-2018 12:45 PM
Welcome to HP Forums,
This is a great place to get support, find answers and tips to your technical queries.
To provide you with an accurate solution, I'll need a few more details:
Did you try with a different cartridge?
Have you tried any troubleshooting steps on your own?
Clean the ink cartridge and printhead contacts
Remove the ink cartridges to clean the ink cartridge and printhead contacts and then reinstall the ink cartridges into the printer.
CAUTION:
Clean the ink cartridges one at a time. Do not leave an ink cartridge outside of the printer for more than 30 minutes. Also, never turn off the printer when an ink cartridge is removed from its slot. Leaving ink cartridge slots empty might cause damage to the ink cartridge ink system.
-
Gather the following materials:
-
A clean, lint-free cloth
-
A clean, dry cotton swab
-
Distilled or bottled water
CAUTION:
Do not use tap water, platen cleaners, or alcohol because they might contain contaminants that can damage the contacts.
-
-
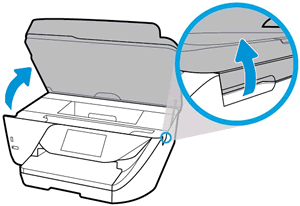
Open the ink cartridge access door.
The carriage moves to the left side of the printer.
NOTE:
If the scanner lid is open, the ink cartridge access door does not open.
Figure : Opening the ink cartridge access door
-
Wait until the printer is idle and silent before you proceed.
-
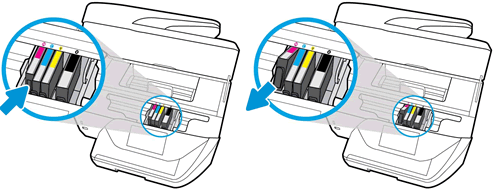
Press the tab inward on the front of the ink cartridge to release it, and then pull up on the ink cartridge to remove it from the slot.
Figure : Pushing the ink cartridge inward and then pulling up to remove it
-
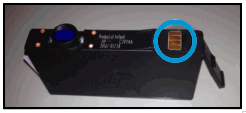
Lightly dampen a clean, lint-free cloth with bottled or distilled water.
Figure : Copper-colored ink cartridge contact
-
Place the cartridge to the side, with the contacts facing upwards.
-
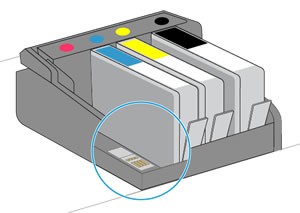
Moisten the cotton swab, and then wipe the contacts inside the printhead.
Figure : Clean the printhead contacts
-
Carefully reinsert the ink cartridge into its slot, and then press down on the ink cartridge until it clicks into place.
Figure : Reinserting the ink cartridge
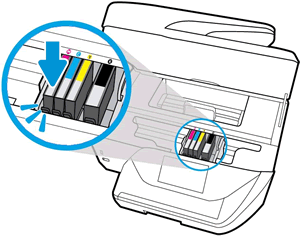
NOTE:
Make sure you insert the ink cartridge into the slot that has the same colored letter as the color you are installing.
-
Repeat these steps for other ink cartridges, if necessary.
-
Close the ink cartridge access door.
Figure : Closing the ink cartridge access door
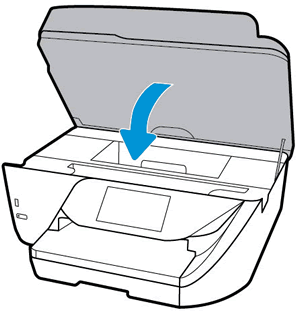
Try to print. If the issue persists, continue to the next step.
Clean the ink cartridge contacts again
Cleaning the ink cartridge contacts a second time can help resolve the issue. Repeat the steps that you performed earlier in this document to clean the ink cartridge contacts.
After cleaning the contacts a second time,
Try to print.
Keep me posted, how it goes!
If the information I've provided was helpful, give us some reinforcement by clicking the Accepted Solution and Kudos buttons, that'll help us and others see that we've got the answers!
Have a great day!
Cheers:)
Raj1788
I am an HP Employee
