-
×InformationNeed Windows 11 help?Check documents on compatibility, FAQs, upgrade information and available fixes.
Windows 11 Support Center. -
-
×InformationNeed Windows 11 help?Check documents on compatibility, FAQs, upgrade information and available fixes.
Windows 11 Support Center. -
- HP Community
- Printers
- Printing Errors or Lights & Stuck Print Jobs
- Photosmart 7525 stopped printing

Create an account on the HP Community to personalize your profile and ask a question
12-11-2018 03:05 PM
Welcome to HP Forums,
This is a great place to get support, find answers and tips to your technical queries.
To provide you with an accurate solution, I'll need a few more details:
Are you using genuine HP Ink cartridge?
Did you try with a different cartridge?
Any hardware changes made in the printer?
I suggest you do a Hard Reset
(1) Turn the printer on, if it is not already on.
(2) Wait until the printer is idle and silent before you continue.
(3) With the printer turned on, disconnect the power cord from the rear of the printer.
(4) Unplug the power cord from the wall outlet.
(5) Wait at least 60 seconds.
(6) Plug the power cord back into the wall outlet.
NOTE: HP recommends connecting the printer power cord directly to the wall outlet.
(7) Reconnect the power cord to the rear of the printer.
(8) Turn on the printer, if it does not automatically turn on.
The printer might go through a warm-up period. The printer lights might flash, and the carriage might move.
Wait until the warm-up period finishes and your printer is idle and silent before you proceed.
Clean the printhead manually
When manually cleaning the printhead, the printhead nozzles are soaked in very warm water for no longer than ten minutes. Use these steps only as a last resort and if the printhead would be disposed of otherwise.
CAUTION:Manually cleaning the printhead should only be performed if the printhead is no longer under warranty.
-
Set the pan on the stove, and then fill the pan with filtered or distilled water.
CAUTION:
Do not use alcohol or other solvents. This might damage the printhead, causing the printhead layers to separate, requiring replacement of the printhead.
-
Heat the water until the water is very warm to the touch, but do not boil the water.
-
Stack the paper towels at the bottom of the disposable container until the stack is about 6.5 mm (1/4 inch) deep.
-
Pour the warm water from the pan into the disposable container so that it is 5 cm (2 inches) deep and covering the paper towels.
-
Put on disposable gloves to prevent ink from transferring to your skin or clothes.
-
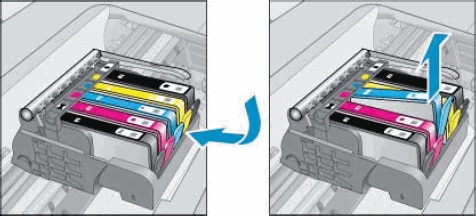
Press the tab on the front of the ink cartridges to release them, and then lift the ink cartridges out of the printhead.
NOTE:
Do not leave the ink cartridge outside the printer for longer than 30 minutes. The printhead and ink cartridges can be damaged by being exposed to air outside of the printer.
-
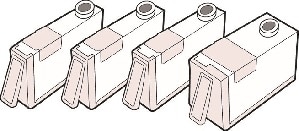
Set the ink cartridges upside down on a paper towel.
-
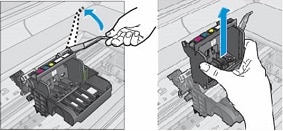
Lift the latch handle on the carriage until it stops, and then carefully lift up on the printhead to remove it from the printer.
-
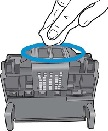
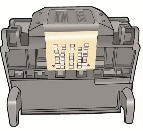
Moisten one of the clean, lint-free cloths with some of the warm water and use it to clean the underside of the printhead. Repeatedly wipe the nozzle area gently until excess black or color ink does not transfer to the cloth. Do not press into the nozzle area as this can cause damage.
CAUTION:
Do not force water into the printhead, this can cause printhead delamination.
-
Place the printhead into the disposable container so that the bottom rests on the paper towels, and then let it soak for 10 minutes.
-
Paper towels
-
Water level
-
-
Remove the printhead, and then gently wipe the excess water with a dry lint free cloth.
CAUTION:
Do not use a hair dryer to dry off the printhead. This could cause the nozzles to dry out and clog.
-
Let the printhead air-dry on a paper towel for 15 minutes with the nozzles facing up.
CAUTION:
Do not use compressed air to blow out the printhead. This can cause delamination of the printhead.
-
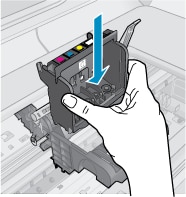
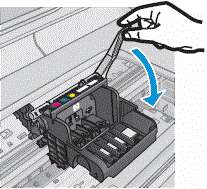
Lower the printhead into the carriage, and then carefully lower the latch handle.
NOTE:
Make sure the colored shapes on the sides of the printhead line up with the colored shapes on the carriage.
-
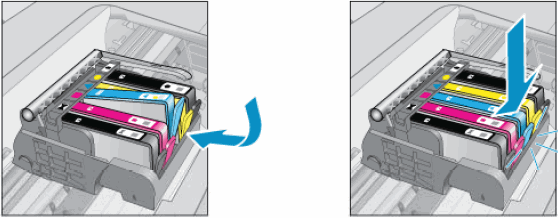
With the ink cartridge contacts facing the printhead, slide the ink cartridge into the correct slot. The color-coded icons on the ink cartridge and in the printhead indicate the correct slot.
Press down on the ink cartridge until it snaps firmly into place.
-
Repeat these steps for each ink cartridge.
Use this link: https://support.hp.com/us-en/product/hp-photosmart-7520-e-all-in-one-printer-series/5199461/model/52... for your reference.
Keep me posted, how it goes!
If the information I've provided was helpful, give us some reinforcement by clicking the Accepted Solution and Kudos buttons on the public post, that'll help us and others see that we've got the answers!
Have a great day!
Cheers:)
Raj1788
I am an HP Employee