-
×InformationNeed Windows 11 help?Check documents on compatibility, FAQs, upgrade information and available fixes.
Windows 11 Support Center. -
-
×InformationNeed Windows 11 help?Check documents on compatibility, FAQs, upgrade information and available fixes.
Windows 11 Support Center. -
- HP Community
- Printers
- Printing Errors or Lights & Stuck Print Jobs
- envy 5530 carriage jam message

Create an account on the HP Community to personalize your profile and ask a question
03-14-2018 12:18 PM
I have a new Envy 5530 printer. it keeps giving me a "carriage jam" message. I have done everything regarding cleaning the tray and checking for paper jams. It says the cartridges cant move and gives me a carriage jam message. I cleaned the rollers as well. i have run out of options. anyone have any new ideas? thanks
03-15-2018 01:02 PM
Thank you for joining HP Forums.
This is a great place to get support, find answers to your technical queries.
I understand that your HP ENVY 5530 e-All-in-One Printer has an error carriage jam on the printer.
Is the carriage moving freely?
Try to move the carriage manually.
I suggest you do a Hard Reset
(1) Turn the printer on, if it is not already on.
(2) Wait until the printer is idle and silent before you continue.
(3) With the printer turned on, disconnect the power cord from the rear of the printer.
(4) Unplug the power cord from the wall outlet.
(5) Wait at least 60 seconds.
(6) Plug the power cord back into the wall outlet.
NOTE: HP recommends connecting the printer power cord directly to the wall outlet.
(7) Reconnect the power cord to the rear of the printer.
(8) Turn on the printer, if it does not automatically turn on.
The printer might go through a warm-up period. The printer lights might flash, and the carriage might move.
Wait until the warm-up period finishes and your printer is idle and silent before you proceed.
Then, Clear any jammed paper from the printer
Follow these steps to clear a paper jam from the input tray or from inside the printer.
Step one: Clear the jam from the rear roller and the duplexer
Follow these steps to remove any jammed paper from the rear roller and the duplexer.
-
With the printer turned on, disconnect the power cord from the rear of the printer.
WARNING:
You must disconnect the power cord before reaching inside the printer to avoid the risk of injuries or electric shock.
-
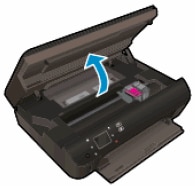
Open the cartridge access door.
Figure : Open the cartridge access door
-
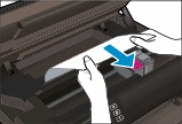
Remove any jammed paper from the cartridge access area, located toward the front of the printer. To avoid tearing any whole sheets of paper, pull the paper with both hands.
NOTE:
Use a flashlight to thoroughly check for torn pieces of paper that might remain inside the printer. If any torn pieces of paper remain inside the printer, more jams might occur.
Figure : Remove paper from the cartridge access area
-
Locate the paper path cover in the area behind the cartridge access area.
Figure : Locate the paper path cover
-
To remove the paper path cover, pinch the tabs together, and then lift up.
Figure : Remove the paper path cover
-
Pinch the tabs together
-
Lift up
-
-
Gently remove any jammed paper and bits of torn paper from the rear roller. To avoid tearing any whole sheets of paper, pull the paper with both hands.
NOTE:
Use a flashlight to thoroughly check for torn pieces of paper that might remain inside the printer. If any torn pieces of paper remain inside the printer, more jams might occur.
Figure : Remove paper from the rear roller
-
Locate the duplexer path cover, directly underneath the paper path cover.
-
Insert your finger into the opening at the rear of the cover, and then lift up. Lift until you hear the duplexer path cover click into the upright position.
-
Gently remove any jammed paper and bits of torn paper. To avoid tearing any whole sheets of paper, pull the paper with both hands.
NOTE:
Use a flashlight to thoroughly check for torn pieces of paper that might remain inside the printer. If any torn pieces of paper remain inside the printer, more jams might occur.
Figure : Lift the duplexer path cover, and then remove any jammed paper
-
Lift the duplexer path cover
-
Remove any jammed paper
-
-
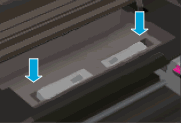
Gently push the duplexer path cover down until you hear it click into place.
- Replace the paper path cover with the spring-loaded tabs facing toward the front of the printer. Gently press the cover down at the left and right edges. The cover clicks into place.
NOTE:
Make sure that both edges of the paper path cover are in place.
Figure : Replace the paper path cover
-
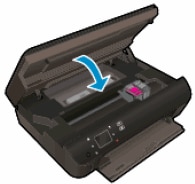
Close the cartridge access door.
Figure : Close the cartridge access door
If the issue persists, Contact Phone Support.
They might have multiple options to help you on this.
Please use the following link to create yourself a case number, then call and it may help speed up the call process:
Step 1. Open link: www.hp.com/contacthp
Step 2. Enter the product number or select to auto detect
Step 3. Scroll down to "Still need help? Complete the form to select your contact options"
Step 4. Scroll down and click: HP contact options - click on Get phone number and phone number appear.
They will be happy to assist you immediately.
Keep me posted on any other assistance. Hope that helps!
Have a great day ahead!
Cheers;)
Raj1788
I am an HP Employee